Napier Waller served with the artillery in the First World War, but that was not the only influence on his art.
In 1937 the Australian War Memorial invited Napier Waller to decorate the Hall of Memory, the nation’s pre-eminent commemorative space, which today houses the Tomb of the Unknown Australian Soldier. Having served in the First World War and lost his right arm in the fighting, Waller would bring to his work on the Hall’s glorious stained-glass windows and monumental wall mosaic a deep understanding of sacrifice and the importance of commemoration.
On 31 August 1915, aged 22, Waller gave up his art studies at Melbourne’s National Gallery School to enlist in the 22nd Infantry Battalion of the 1st Australian Imperial Force (AIF). After starting his military training at Royal Park Camp, he moved to Maribyrnong, where he trained as a gunner with the 32nd Battery, 8th Field Artillery Brigade (FAB). This was heavy work for which Waller was well suited. A “boy from the bush”, he had worked on his parents’ dairy farm at Penshurst in western Victoria before moving to Melbourne in 1913 to study art.
On 20 May 1916, Waller embarked for the war on the troopship HMTS Medic, sailing to England via Durban. After disembarking at the port of Plymouth, he was sent to Lark Hill camp on the Salisbury Plain. There he spent the next seven months training in the operation of 4.5-inch howitzers, short-barrelled artillery pieces capable of lobbing shells almost vertically into enemy trenches and gun emplacements. In his free time, he visited the public art galleries in London and explored the art and architecture in the nearby cathedral cities of Winchester and Salisbury. At Winchester Cathedral, Waller would have admired a magnificent series of stained-glass windows made by William Morris, master craftsman and leading member of England’s 19th-century Arts and Crafts movement. Perhaps it was these windows that inspired Waller’s transition after the war to producing stained glass in the Arts and Crafts style.
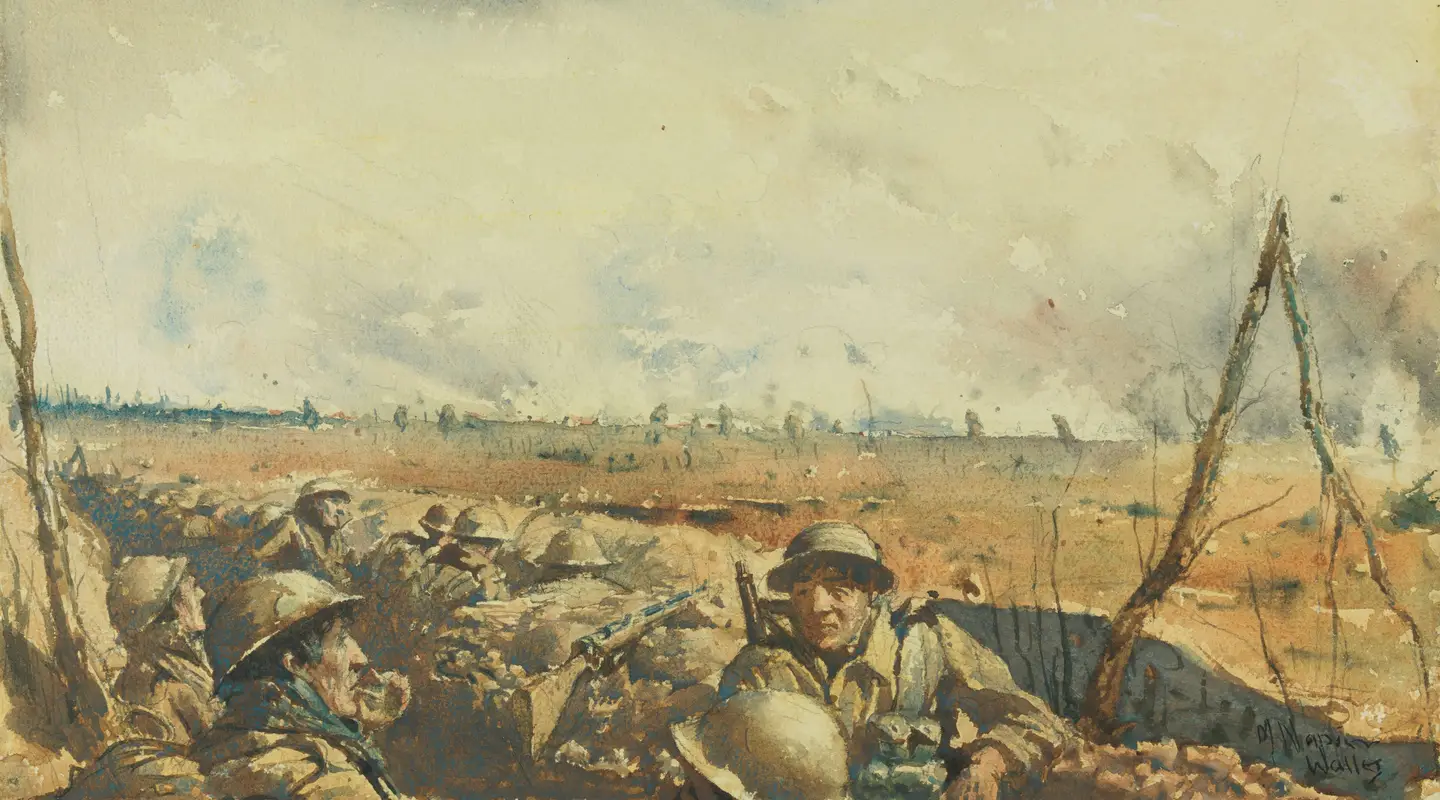
On 31 December 1916, Waller left England for the Western Front as a bombardier with the 23rd Field Artillery (Howitzer) Brigade. From the port of Le Havre he travelled north by train to Flanders, where he was taken on strength of the 3rd Australian Division and assigned to the 118th Howitzer Battery. From his arrival in France, Waller sketched the French landscape as well as the everyday activities of his artillery battery and his experiences on the front line. Later he would use these sketches as the basis for a successful series of war paintings. He also kept a diary, which offers glimpses of life on the Western Front in 1917 through an artist’s eyes.
Writing in late January 1917, Waller described a wintry sunset near his base at Strazeele:
Lovely sunsets these evenings being splendid – through the tall limbless, leafless trees – the sun is of brilliant hot light – severs the trunks of distant trees with its diffuse light – the golden light being the most beautiful as it caught on the blue snow.
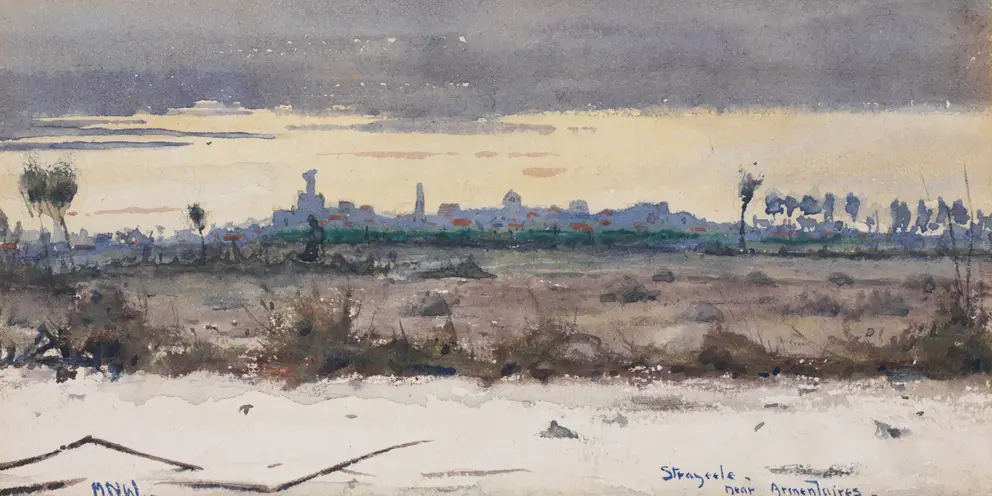
Napier Waller, Strazeele – near Armentières (c. 1917, watercolour on paper on cardboard, 40 x 21 cm). AWM ART93194
While these lines convey a sense of serene beauty, they were doubtless written to the sound (as Waller described it) of “terrible bombardment continuing … day and night … with great thunder.” Even in the midst of war, Waller would often find beauty in his surroundings, and when he did, it seems that everything else receded from his consciousness.
In January 1917, the Australians reorganised their artillery, and Waller’s 118th Battery was transferred to the 12th FAB in the 4th Australian Division. Although his new unit was based 100 kilometres away on the Somme Valley, on this occasion train travel was not on offer. Instead, on 4 February Waller set out with his battery to cover the distance on foot, their guns and equipment hauled by teams of horses. As the convoy proceeded southward, they suffered the full force of the coldest winter Europe had seen in 30 years, temperatures plummeting to minus 33ºC. To reduce the risk of freezing to death, they travelled by night, when it was coldest, and rested during the day. Two days into the march, Waller wrote:
Five days after setting out, on 9 February, the convoy met up with the 12th FAB at Fréchencourt, near Amiens. For the next four weeks, Waller performed practice drills and guard duty. In his free time, he explored the surrounding villages, making notes on architectural features and exclaiming in his diary: “Every building is a picture worth long study!” Perhaps Waller’s enchantment with the French architecture influenced his transition after the war to producing murals and large-scale wall mosaics – which, as decorative arts, are closely aligned with applied arts such as interior design and architecture.
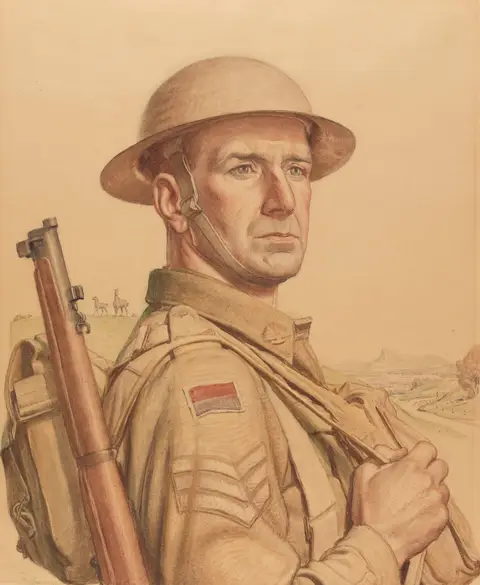
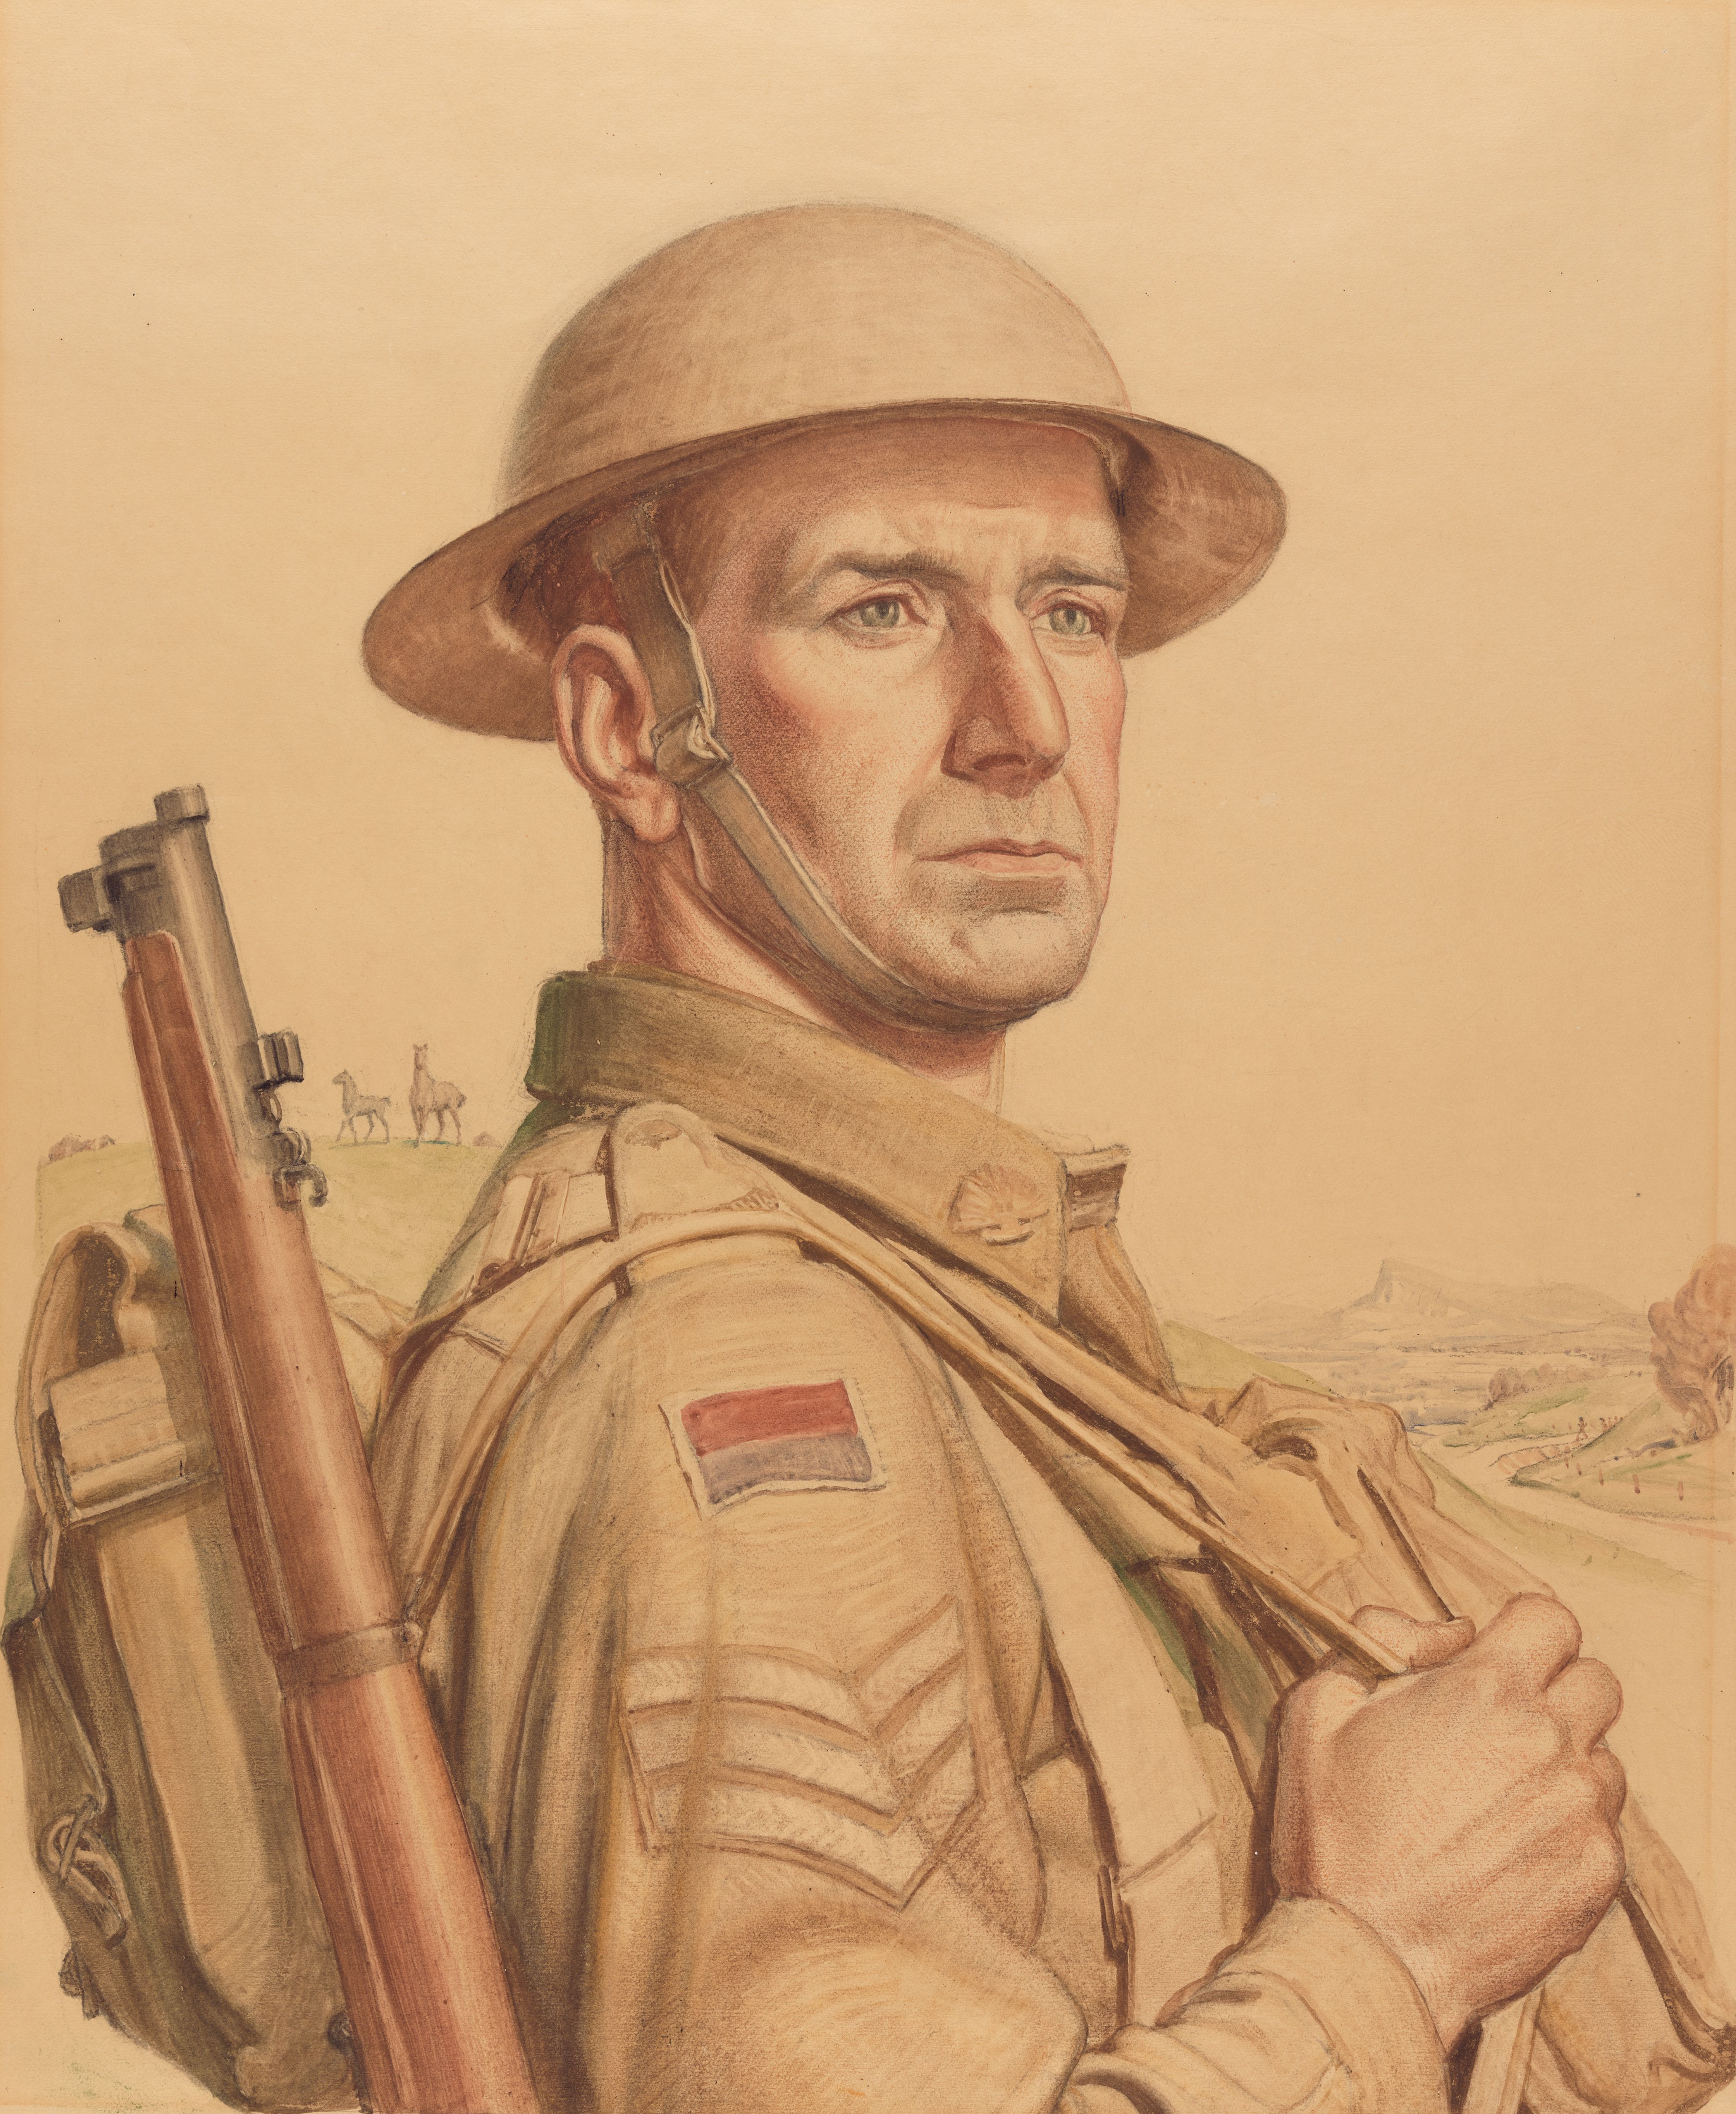
Napier Waller, Self-portrait, the sergeant (1942, watercolour over pastel and pencil, 76 x 57 cm). Waller used himself, with an intact right arm, as a model for this patriotic poster during the Second World War. AWM ART27820
In late February, news arrived that all along the Somme front the Germans were retreating. Their hopes of victory restored, the Australians set out in pursuit. After the 4th Australian Division Artillery had hastily reshuffled their personnel, Waller left for the front line on 12 March with the 111th Howitzer Battery, 11th FAB, his new brigade having received orders to support the 2nd Australian Division in an operation near Gueudecourt.
Later the same day, after the 11th Brigade had established their wagon lines, Waller was one of a party sent to dig gun pits in a forward position. As they worked, it seems the party was spotted by the Germans, for they suddenly came under heavy shellfire and were forced to beat a hasty retreat. Waller later described this harrowing experience as a “trip through an inferno of eruption”. Once the shelling had stopped, Waller helped move the guns forward over the shell-pocked battlefield. This was onerous work, particularly as the horses hauling the guns kept slipping in the mud and falling into shell craters.
That night, the Germans withdrew beyond the range of the allies’ guns, and the next day the planned attack was aborted. The Germans were not retreating, however, but rather staging a planned withdrawal from the Somme to a series of defensive lines known by the allies as the Hindenburg Line.
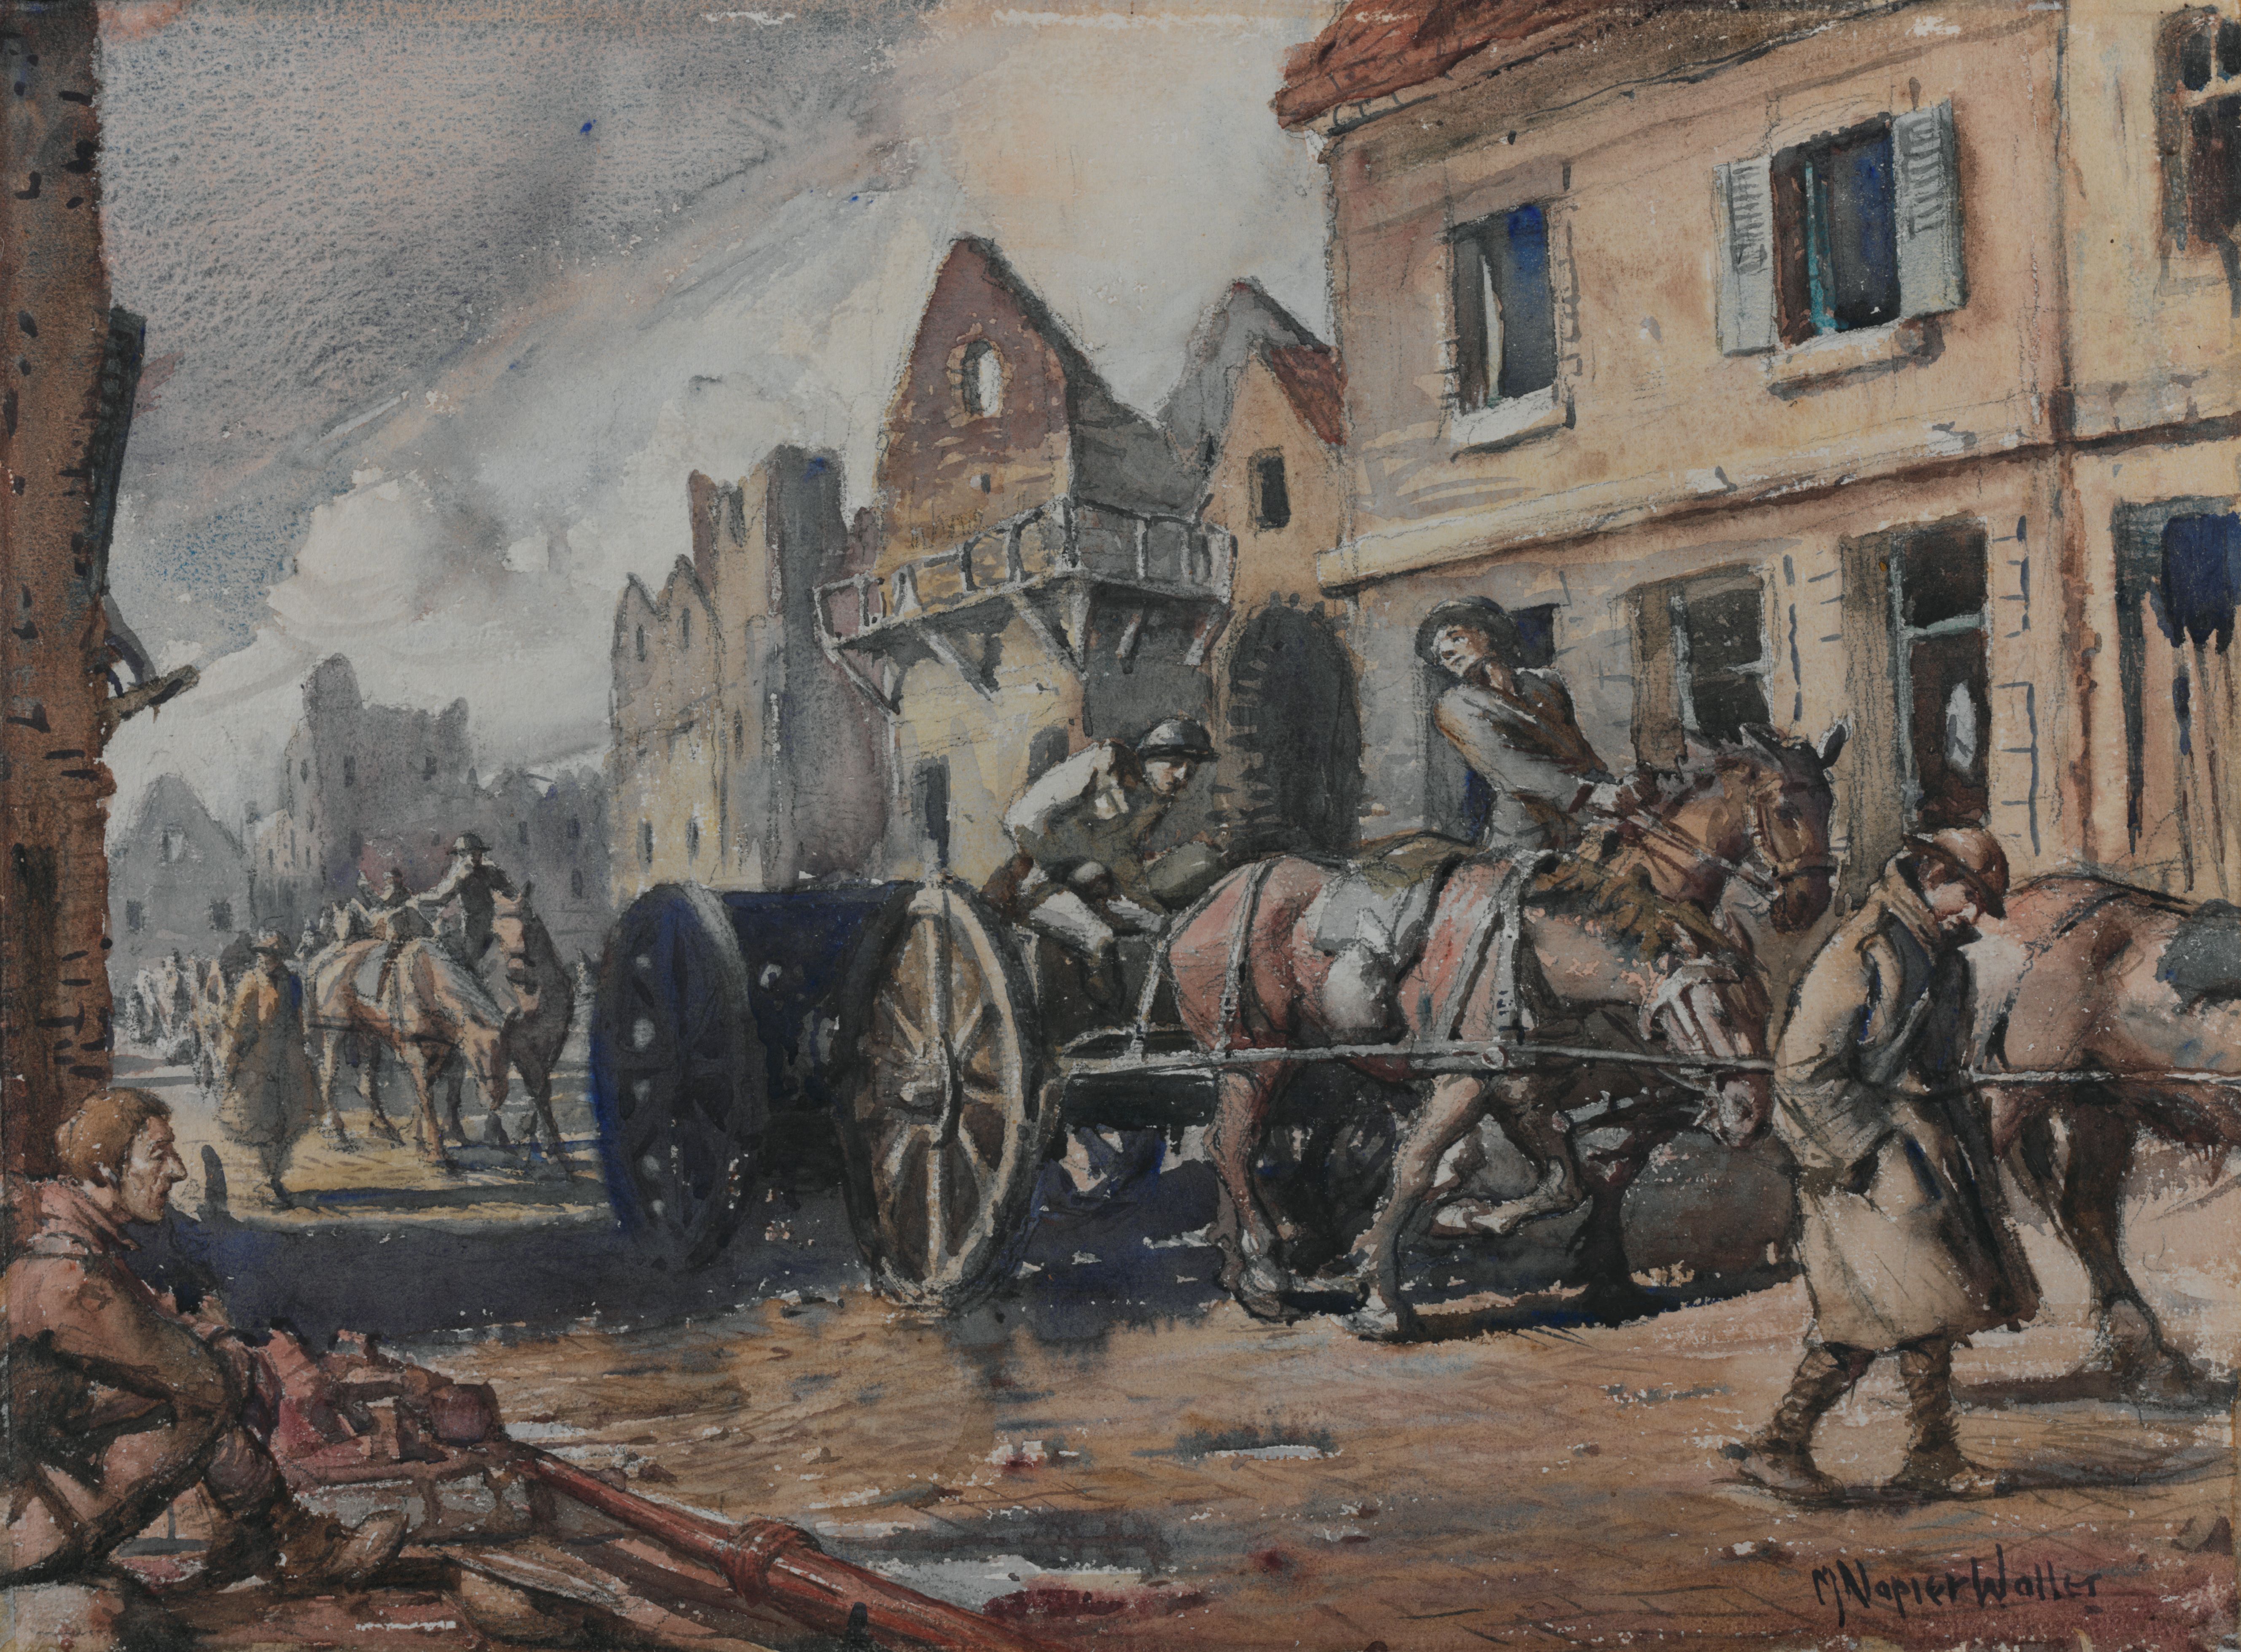
Continuing their withdrawal, on 16 March the Germans pulled out of Bapaume. Entering the town the following day, the Australian 2nd Division was in high spirits at finally leaving the foul mud of the Somme battlefields behind them. A more sombre mood, however, was reflected in a sketch made by Waller two weeks later when the Australian artillery passed through Bapaume. In Australian artillery passing through Bapaume, we see horses straining to pull heavily loaded wagons, and artillerymen looking tired, cold and pensive. From Bapaume, Waller’s brigade proceeded to Lagnicourt, about six kilometres south-west of Bullecourt, which was on the Hindenburg Line. Between the brigade and Bullecourt lay a formidable array of defences incorporating large trench systems, banks of guns and acres of barbed wire entanglements.
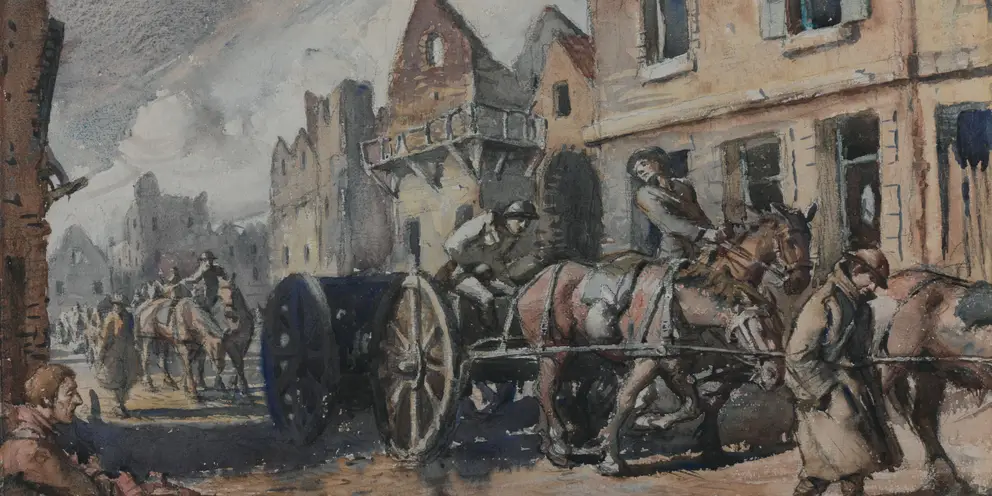
Napier Waller, Australian artillery passing through Bapaume (c. 1917, watercolour, pencil on paper, 33 x 44 cm). AWM ART92983
Less than a week later, on the morning of 11 April 1917, the 4th Australian Division was ordered to attack the Hindenburg Line. That night, Waller described how shells had fallen “within a couple of feet from where we lay, throwing dirt … upon us and shaking the earth about us.” Hastily planned and heavily dependent on a dozen British tanks that failed to reach the German lines, this attack on Bullecourt was a complete disaster. By the end of the day, the Australians had suffered catastrophic losses, with more than 3,000 killed or wounded and another 1,170 captured by the Germans.
After the battle, the depleted battalions of the 4th Australian Division were withdrawn to recover. Their artillery, however, stayed on to support the 1st, 2nd and 5th Australian Divisions. On the evening of 12 April, Waller wrote that his battery had dug in at Écoust-St-Mein, about two kilometres south of Bullecourt.
Aware that the Australian artillery was now thinly spread and dangerously far forward, on 15 April the Germans launched a counter-attack. Although the brunt of this assault was born by the 1st Division at Lagnicourt and part of the 2nd Division at nearby Noreuil, the 4th Division Artillery at Écoust-St-Mein came under heavy shellfire. Later that night, Waller wrote:
The following morning, a vigorous counter-attack by the Australians forced the enemy to withdraw. On 3 May, the Australians were ordered to attack Bullecourt once again. This time the battle would rage for two weeks, the Germans bringing in reinforcements, mounting strenuous counter-attacks and maintaining near constant artillery fire. After seven days of continuous action, Waller’s battery received word that they would be relieved. Two days later, on 12 May, the weary artillerymen were probably making their way to a rest area behind the lines when shells began raining down on them. His luck finally running out, Waller was struck by shell fragments in his right hand, right shoulder and back.
Seriously wounded, his shoulder joint shattered, Waller was carried by stretcher-bearers to a dressing station behind the lines where his wounds were cleaned and bandaged. From there, a field ambulance took him to the nearest casualty clearing station (CCS) at Grevillers, near Bapaume, where military doctors and nurses worked day and night to cope with the enormous number of wounded coming in. Waller remained at the CCS under the care of army nurses until his condition had stabilised and he could be safely moved to a military hospital. Perhaps it was this experience, and an enduring sense of gratitude to these nurses, that would later inspire Waller to feature an army nurse centrally in the stained-glass windows at the Australian War Memorial. Labelling her Devotion, he would place her directly above the entrance to the Hall of Memory.
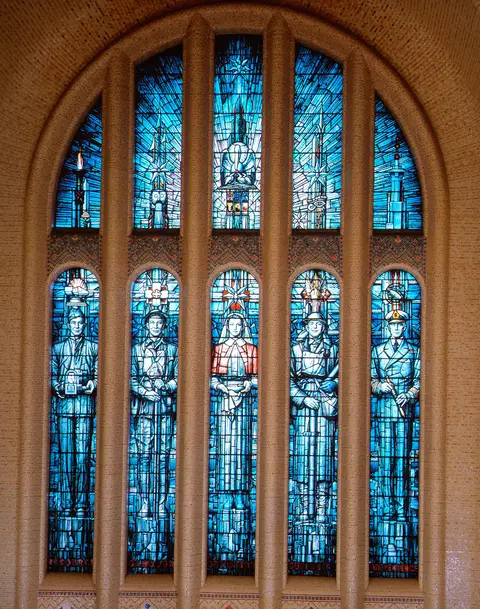
Napier Waller, south window, Hall of Memory, Australian War Memorial (1950, stained glass). AWM ART90410.001
As Waller’s life hung in the balance, the second and final battle for Bullecourt drew to a close, its toll a staggering 7,482 Australian casualties. In the end, Bullecourt had been captured from the Germans at a total cost of more than 10,000 Australians killed, wounded or captured by the enemy. Once Waller’s condition had stabilised, he was transported by ambulance train to Camiers on the French coast, where he was admitted on 3 June to the American 22nd General Hospital. There he was operated on four times, his arm initially amputated at the elbow in the hope of saving his upper arm. But because the wound haemorrhaged severely, it became necessary to amputate his whole arm in order to save his life.
On 26 June, Waller was transferred to Horton County of London War Hospital where, on 7 July, he was finally removed from the “seriously ill” list. Three months later he returned to Australia on the Hospital Transport Anchises, disembarking at the Port of Melbourne on 3 January 1918. During his convalescence in England, Waller had trained himself to draw and paint with his left hand – so successfully, in fact, that on returning from the war he produced a series of war paintings that were exhibited in Melbourne in August 1918. Achieving unqualified commercial and critical success, the exhibition was taken by popular demand to Sydney, Adelaide and Hobart.
Although Waller’s war art brought him national acclaim and considerable financial gain, he was not content to produce artwork for display in galleries and private homes. Instead, during the 1920s and 1930s, he began producing large-scale wall decorations for public buildings in the form of painted murals and mosaics. Together with his wife Christian, he also designed and produced stained-glass windows in response to a growing number of requests from churches across the country for windows commemorating local parishioners who had died in the war. Praising the couple’s skill in window design, in 1934 prominent church architect Louis Williams said,
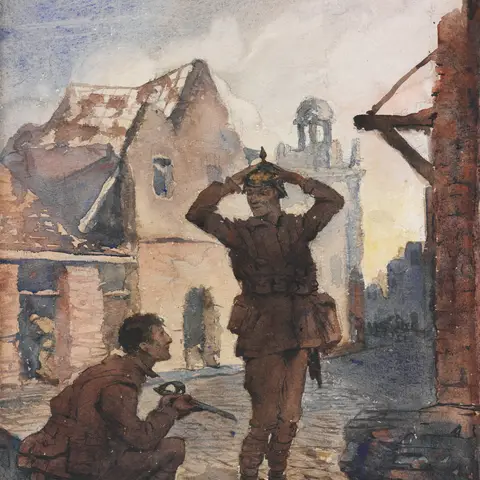
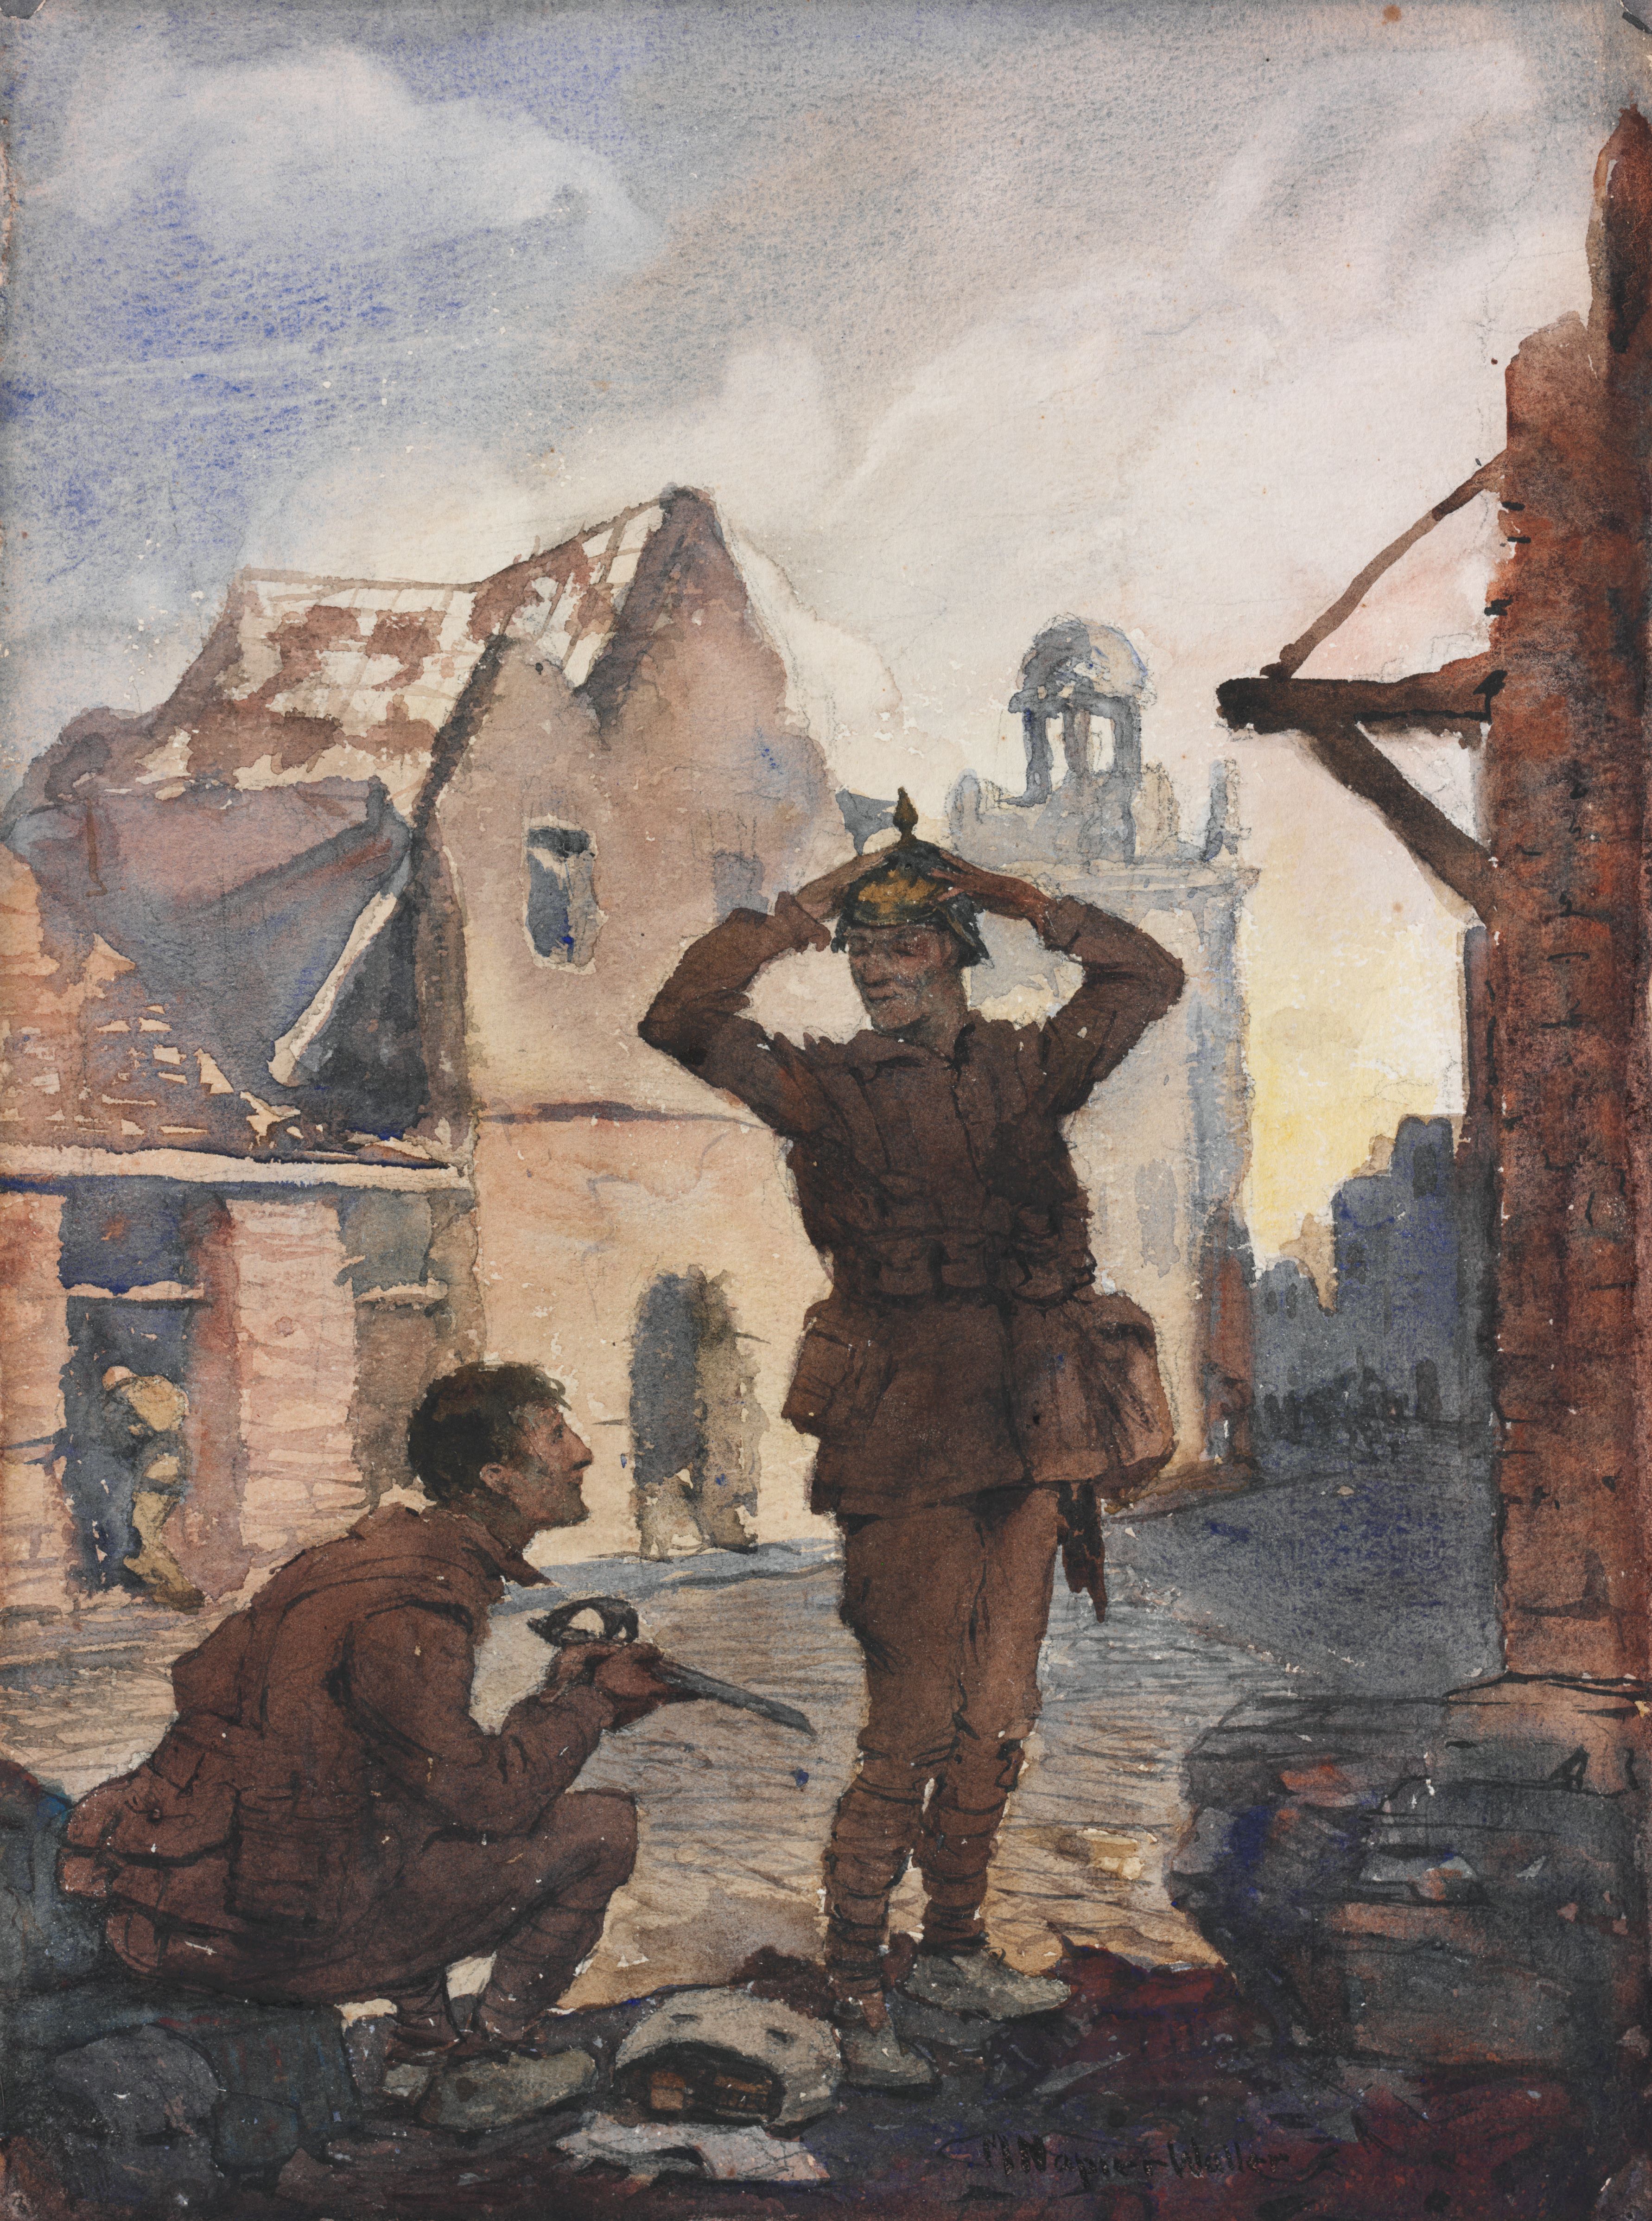
Depicts a seated soldier, in the foreground, holding a small sword in his hands. Beside him stands an Australian soldier trying on a recently acquired German pickelhaube helmet. They stand amongst the ruined buildings of a French town. Mervyn Napier Waller (1893-1972)
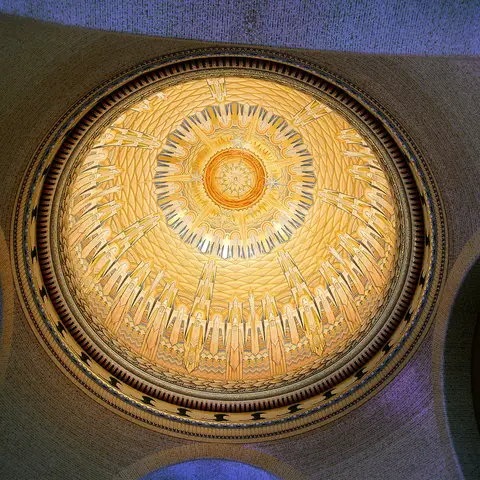
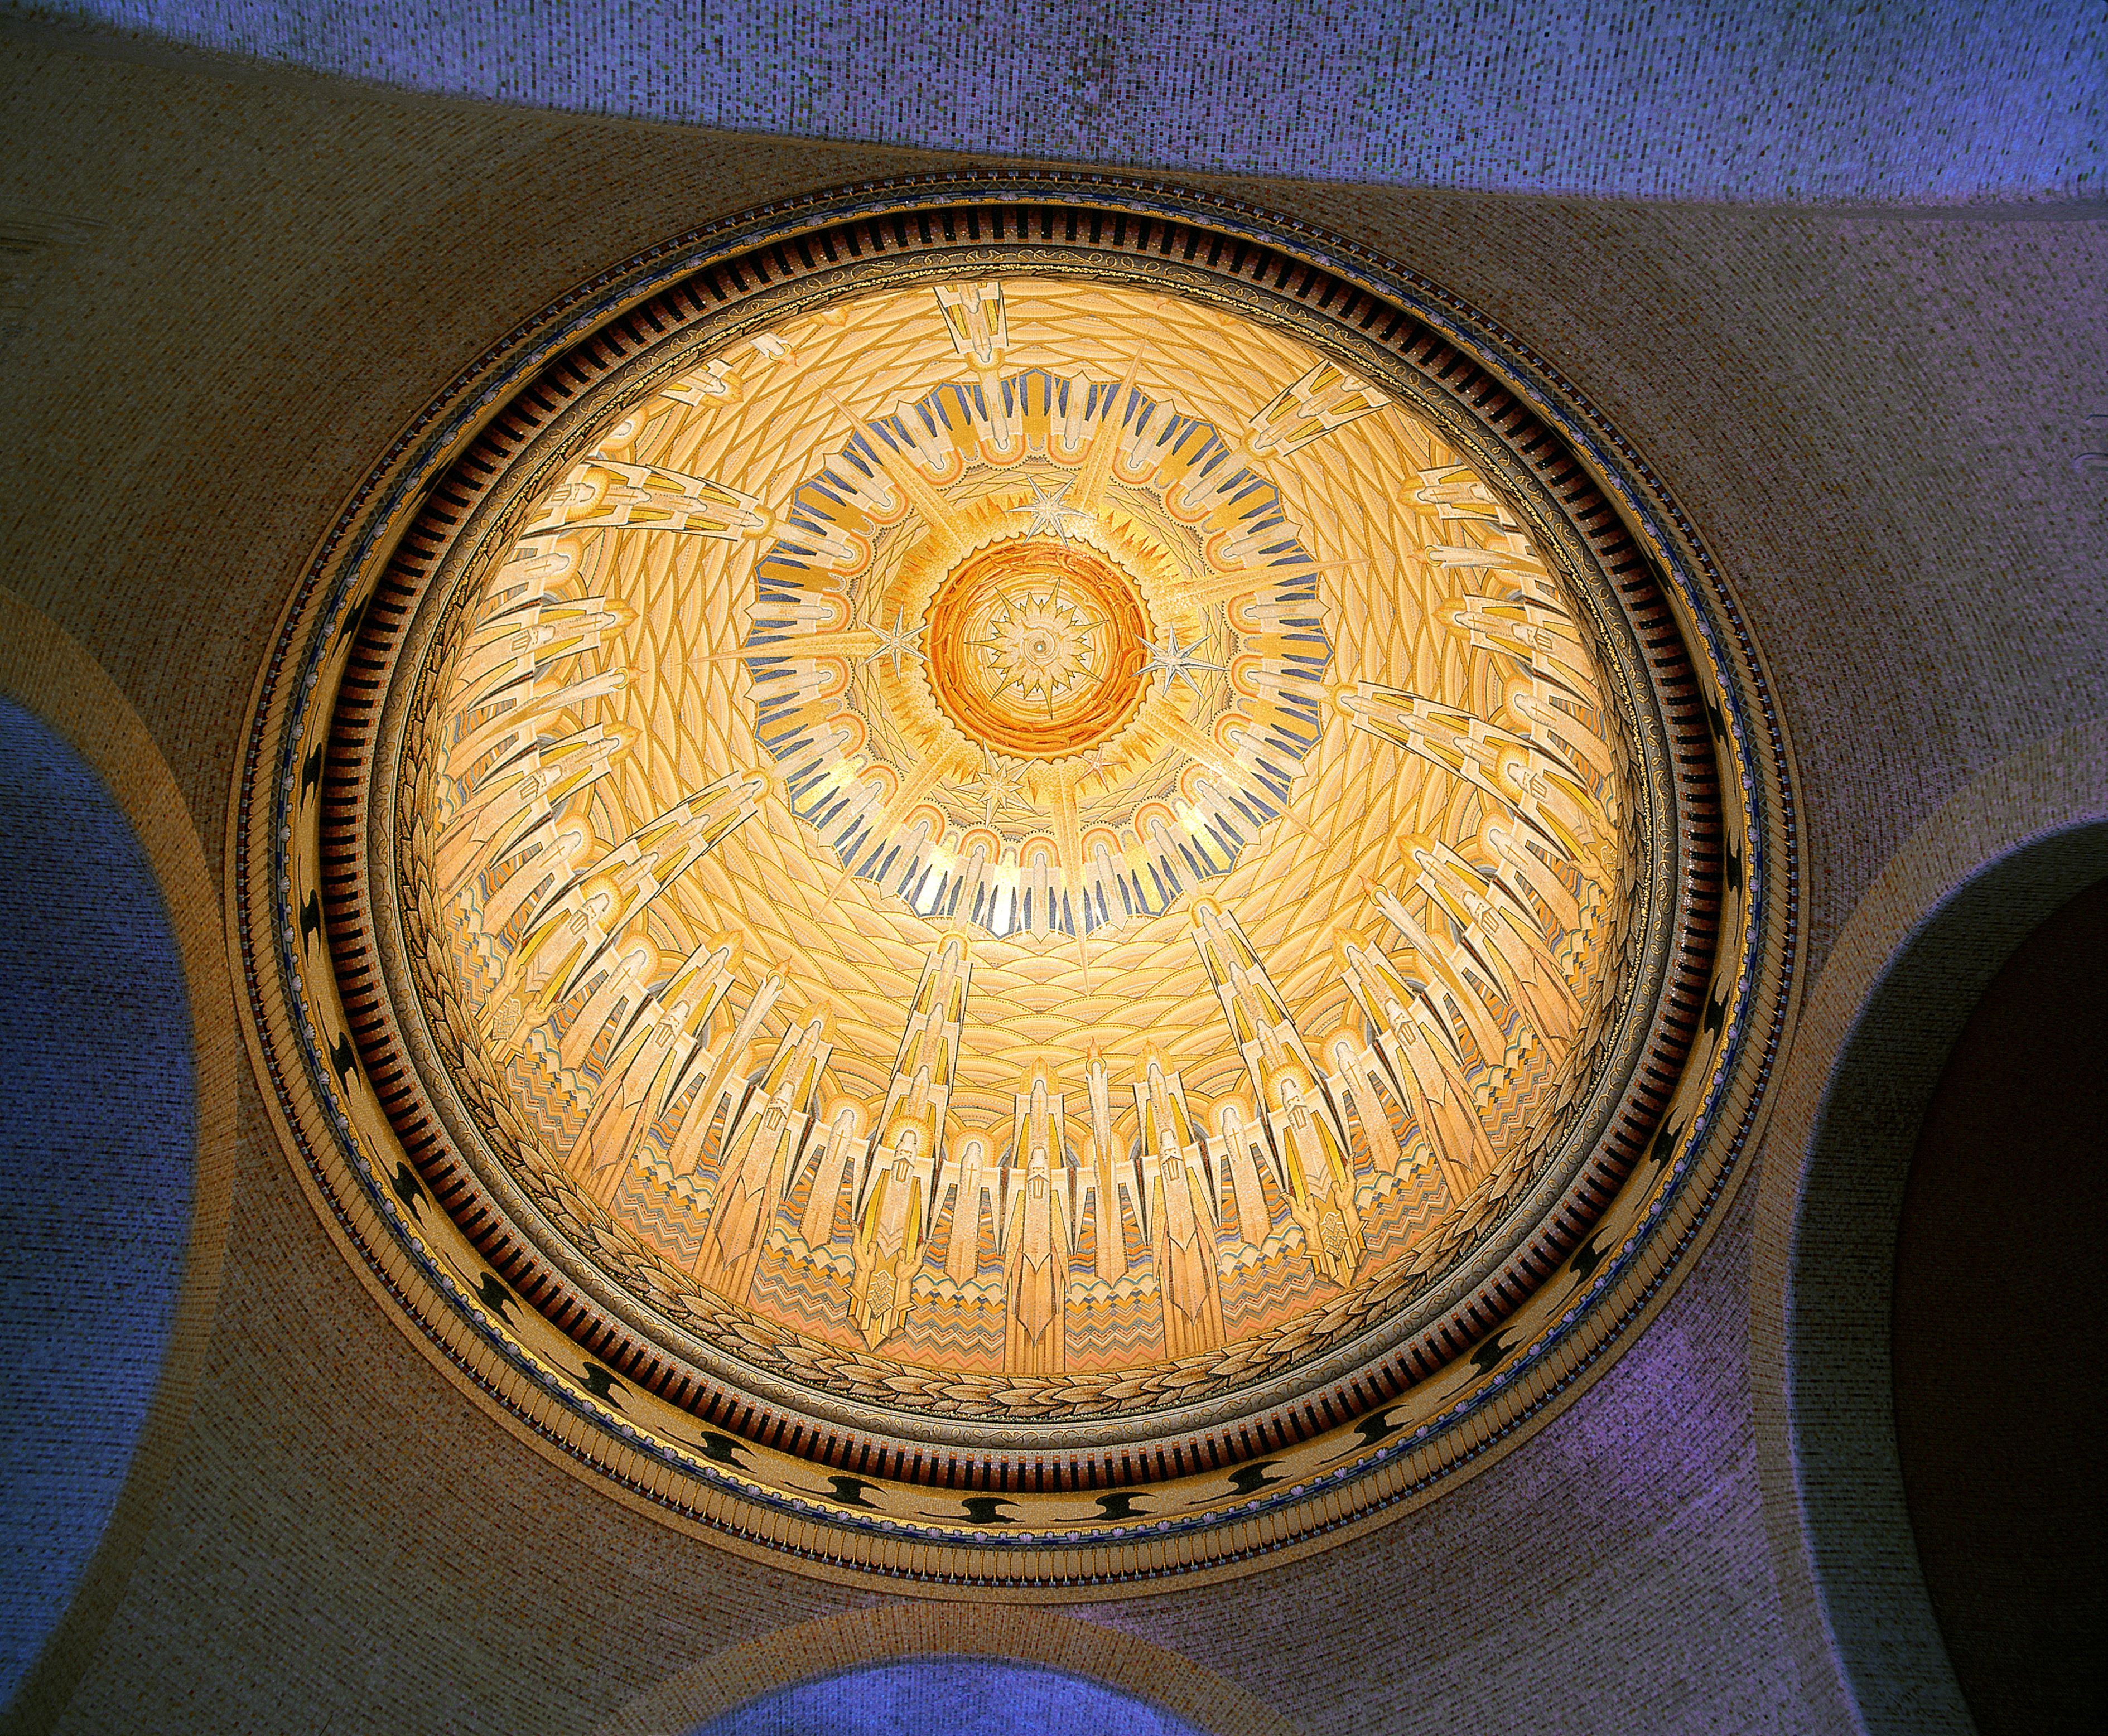
Napier Waller, Hall of Memory mosaic dome, Australian War Memorial (1955–1958, glass enamel tesserae). AWM ART90409.005
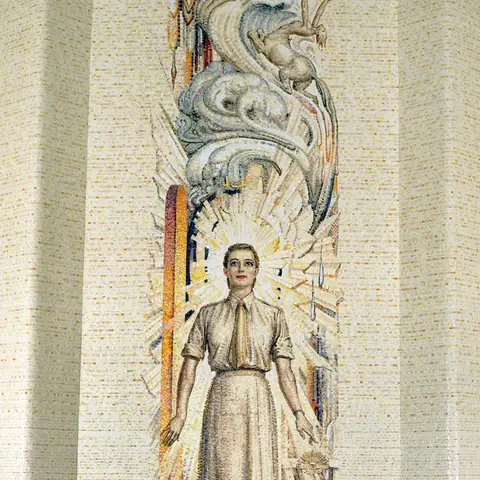
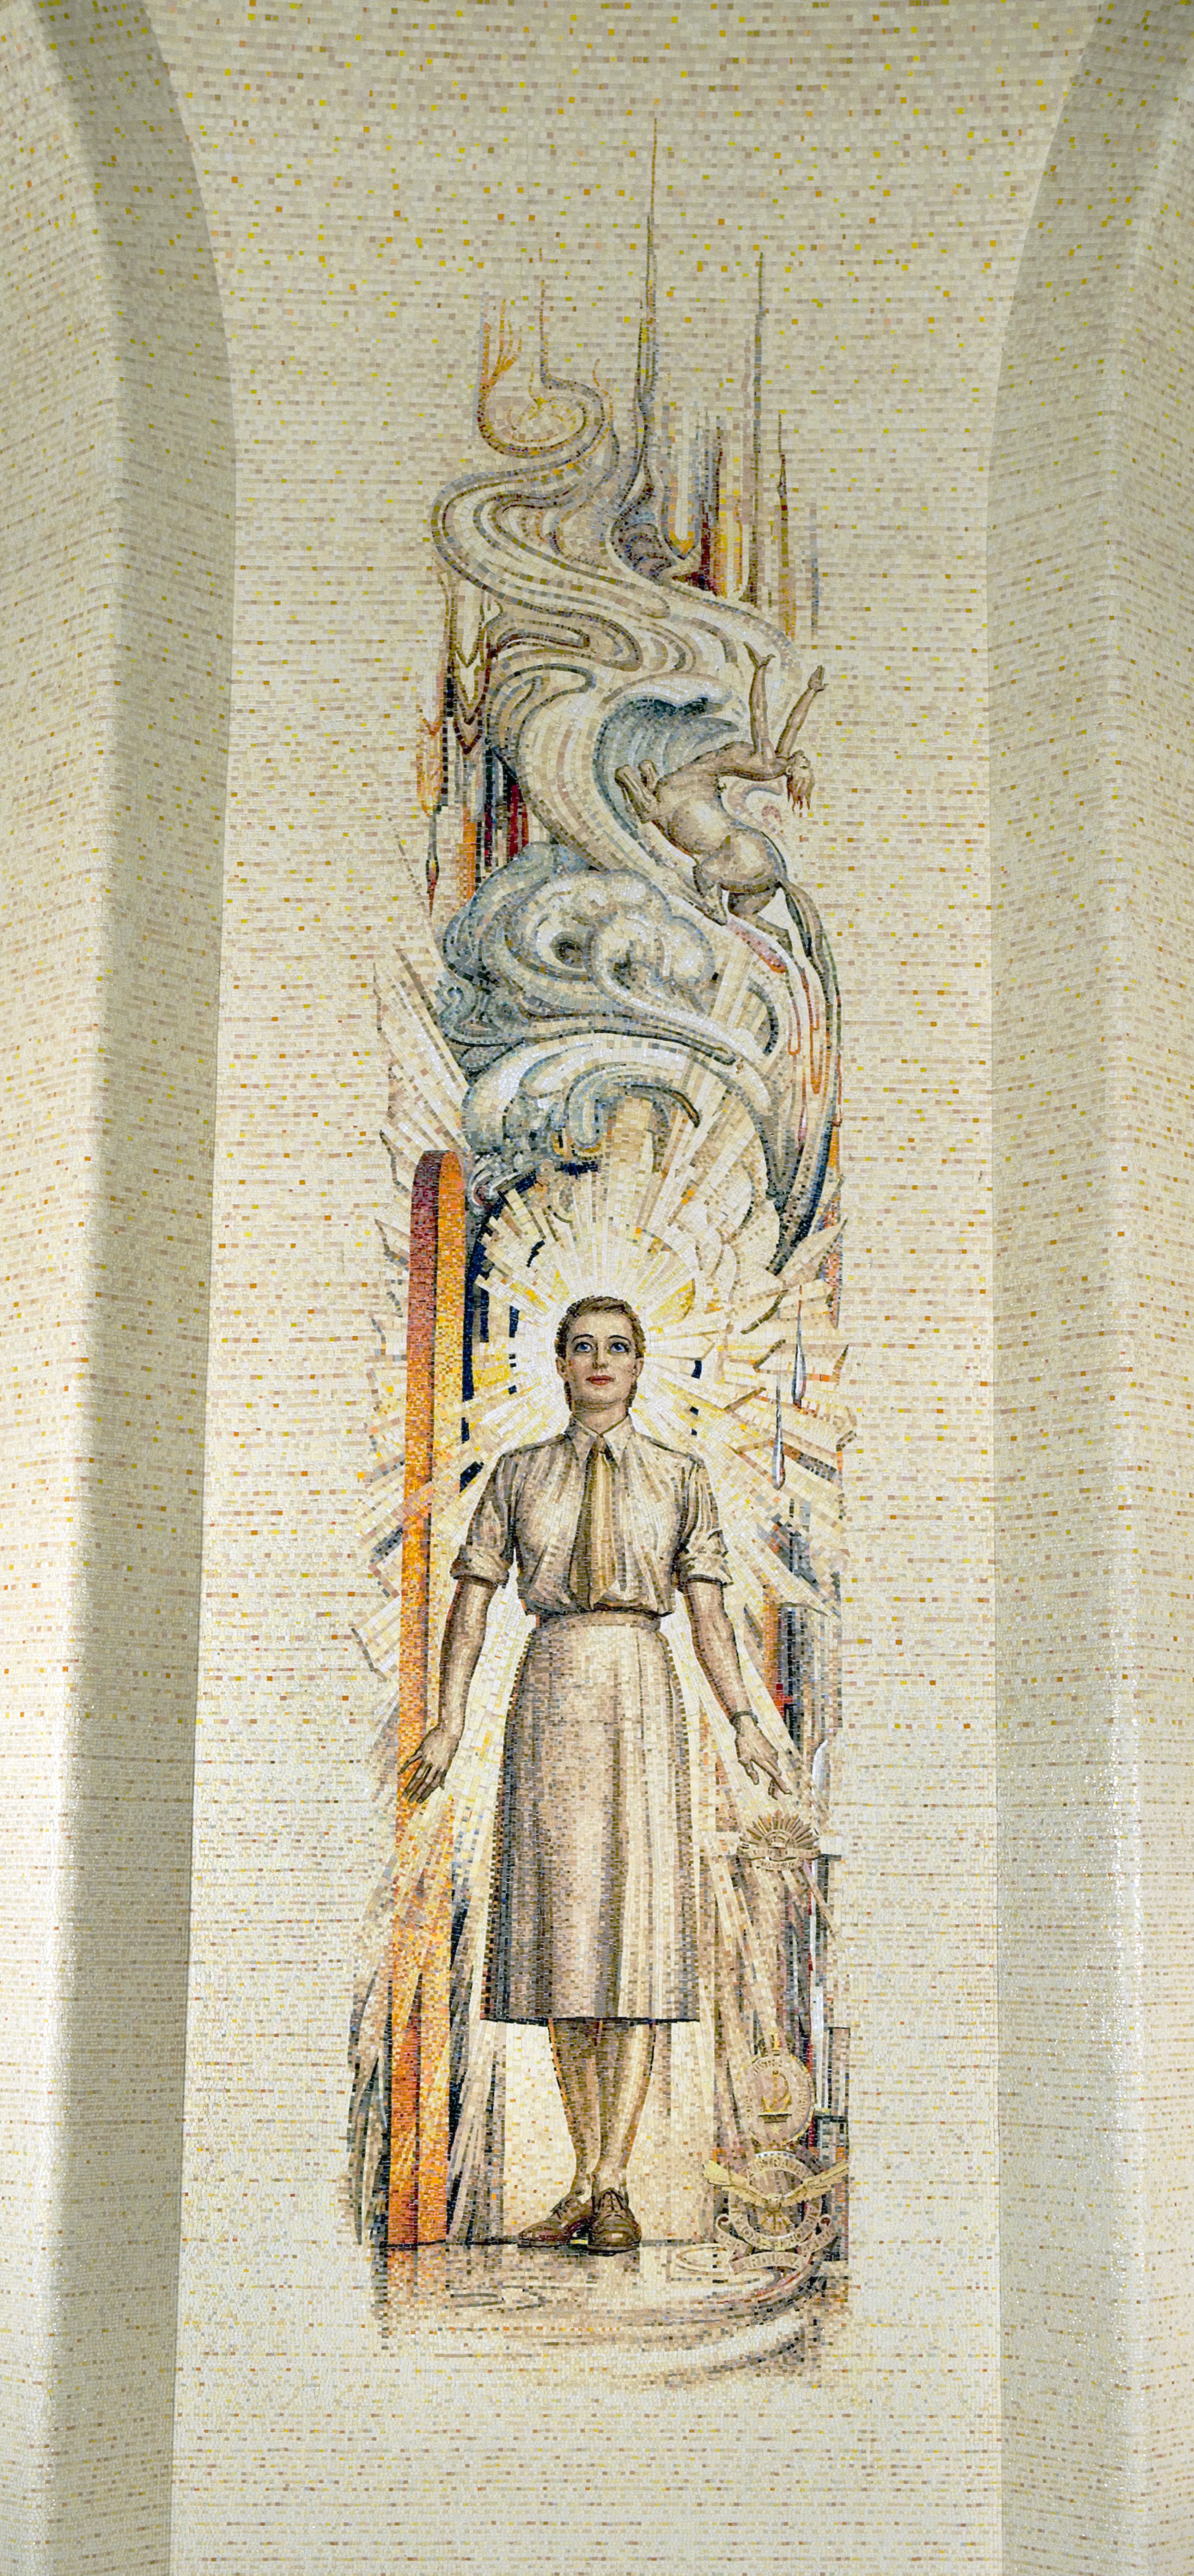
Hall of Memory mosaic pendentive: Women's services
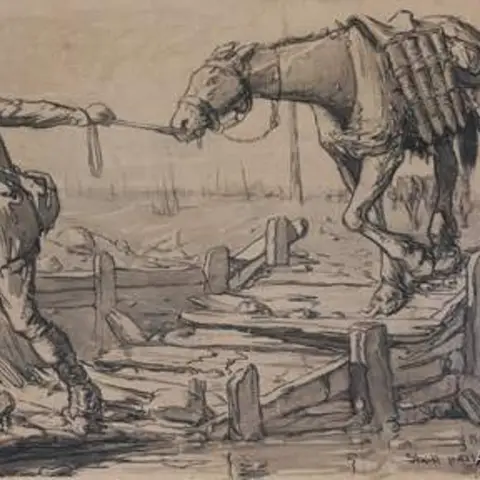
Shell pack horses, the Somme
Waller’s transition to the decorative arts seems to have been influenced, not by any limitations imposed by his disability, but rather by his newfound passion for producing public art, which he is credited with pioneering in Australia. His inspiration came from the writings of William Morris, a prominent English artist and designer, and also an avid writer and an outspoken socialist. Morris’s writings on Utopian Socialism, and his lectures on the responsibility of the artist in contributing to the improvement of society, resonated powerfully with Waller and exerted a strong influence over his art.
Waller is often known for saying, “an artist draws with his head, not his hands.” He also said about losing his right arm: “I’ve never felt it was anything to make a fuss about … It’s never become a right hand, but I’ve always been able to do what I wanted with it.” Typically modest and reticent, Waller worked assiduously and successfully at his art for some 60 years, until his death in 1972 at the age of 79. Shying away from the limelight, he is still far less well known than he should be.
In 1952, the Commonwealth government decided to extend the scope of the memorial to cover all walls in which Australians had taken part, and in this central block, the Hall of Memory, the entire inside wall area will be covered in mosaics, figures and designs to represent the sacrifice of the men and women of the Australian services.
Work is going on now. Most of it is done 400 miles away in Melbourne, where the various designs and motifs are drawn to scale, where the dominant figures for each of the four walls are sketched, and eventually translated into mosaic form from full-scale cartoons such as this.
It's all the work of Napier Waller, veteran of the First World War, a mosaic and stained glass expert, who has been commissioned to design and supervise the completion of the Hall of Memory.
I've been working on the Hall of Memory for four and a half years, first on the stained glass windows and now on the mosaics, some of the designs of which you see around here.
The whole area for the walls to be covered is about 13,000 square feet, or five tennis courts, or terms of weights, about 18 or 20 tonnes of mosaic material.
The height of each of these walls is 40 feet.
This figure is 11 feet high and symbolises the women's services.
It may be of interest to know that the model who helped with the figure was an army nurse sister and is now living in Scotland.
Now the symbolism which surrounds the figure, you may have noticed the Sea Centaur. Centaur was the name of the hospital ship in which a number of army nurses lost their lives.
The woman's figure is the only one so far completed and in place in Canberra. Napier Waller is at present working on the figure representing the army.
Tracings are taken of the completed cartoon section by section.
Mosaic lines are marked on the tracings following the natural construction lines of the limb as much as possible and from this tracing another one but in reverse is taken.
And on this tracing glue is applied along the tessera lines and each individual piece of tessera put face downwards onto the glued paper.
All designs are in sections and when completed they are sent to Canberra and applied to the walls like this.
Waller is using 70 different colours in the same way as a painter uses. Each colour has its own number and is kept in separate boxes.
Mosaic sections for parts of the wall which are plain, designs such as in the window panels which are repeated in each bay, are prepared by a staff all working on the same pattern and applying the same coloured piece of tessera as it is handed out by a monitor, faced downwards onto the paper.
These sections will be tapped into soft cement rendering on the walls and then the paper is washed off to leave the flat face on the outside.
As each section is completed it is packed in boxes ready for dispatch to Canberra.
On arrival in Canberra the sections are spread out in their order.
Their numbers are checked against a replica of Napier Waller's plan in Melbourne and then they are sent up in order to the Mosaic craftsmen working above in the gantries.
Sections of wall are prepared about 30 square feet at a time with cement.
Before the cement rendering has set, a matter of a few minutes, the Mosaic section itself well covered with white cement is put into position and tapped firmly into place.

