Australia made a significant contribution to campaigns in the Mediterranean and North Africa, 1940–43
During the Second World War, Australians served across the world: from the deserts of North Africa to the jungles of South-East Asia, to the Arctic, China, and Burma, as well as in the skies above Europe and on the world's seas. For the first half of the war, the Mediterranean and the Middle East were the primary operational theatre for Australian personnel.
Of the Second Australian Imperial Force's (AIF) four infantry divisions, three – the 6th, 7th, and 9th – served for extended periods across the theatre. The Royal Australian Navy (RAN) was active there as early as September 1939, as was the Royal Australian Air Force (RAAF). Nos 3 and 450 Squadrons, the RAAF's most active squadrons during the war, operated across the region until late 1945.
The Mediterranean was not the intended destination for Australian forces; it was merely a waystation on the journey to Britain, where the AIF would then reinforce the British Expeditionary Force in France ahead of the anticipated German spring offensive. The fall of France in June 1940 made any reinforcement impossible, as did Mussolini's decision to declare war. That was no surprise to Britain or Australia; “fence-sitters” like Italy, said the acting chief of the Australian general staff, Major General John Northcott, would not pass up the opportunity presented by any significant Allied reversal or defeat in Europe.
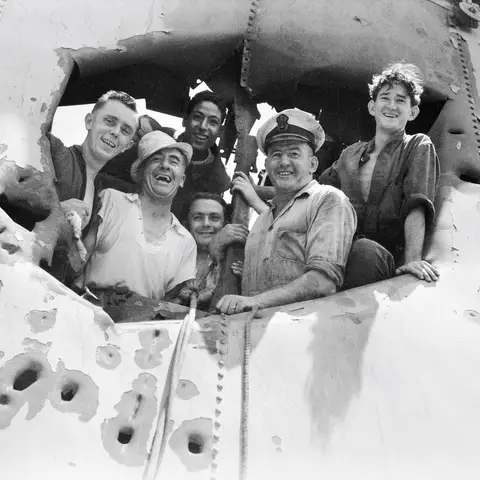
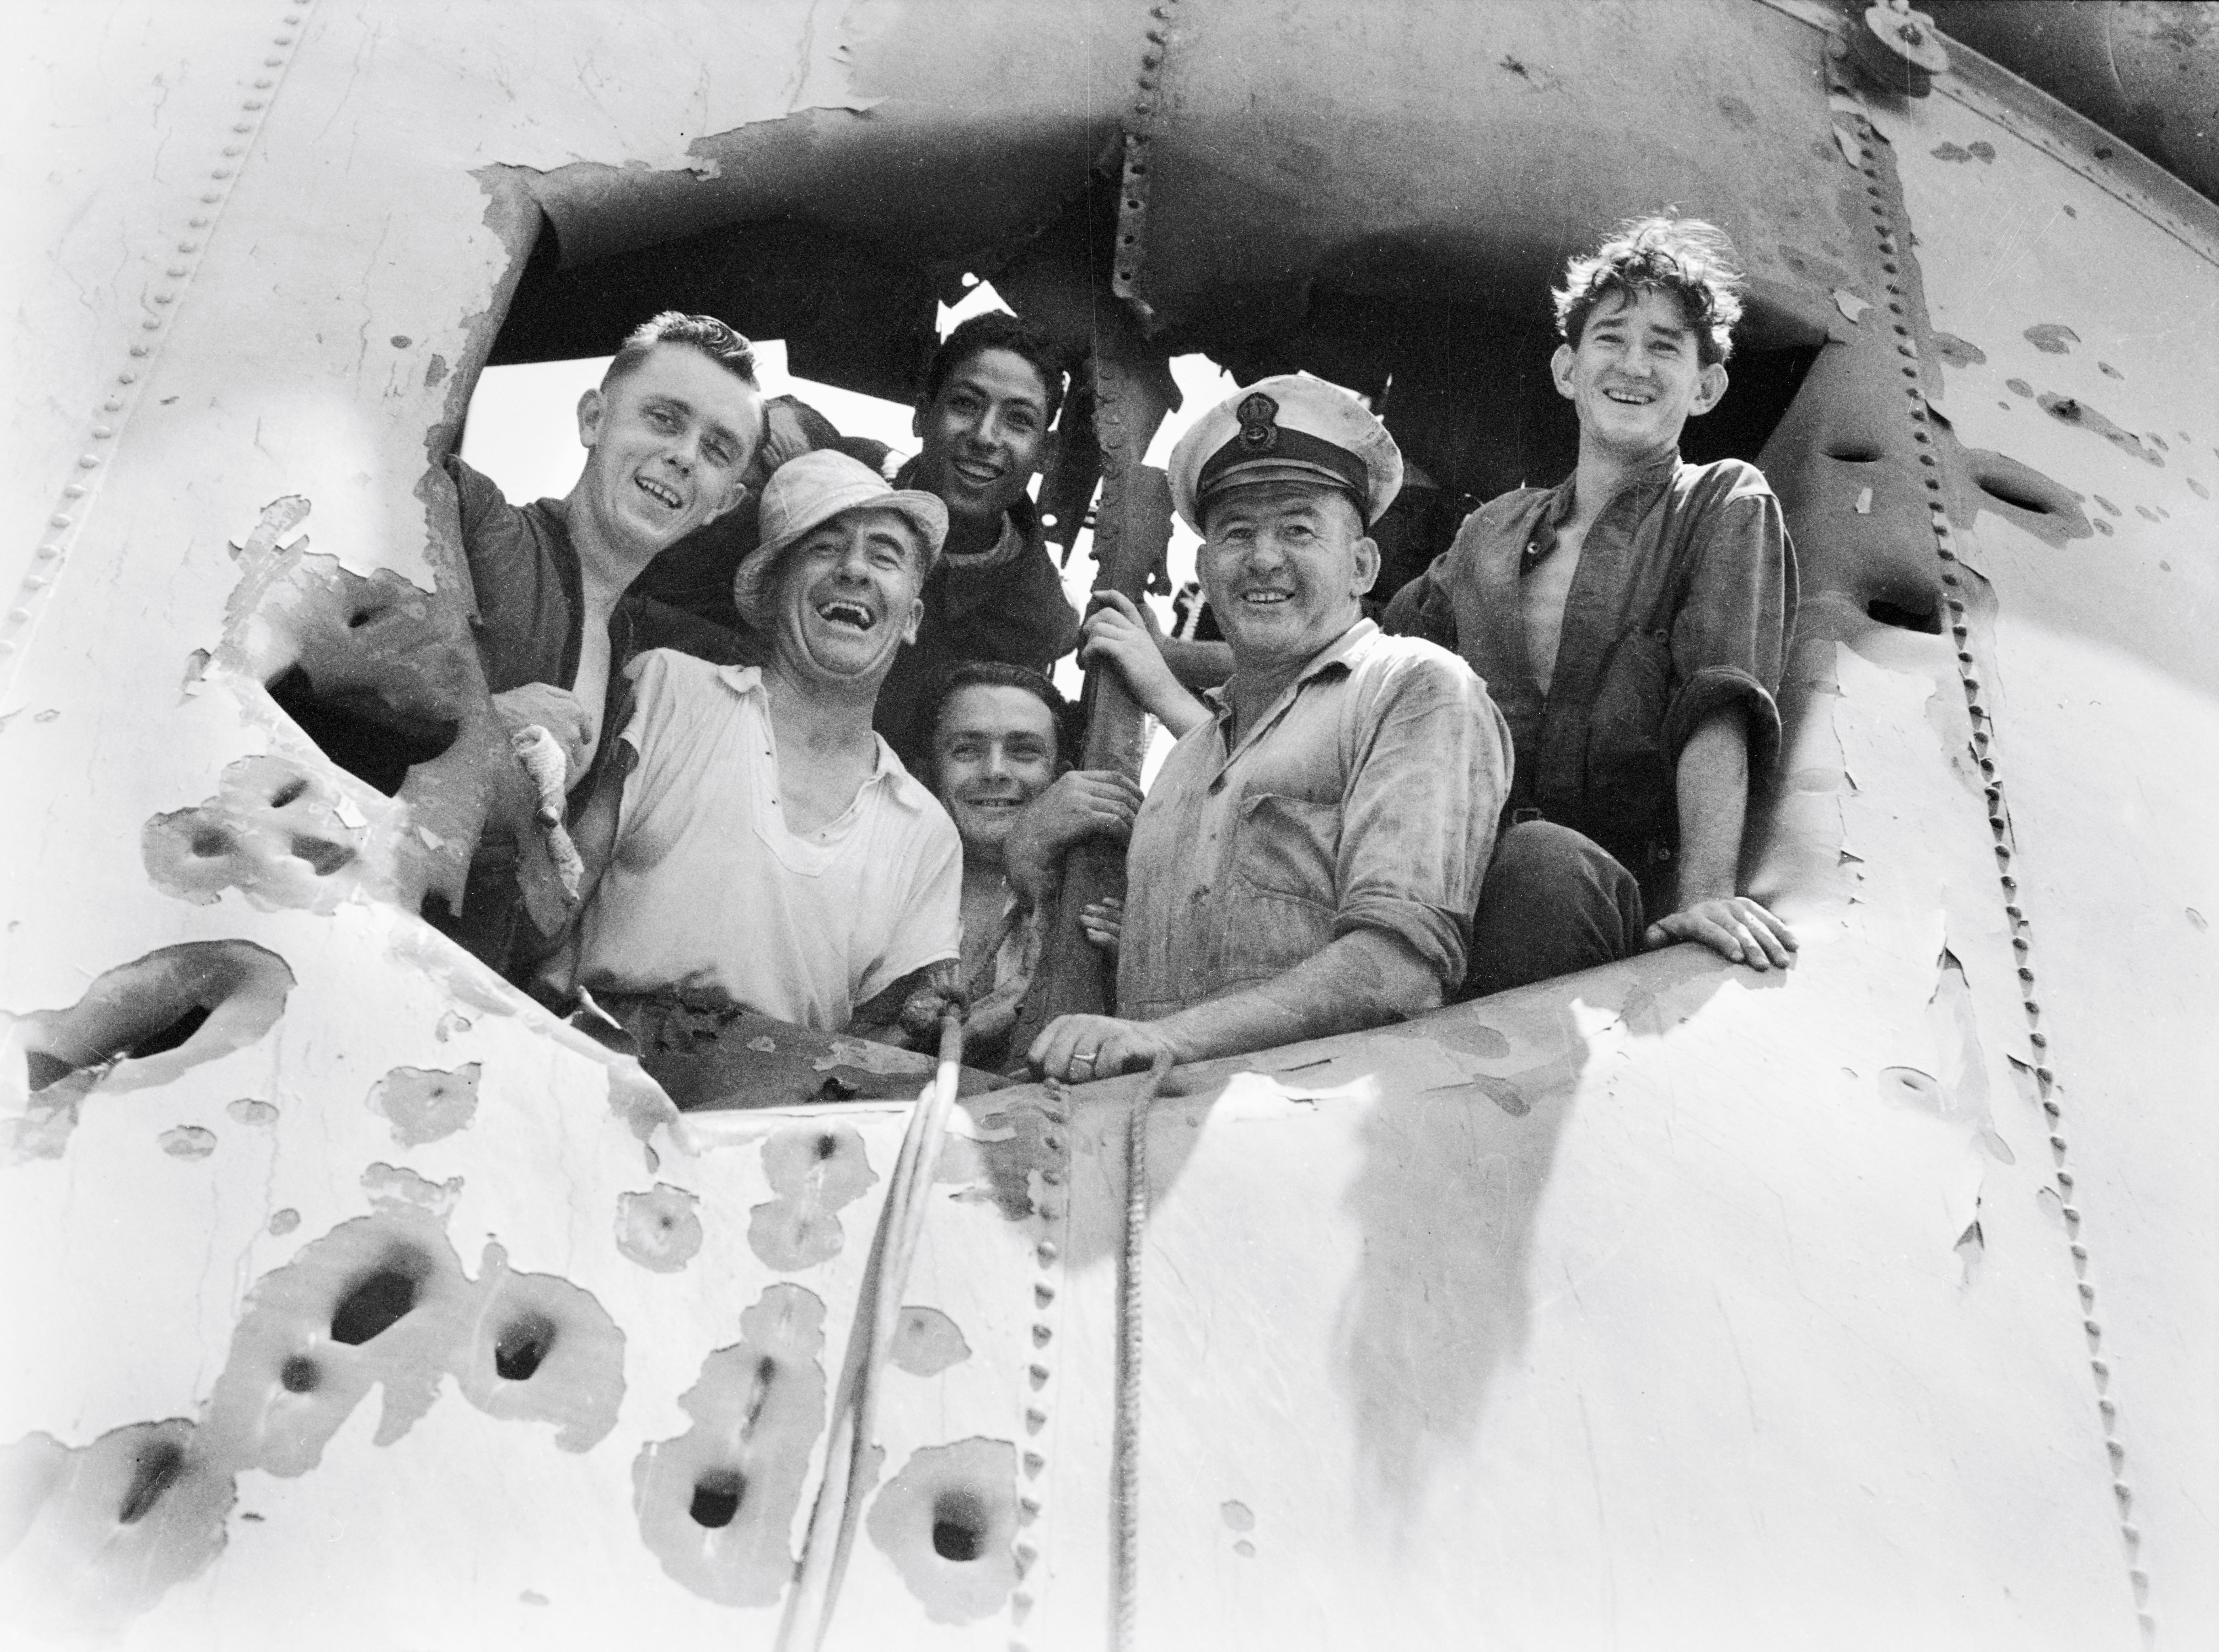
Crewmen from HMAS Sydney (II) at a hole in the ship’s forward funnel, damaged in action against Italian cruiser Bartolomeo Colleoni off Cape Spada, Crete. 22 July 1940.
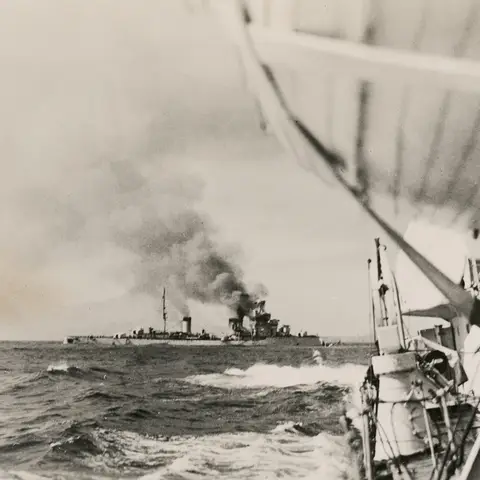
THE ITALIAN CRUISER BARTOLOMEO COLLEONI BEING TORPEDOED BY A BRITISH DESTROYER AFTER SHE HAD BEEN ABANDONED BY HER CREW. THE COLLEONI HAD BEEN BADLY DAMAGED IN A FIERCE NINETY MINUTE BATTLE WITH HMAS SYDNEY OFF CAPE SPADA, CRETE, THE FIRST CRUISER DUEL OF THE SECOND WORLD WAR.
The Mediterranean's strategic significance differed for each nation involved. For Britain, the Mediterranean was the main event; it was the only theatre in which its forces could fight the Axis powers after France's capitulation. More than merely a symbol of British imperialism, the Mediterranean was a hub of imperial lines of communications and supply; it provided a ready and all-too-necessary supply of oil products as well as a vital shortcut route to India and the British Empire. For his part, Mussolini was bent on realising his dream of expansion; he wanted to carve out a new Roman empire, and the British and French were the gatekeepers to what he called his Mediterranean “prison”. In contrast, the German high command was focused on Hitler's ambitions in Europe and sought to ensure that Mussolini did not chase prestige targets, which would undermine the broader Axis war effort. For Germany, the Mediterranean was initially little more than a distraction.
Australia had its own concerns, as it relied on its position within the British Empire; the Mediterranean and Middle Eastern lines of communication and trade were the lifeblood of both Australia and New Zealand. The British also clearly stated that their capacity to defend Australia against Japanese aggression was predicated on peace in the Mediterranean, so Australia had a strong interest in ensuring that the war in the Mediterranean was won.
First victories
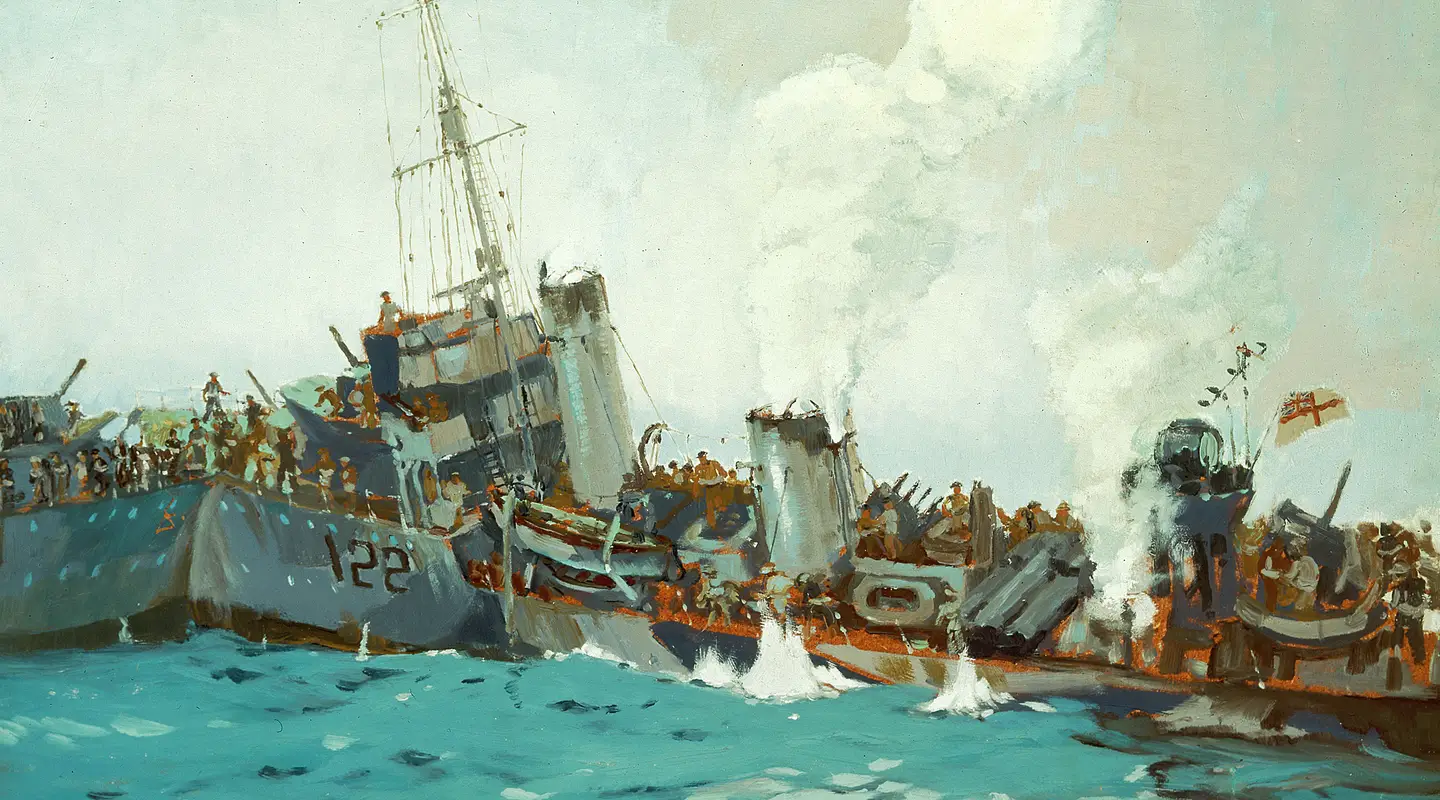
The RAN was the first to operate in the Mediterranean. When war was declared, Australia had five ageing destroyers (the so-called Scrap Iron Flotilla), two heavy cruisers, four light cruisers, and four sloops at its disposal. In November 1940, while en route to Singapore, the Stuart, Voyager, Vampire, Vendetta and Waterhen altered course for the Mediterranean, arriving in Malta in mid-December. They were later accompanied by HMAS Sydney (II) and then by HMAS Perth.
RAN ships carried out escort and patrol duties until Italy entered the war in June 1940, which brought them swiftly into battle. In the following six months, they were involved in several significant surface actions, including the first British–Italian surface engagement of the war, the battle of the Espero Convoy (28 June), in which Sydney disabled and sank the Italian detroyer Espero. A few weeks later, on 19 July, Sydney again distinguished itself off Crete's coast when it engaged two Italian cruisers, Bartolomeo Colleoni and Giovanni Delle Bande Nere, sinking the first and forcing the other to flee. Between 1939 and 1942, each of Australia's three light cruisers – the Sydney, Perth, and Hobart – served in the Mediterranean, providing fire support to land operations, ferrying supplies and personnel across the theatre, and escorting vital convoys.
Australian infantrymen in Bardia c. March 1941.
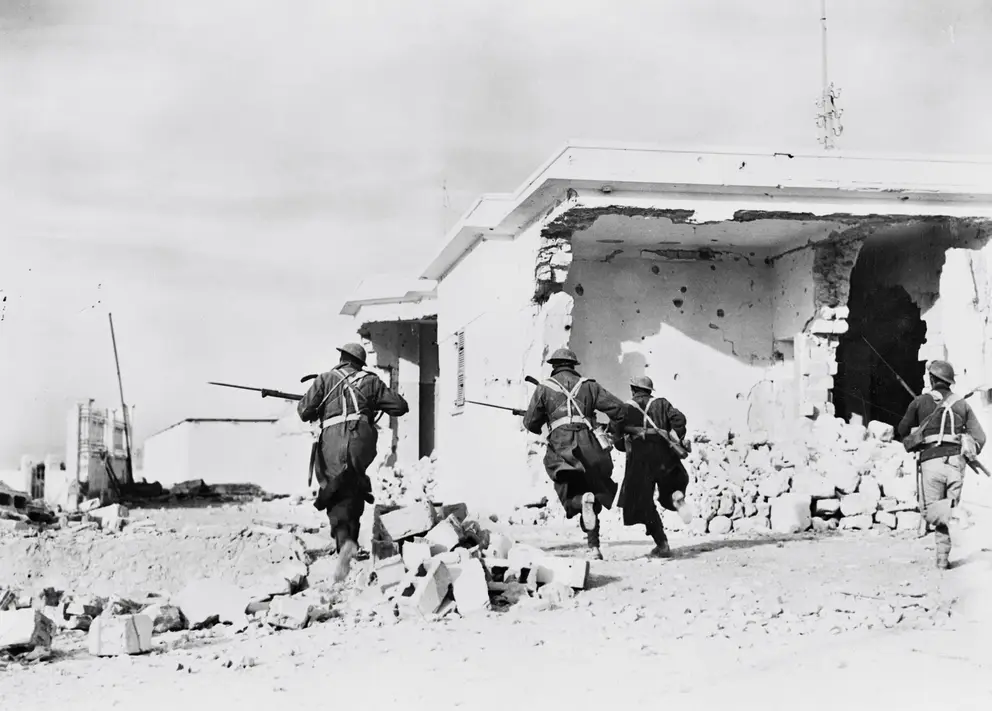
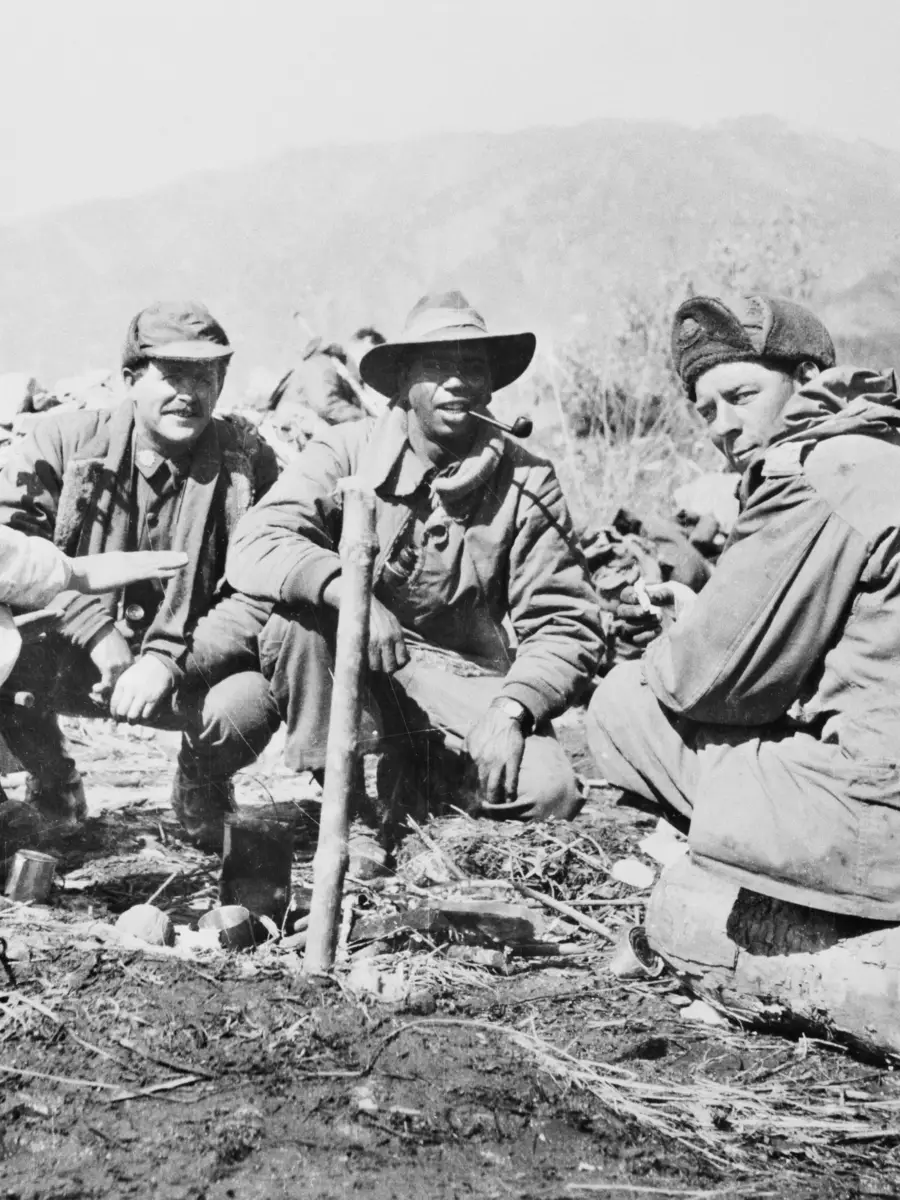
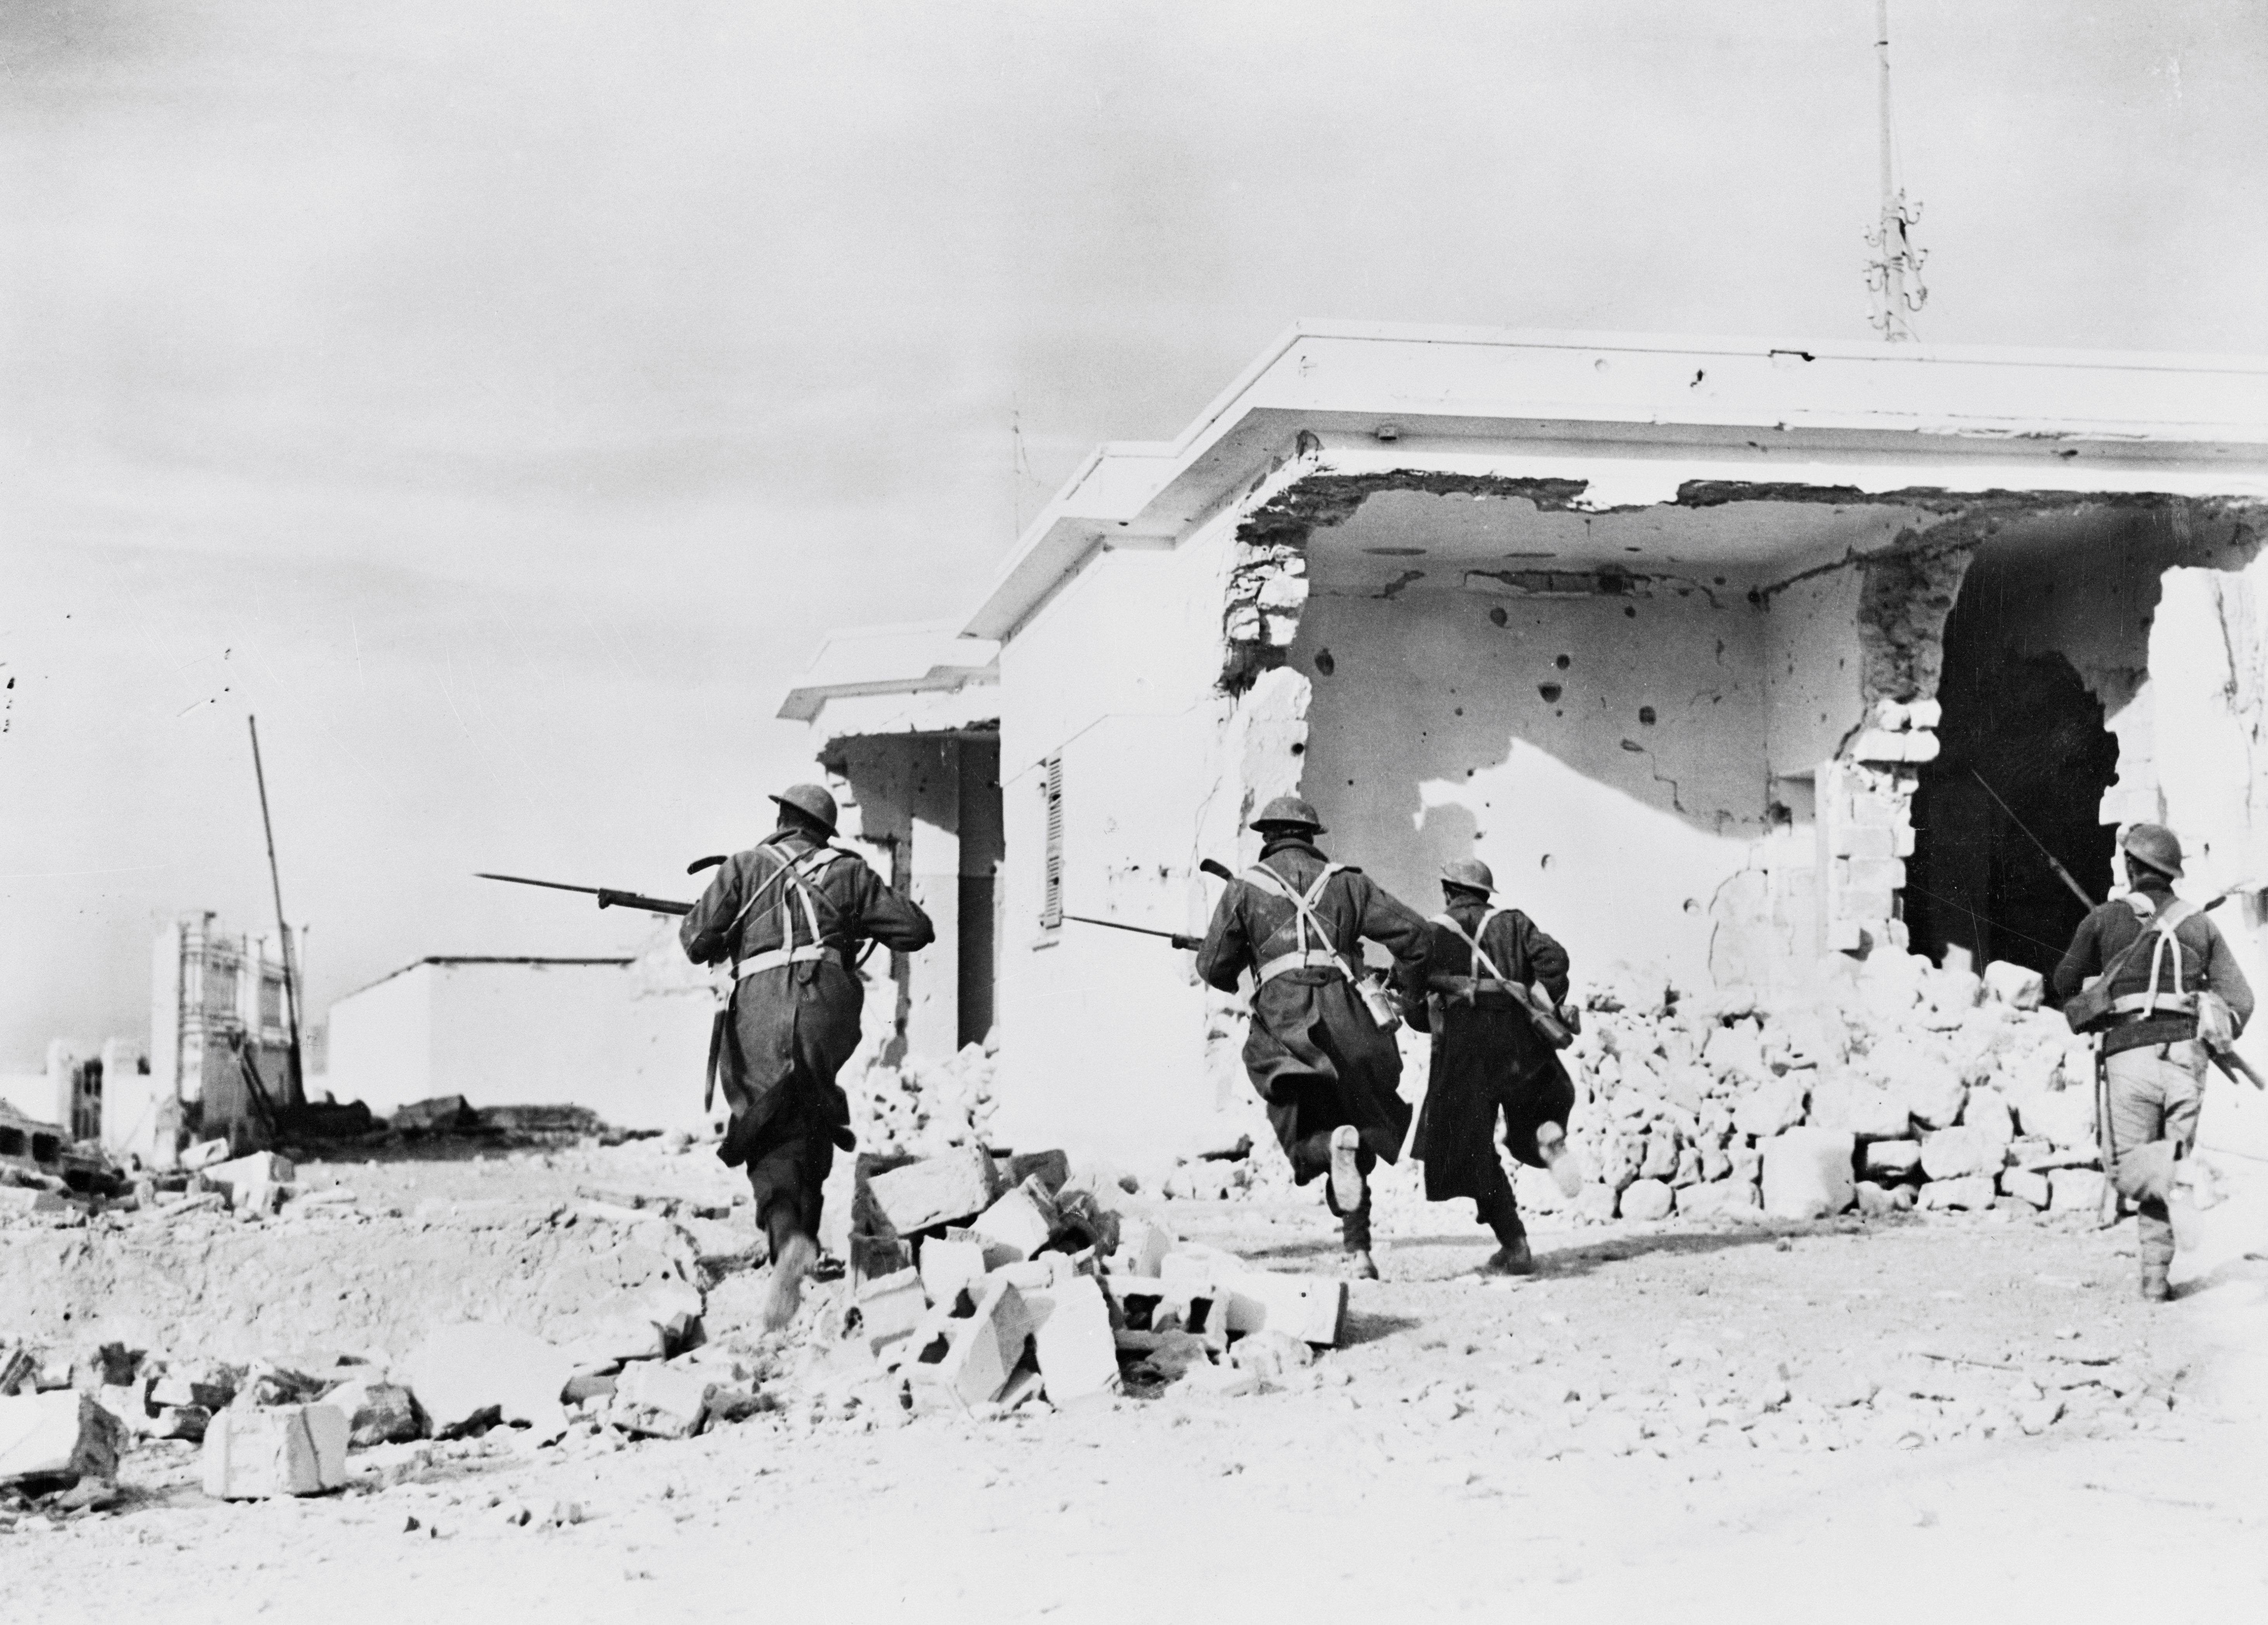
Australian soldiers began to arrive in theatre in early 1940. Most of 6th Division arrived in the Middle East in February, but they would not enter combat for almost a year. 6th Division spent most of 1940 in Palestine, where it trained and equipped for battle and was later joined by 7th and 9th Divisions. In January 1941, Australians went into battle against Italy's Tenth Army, which invaded Egypt but advanced less than 100 kilometres across the border before halting. Though outnumbered by almost four to one, the British counter-offensive, Operation Compass, successfully repelled the Italian army. 6th Division was the first to see battle as part of Western Desert Force (WDF), the British Army formation in North Africa. Between December and early February 1941, the WDF (retitled XIII Corps at the start of 1941) pursued the retreating Italian force, resulting in the successive capture of significant Italian positions, including Bardia, Tobruk and Benghazi. At Bardia, in their first action, Australian troops captured approximately 45,000 Italians; it was also the first in which they operated under Australian command, and the first to be planned by an Australian staff. Almost three weeks later, they captured Tobruk, the port so central to the story of Australian involvement in the Mediterranean.

HMAS Voyager (I) underway off Suda Bay, Crete, 25 May 1941
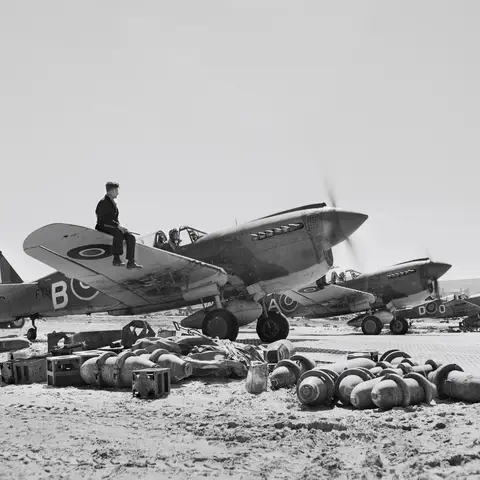
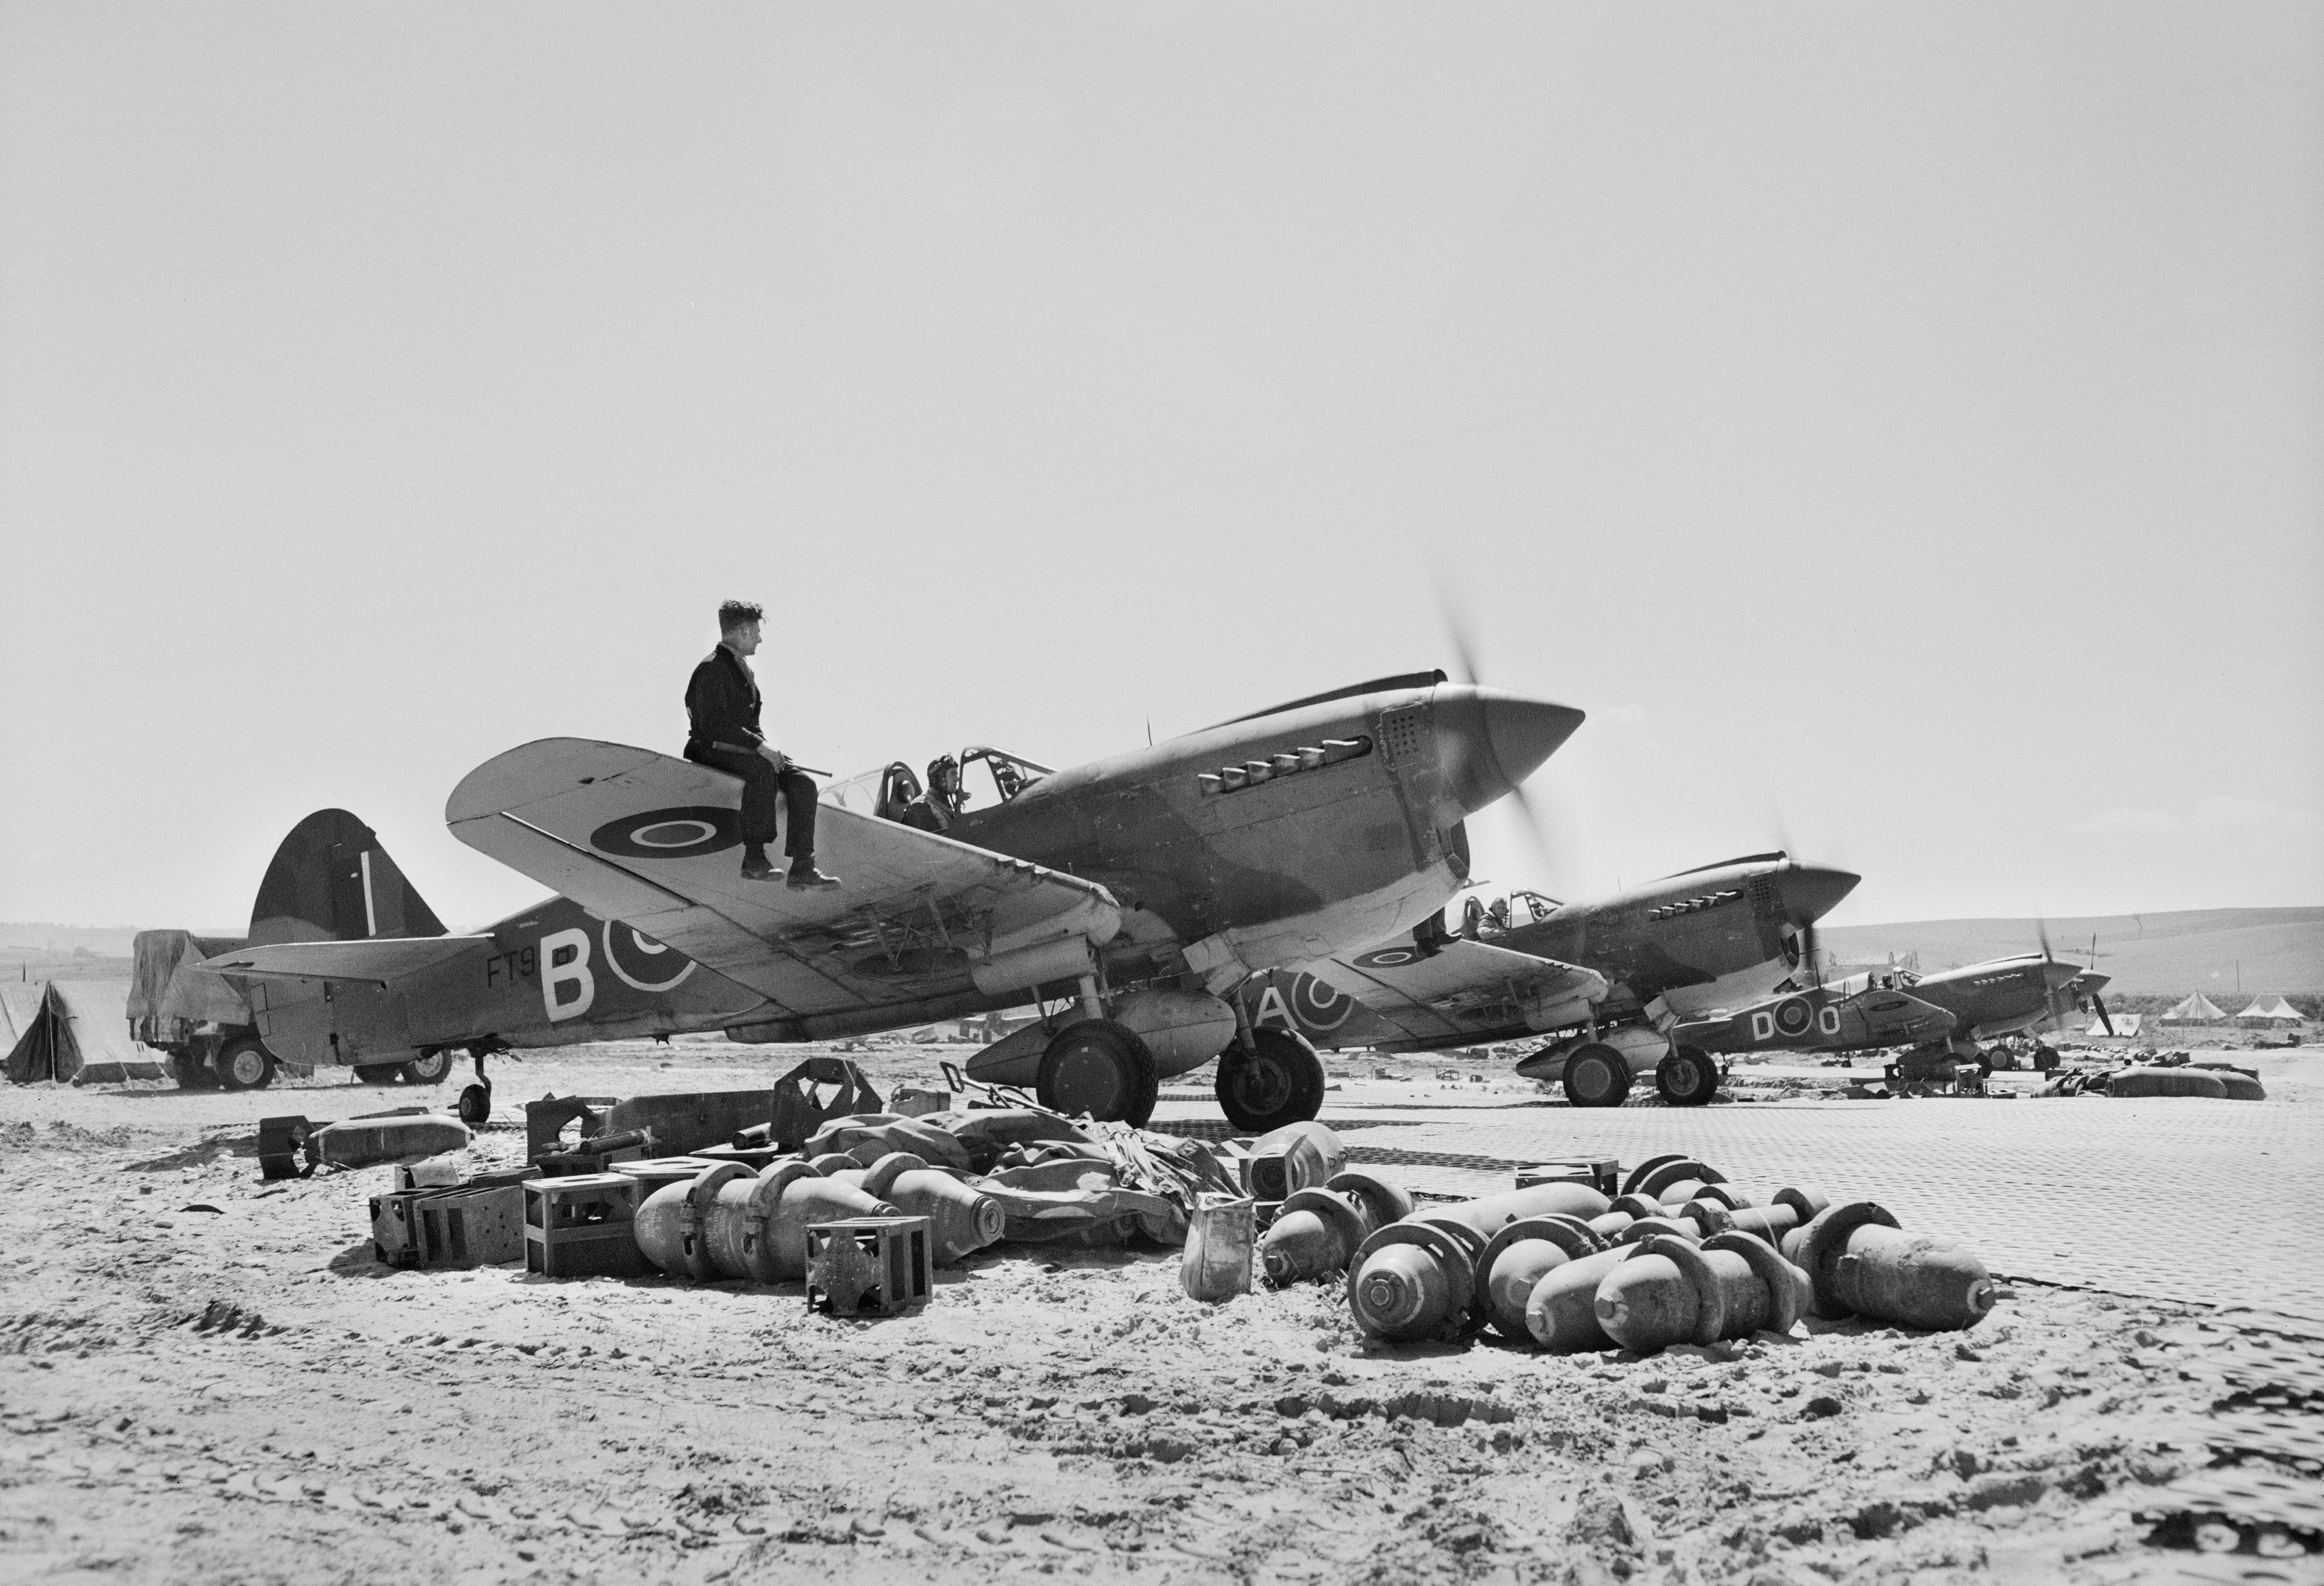
Italy. c. 1944. Curtiss P40 Kittyhawk aircraft of the Desert Harassers No. 450 Squadron RAAF, in line for take-off on an operation over Yugoslavia. Note the bombs in the foreground.
The pendulum swings
These initial successes saw Italian forces beaten back in North Africa; but at the same time, Italian troops concentrated in Albania as they attempted to invade and capture Greece, if unsuccessfully. As it became clear that Germany was preparing to reinforce Italian troops and invade Greece, it was also apparent that Greece could not withstand a full-scale invasion. Discussions were held between Britain and Greece as to what assistance could be provided. Australia had reservations about sending troops to assist as the situation deteriorated. The position in Greece was considered “highly dangerous” and “hazardous”; British and Commonwealth forces were unlikely to be able to combat the anticipated German offensive and would probably become trapped and need to be evacuated. Nonetheless, Australia agreed to send its soldiers to defend Greece – not to do so would have been considered a moral failure to defend an ally – though Lieutenant General Sir Thomas Blamey, commander of the AIF, notably opposed the operation as it was initially planned.
Regardless, Australian troops joined their British and New Zealand counterparts in Greece, where they supported their Greek allies in their attempt to fend off the German–Italian invasion.

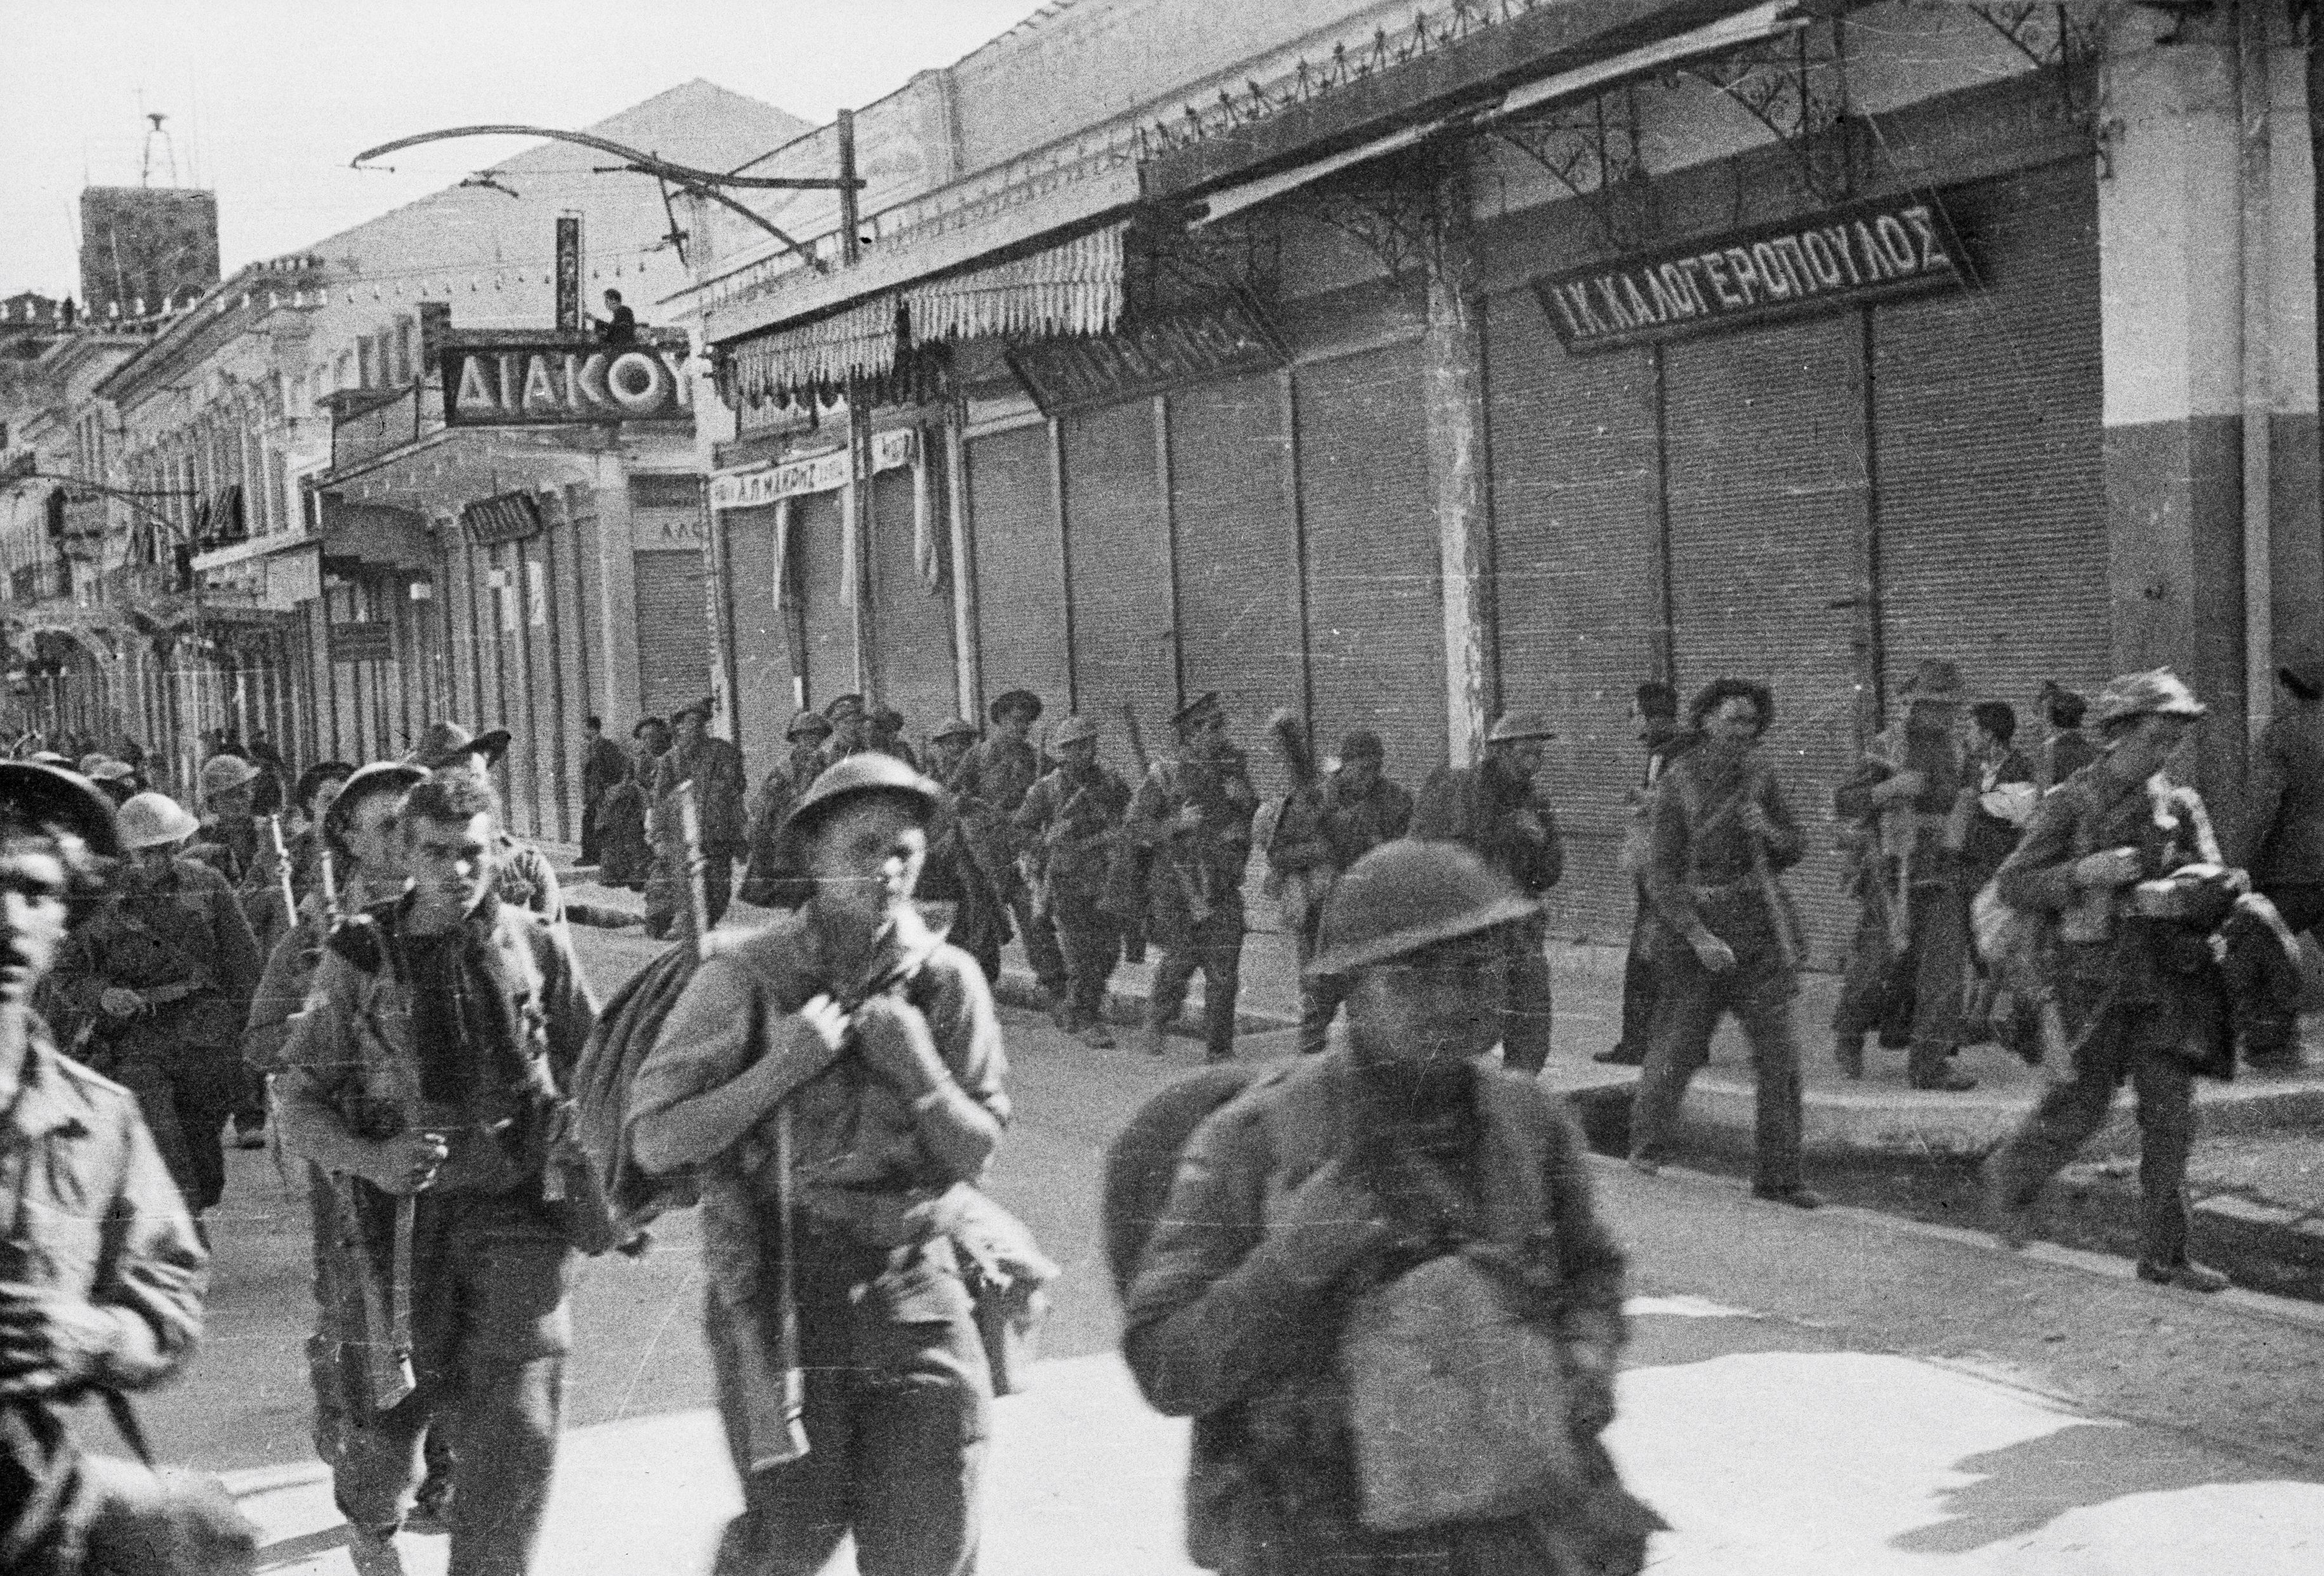
KALAMATA AREA, GREECE, 1941-04-26. BRITISH AND AUSTRALIAN TROOPS MARCHING THROUGH A STREET IN KALAMATA TO THE EMBARKATION POINT IN THE AREA DURING THE WITHDRAWAL OF THE ALLIED FORCES. IDENTIFIED PERSONNEL ARE:- E.T. FULTON (1); L. DEMPSEY (2); R.M. THOROLD (3); GUNNER T. HOWES (4); ALL ARE MEMBERS OF THE 2/1ST FIELD REGIMENT.
That invasion was an overwhelming success for the enemy. British Commonwealth troops were forced to make an ordered retreat as they were pushed towards the coast in southern Greece, from where the Royal Navy and RAN ships would eventually evacuate them with the help of the Greek merchant navy. The invasion began on 6 April, and a week later, Allied troops were withdrawn to Thermopylae – the site of the Spartans’ famous stand under Leonidas against the Persians – after Greek troops had surrendered in the north. The decision to evacuate was made eight days later, and on Anzac Day Australian and New Zealand troops dug in around Thermopylae to enable the main force's withdrawal and evacuation.
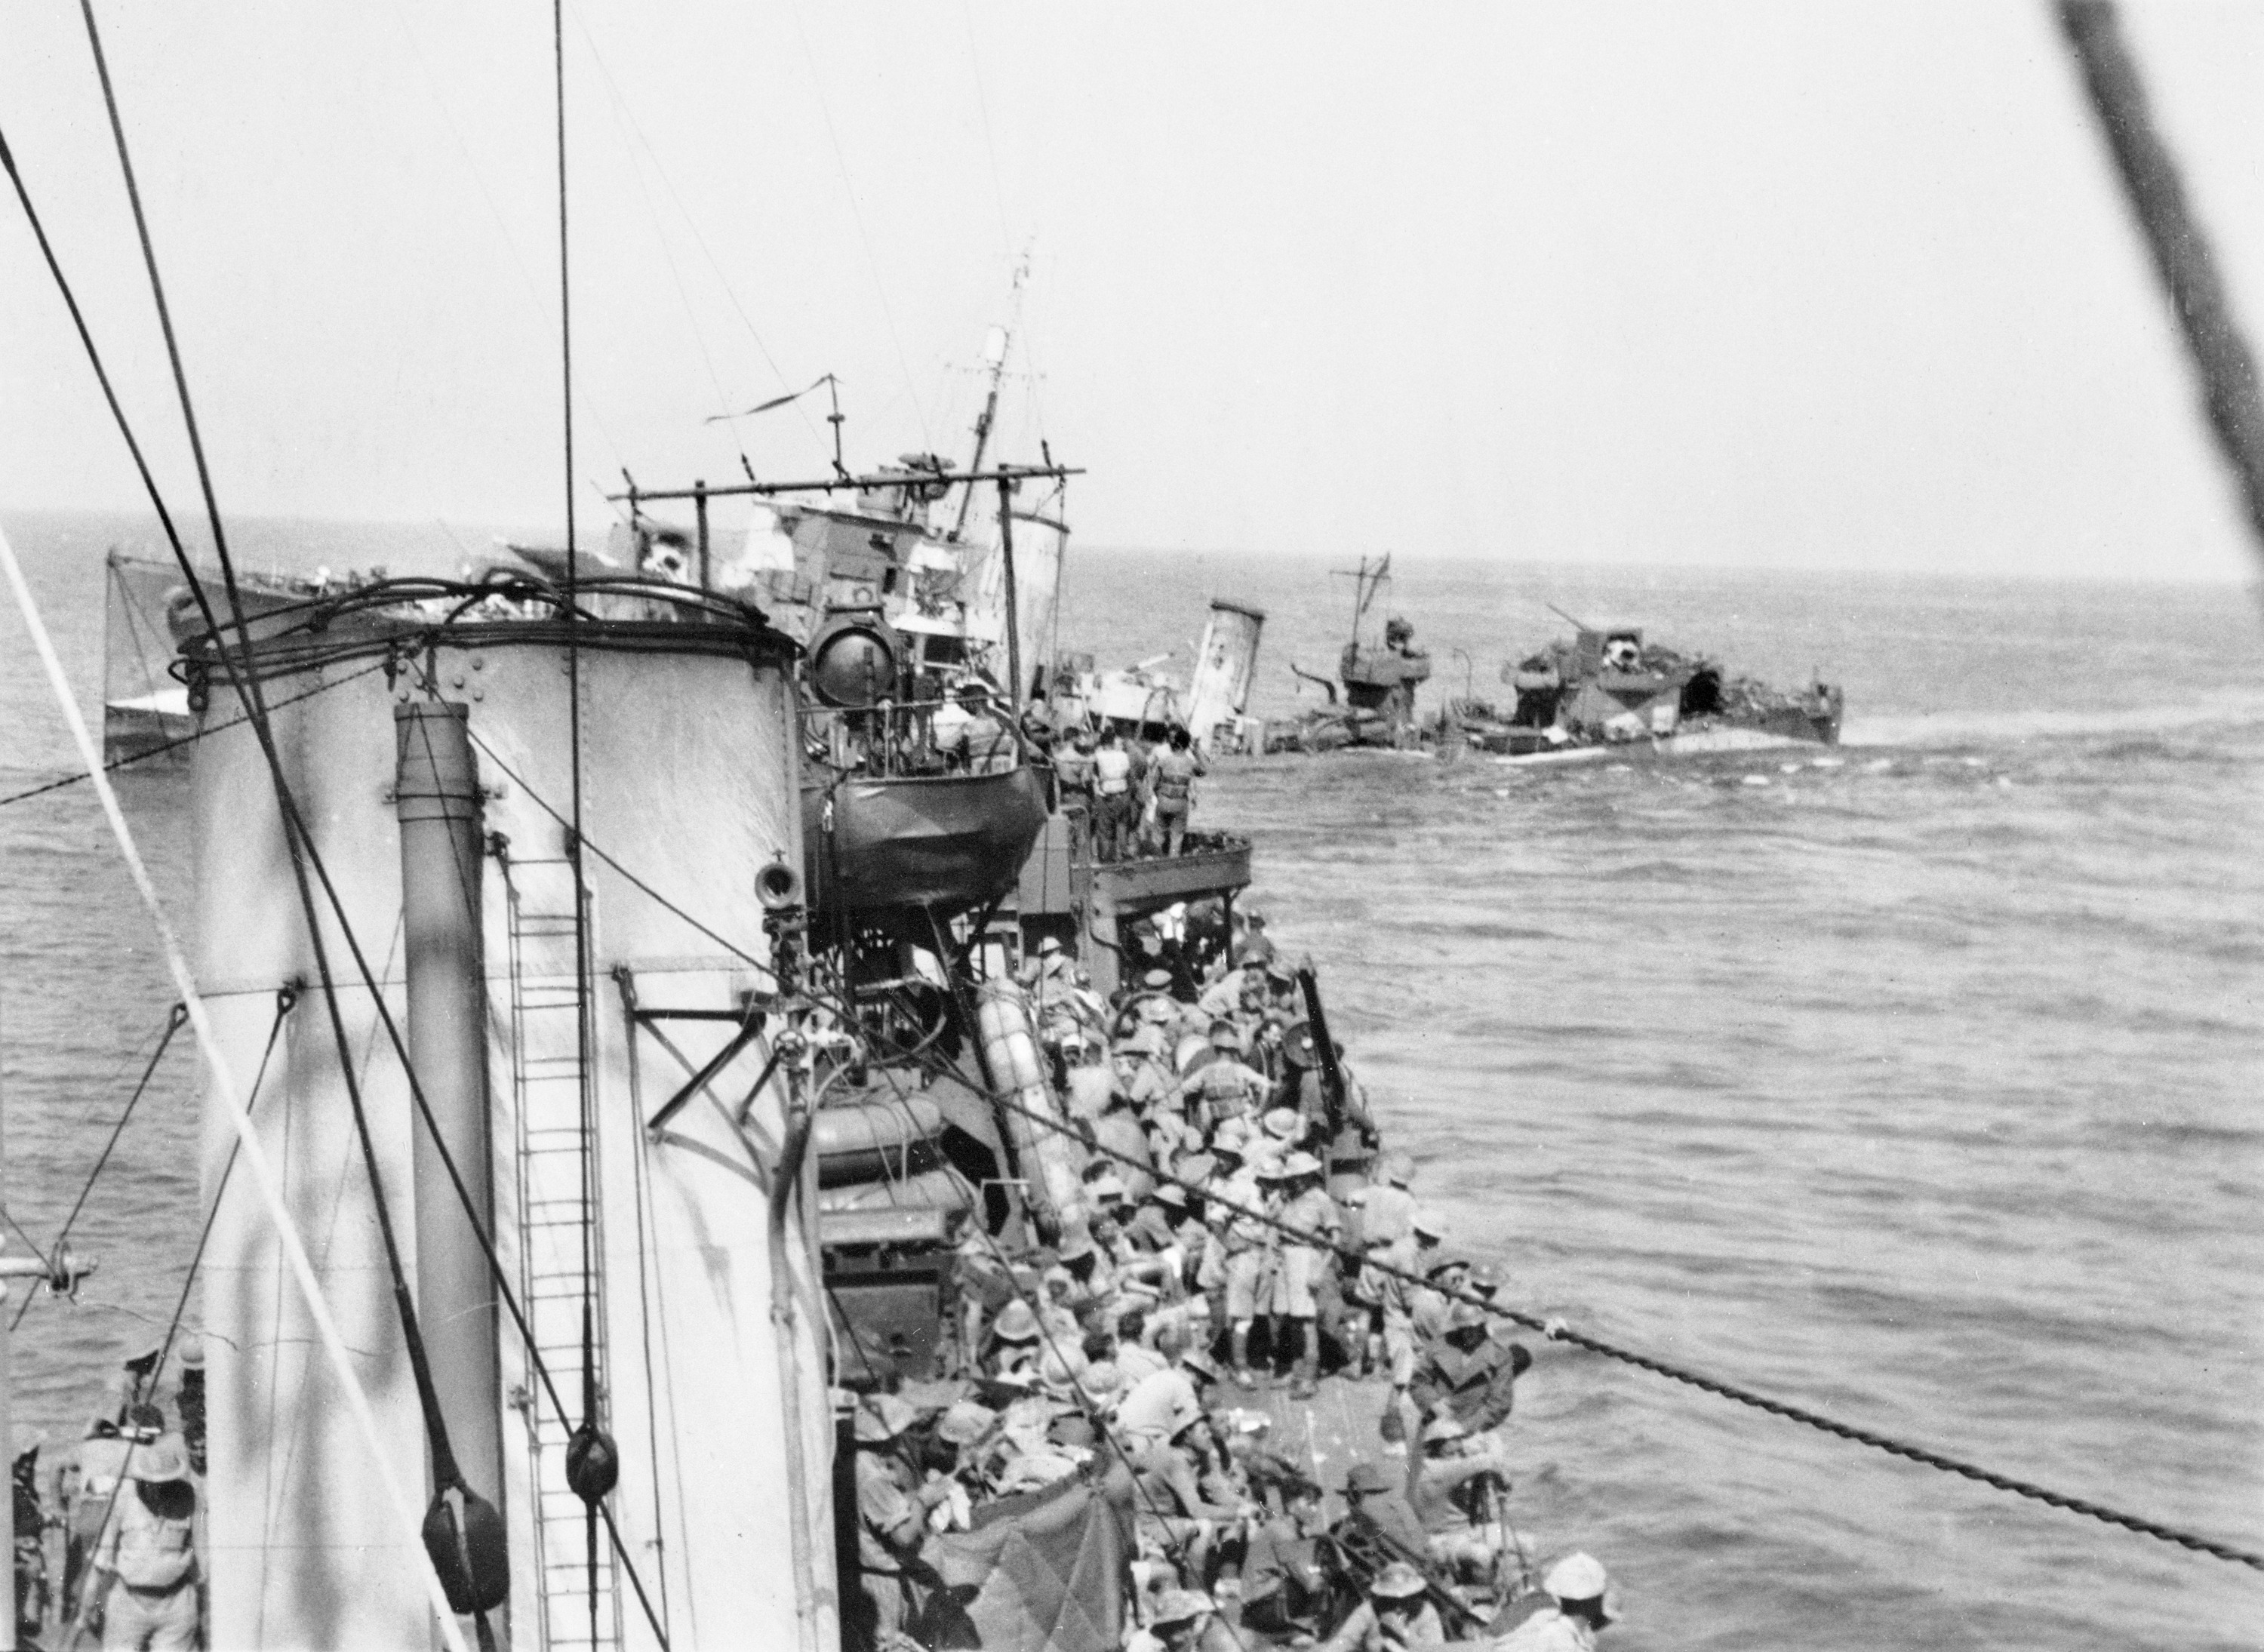
Perth, Stuart, Vampire and Vendetta were all involved in evacuating 50,000 Allied troops from mainland Greece. Of the 62,532 men sent to Greece under the codename “Lustreforce”, 50,627 were evacuated from the mainland. However, nearly 16,000 were left behind when the navy was forced to leave because of the threat of attack from German aircraft, including the 2/7th Australian Infantry Battalion, which was forced to surrender at Kalamata. Five hundred men were killed when Luftwaffe aircraft attacked and sank the Slamat, Wryneck and Diamond during the evacuation. There, almost of those who were evacuated from mainland Greece, 26,950 were taken to Crete, and the remainder went directly to Egypt. Almost 20,000 of those taken to Crete stayed to defend the island against the imminent German attack, and the remaining 7,000 moved to Egypt.
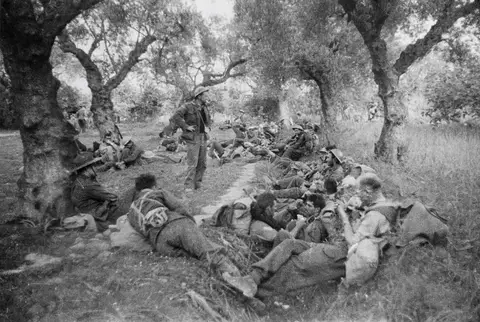
KALAMATA AREA, GREECE. 1941-04-26. AUSTRALIAN TROOPS RESTING UNDER THE TREES IN THE KALAMATA AREA WHILE AWAITING EMBARKATION DURING THE WITHDRAWAL OF THE ALLIED FORCES FROM GREECE
The German invasion of Crete got off to a rocky start as the paratrooper-led assault met determined Allied resistance (an estimated two-thirds of the 600-strong 3rd Parachute Battalion were killed as they descended or landed), but the successful capture of Maleme airfield enabled a swift German advance across the island. Within a week, the weary and outmatched Allied troops were again making for the coast as they prepared for evacuation. However, 2/1st and 2/11th Battalions were unaware of the evacuation order as they defended the town of Retimo. The battalions were forced to surrender, but many in 2/11th took up their commanding officer's offer to flee and evade capture. Between 28 May and 1 June, some 15,000 men were evacuated, and another 12,000, including 3,109 Australians, were left to become prisoners of war. On its return to Alexandria, Perth's convoy was attacked five times, and a direct hit killed 13 men; the light cruiser had to remain in port until mid-June for repairs.
North Africa
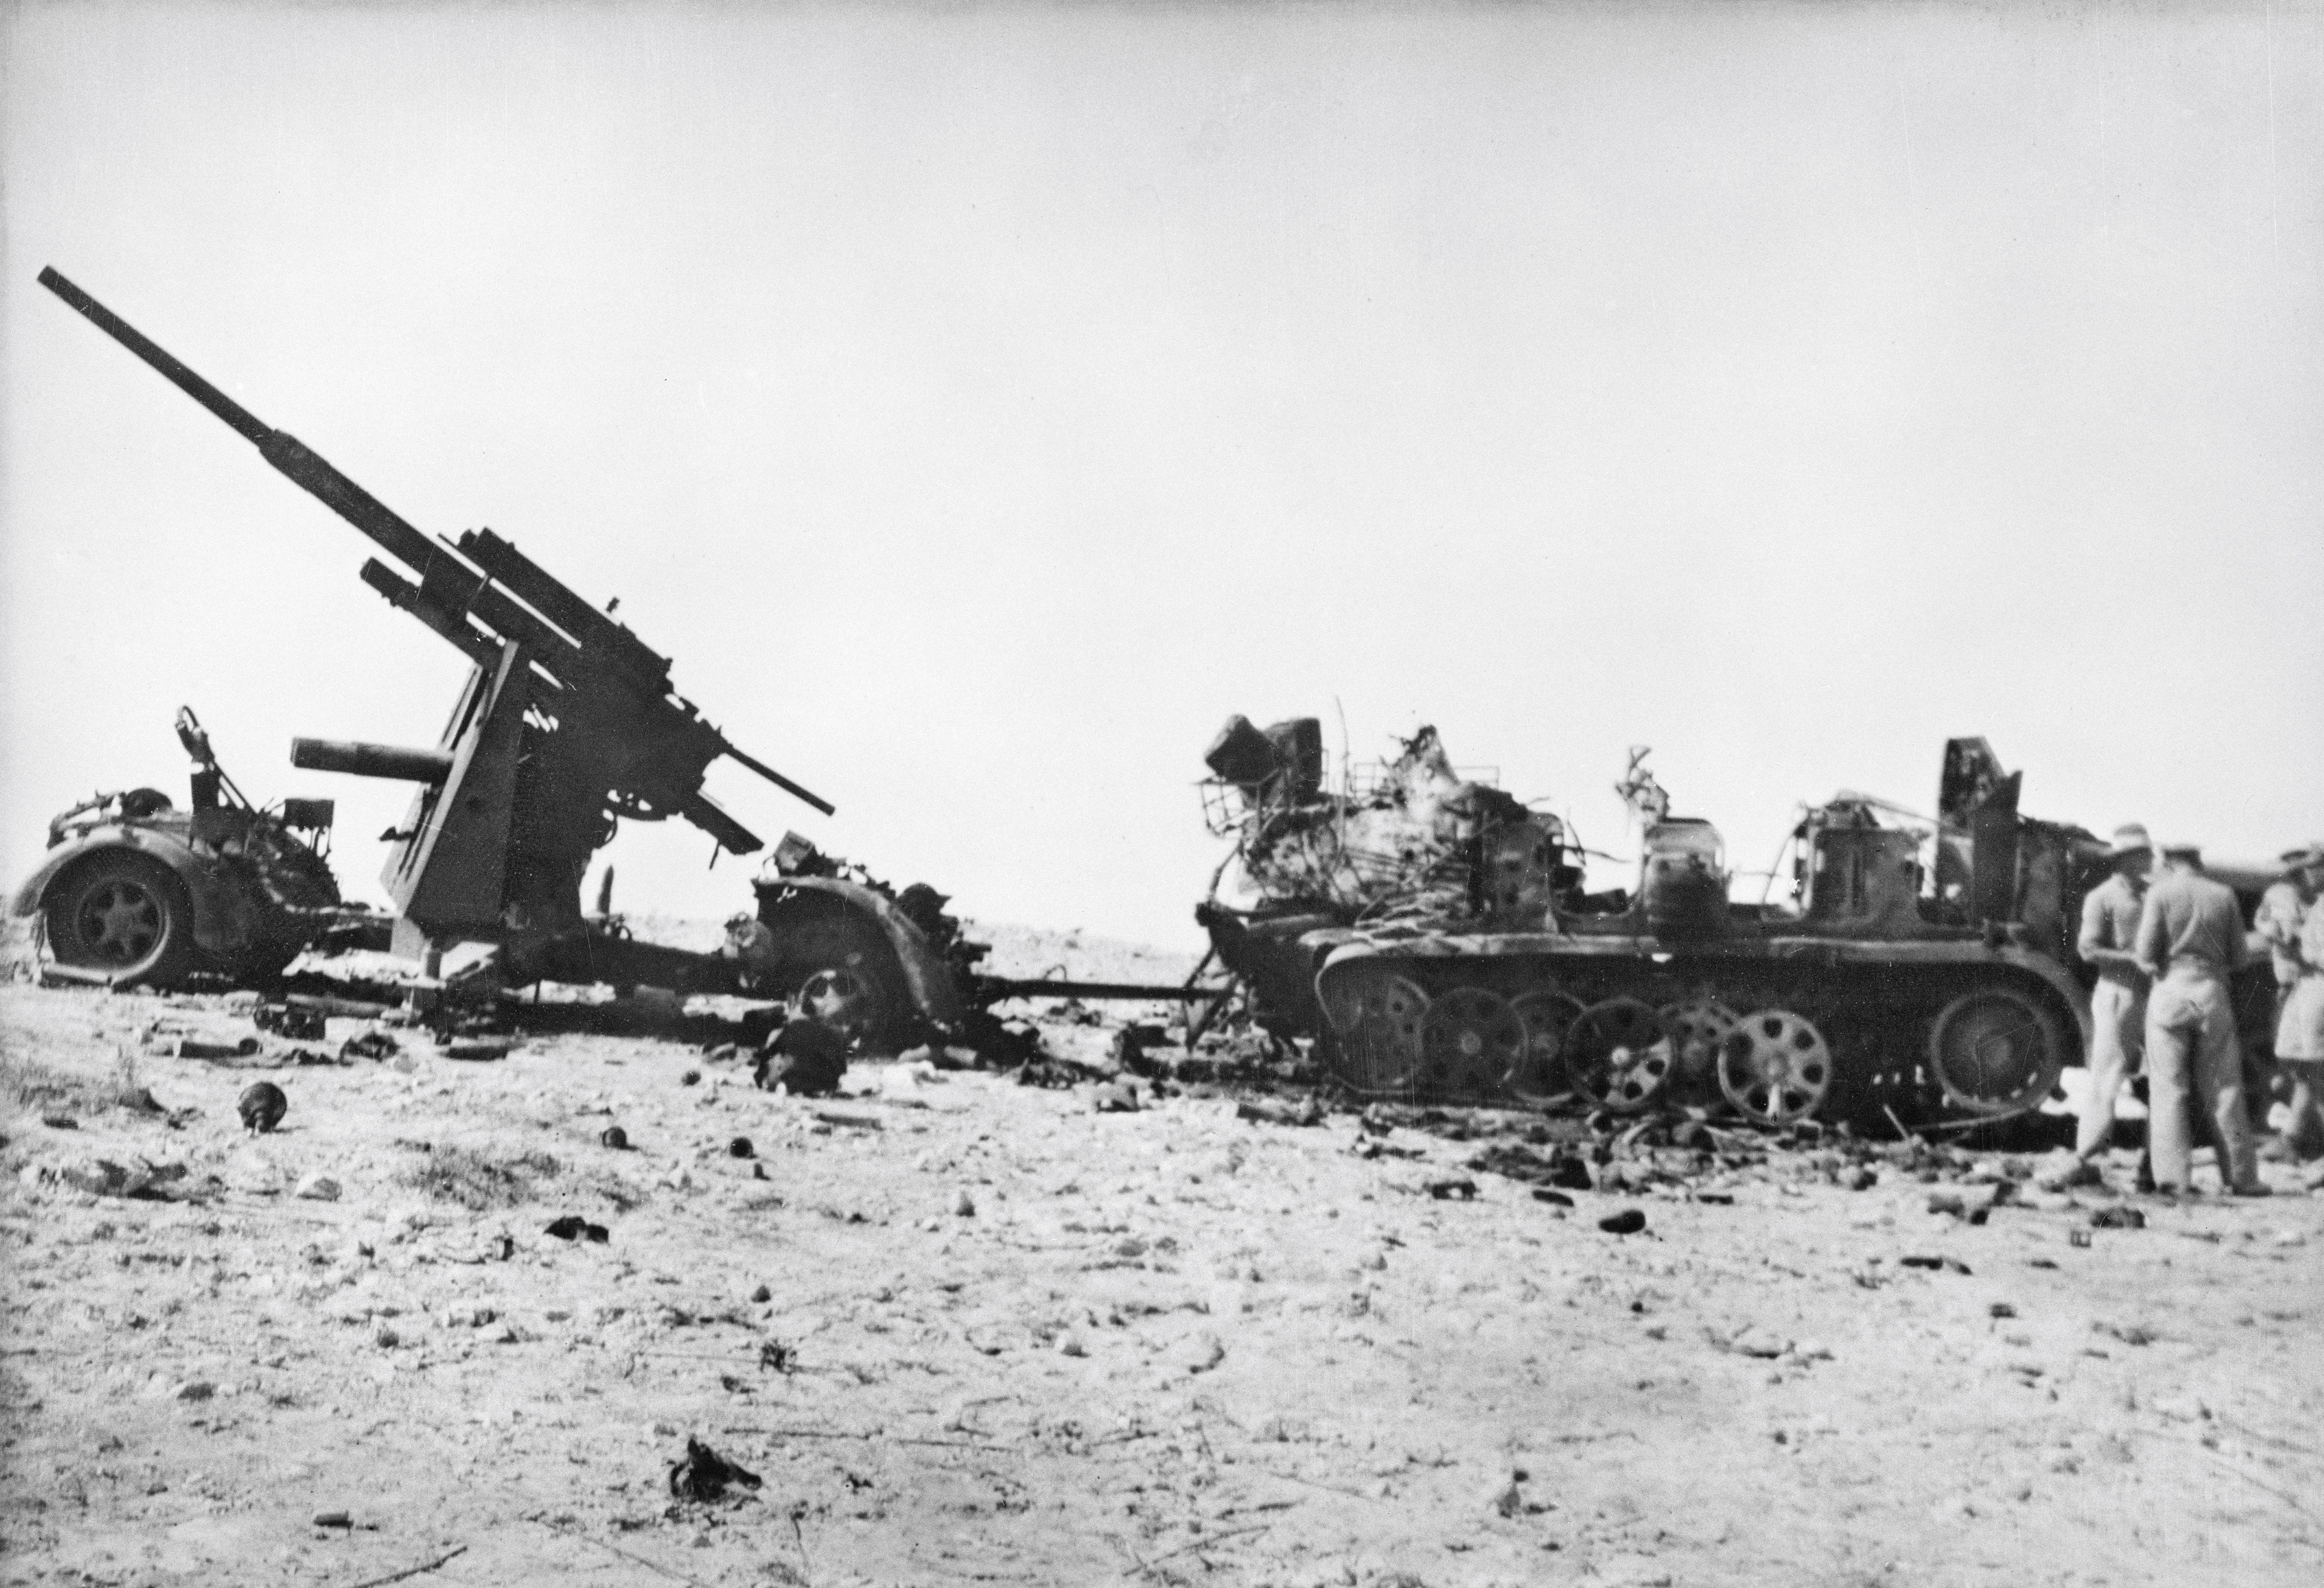
Meanwhile, in North Africa, XIII Corps was embattled as it faced a renewed Axis offensive that forced it to retreat toward Egypt. Eventually, a primarily Australian force found itself holed up in the Libyan port city of Tobruk, along with British and Indian troops, where they bought the main force time to retreat to and regroup in Egypt, where the commanders could prepare a counter-offensive. The German–Italian army, led by then-Lieutenant General Erwin Rommel, needed to capture Tobruk. Rommel’s supply lines were strained and struggled to support the army from Tripoli. He could not simply advance past the port city, as this would leave his rear open to attack and would risk encirclement if Allied forces in Egypt pushed forward again.
The garrison's sole lifeline was naval support provided by the British Mediterranean Fleet, including RAN ships, which supplied the garrison by sea. This “Tobruk Ferry Service” was crucial in allowing the beleaguered troops to withstand the siege, and the RAN's Scrap Iron Flotilla had a primary role in resupplying the Tobruk garrison. The Australian destroyers made a total of 139 runs between Alexandria and Tobruk, but it was no picnic. They faced continued and determined attacks from air and sea, and the RAN suffered its first loss to enemy action during the war when HMAS Waterhen was holed and immobilised by near misses from German dive bombers on 28 June. HMAS Parramatta (II) was also lost several months later when it was struck by a German torpedo in late November, killing 135 officers and ratings.

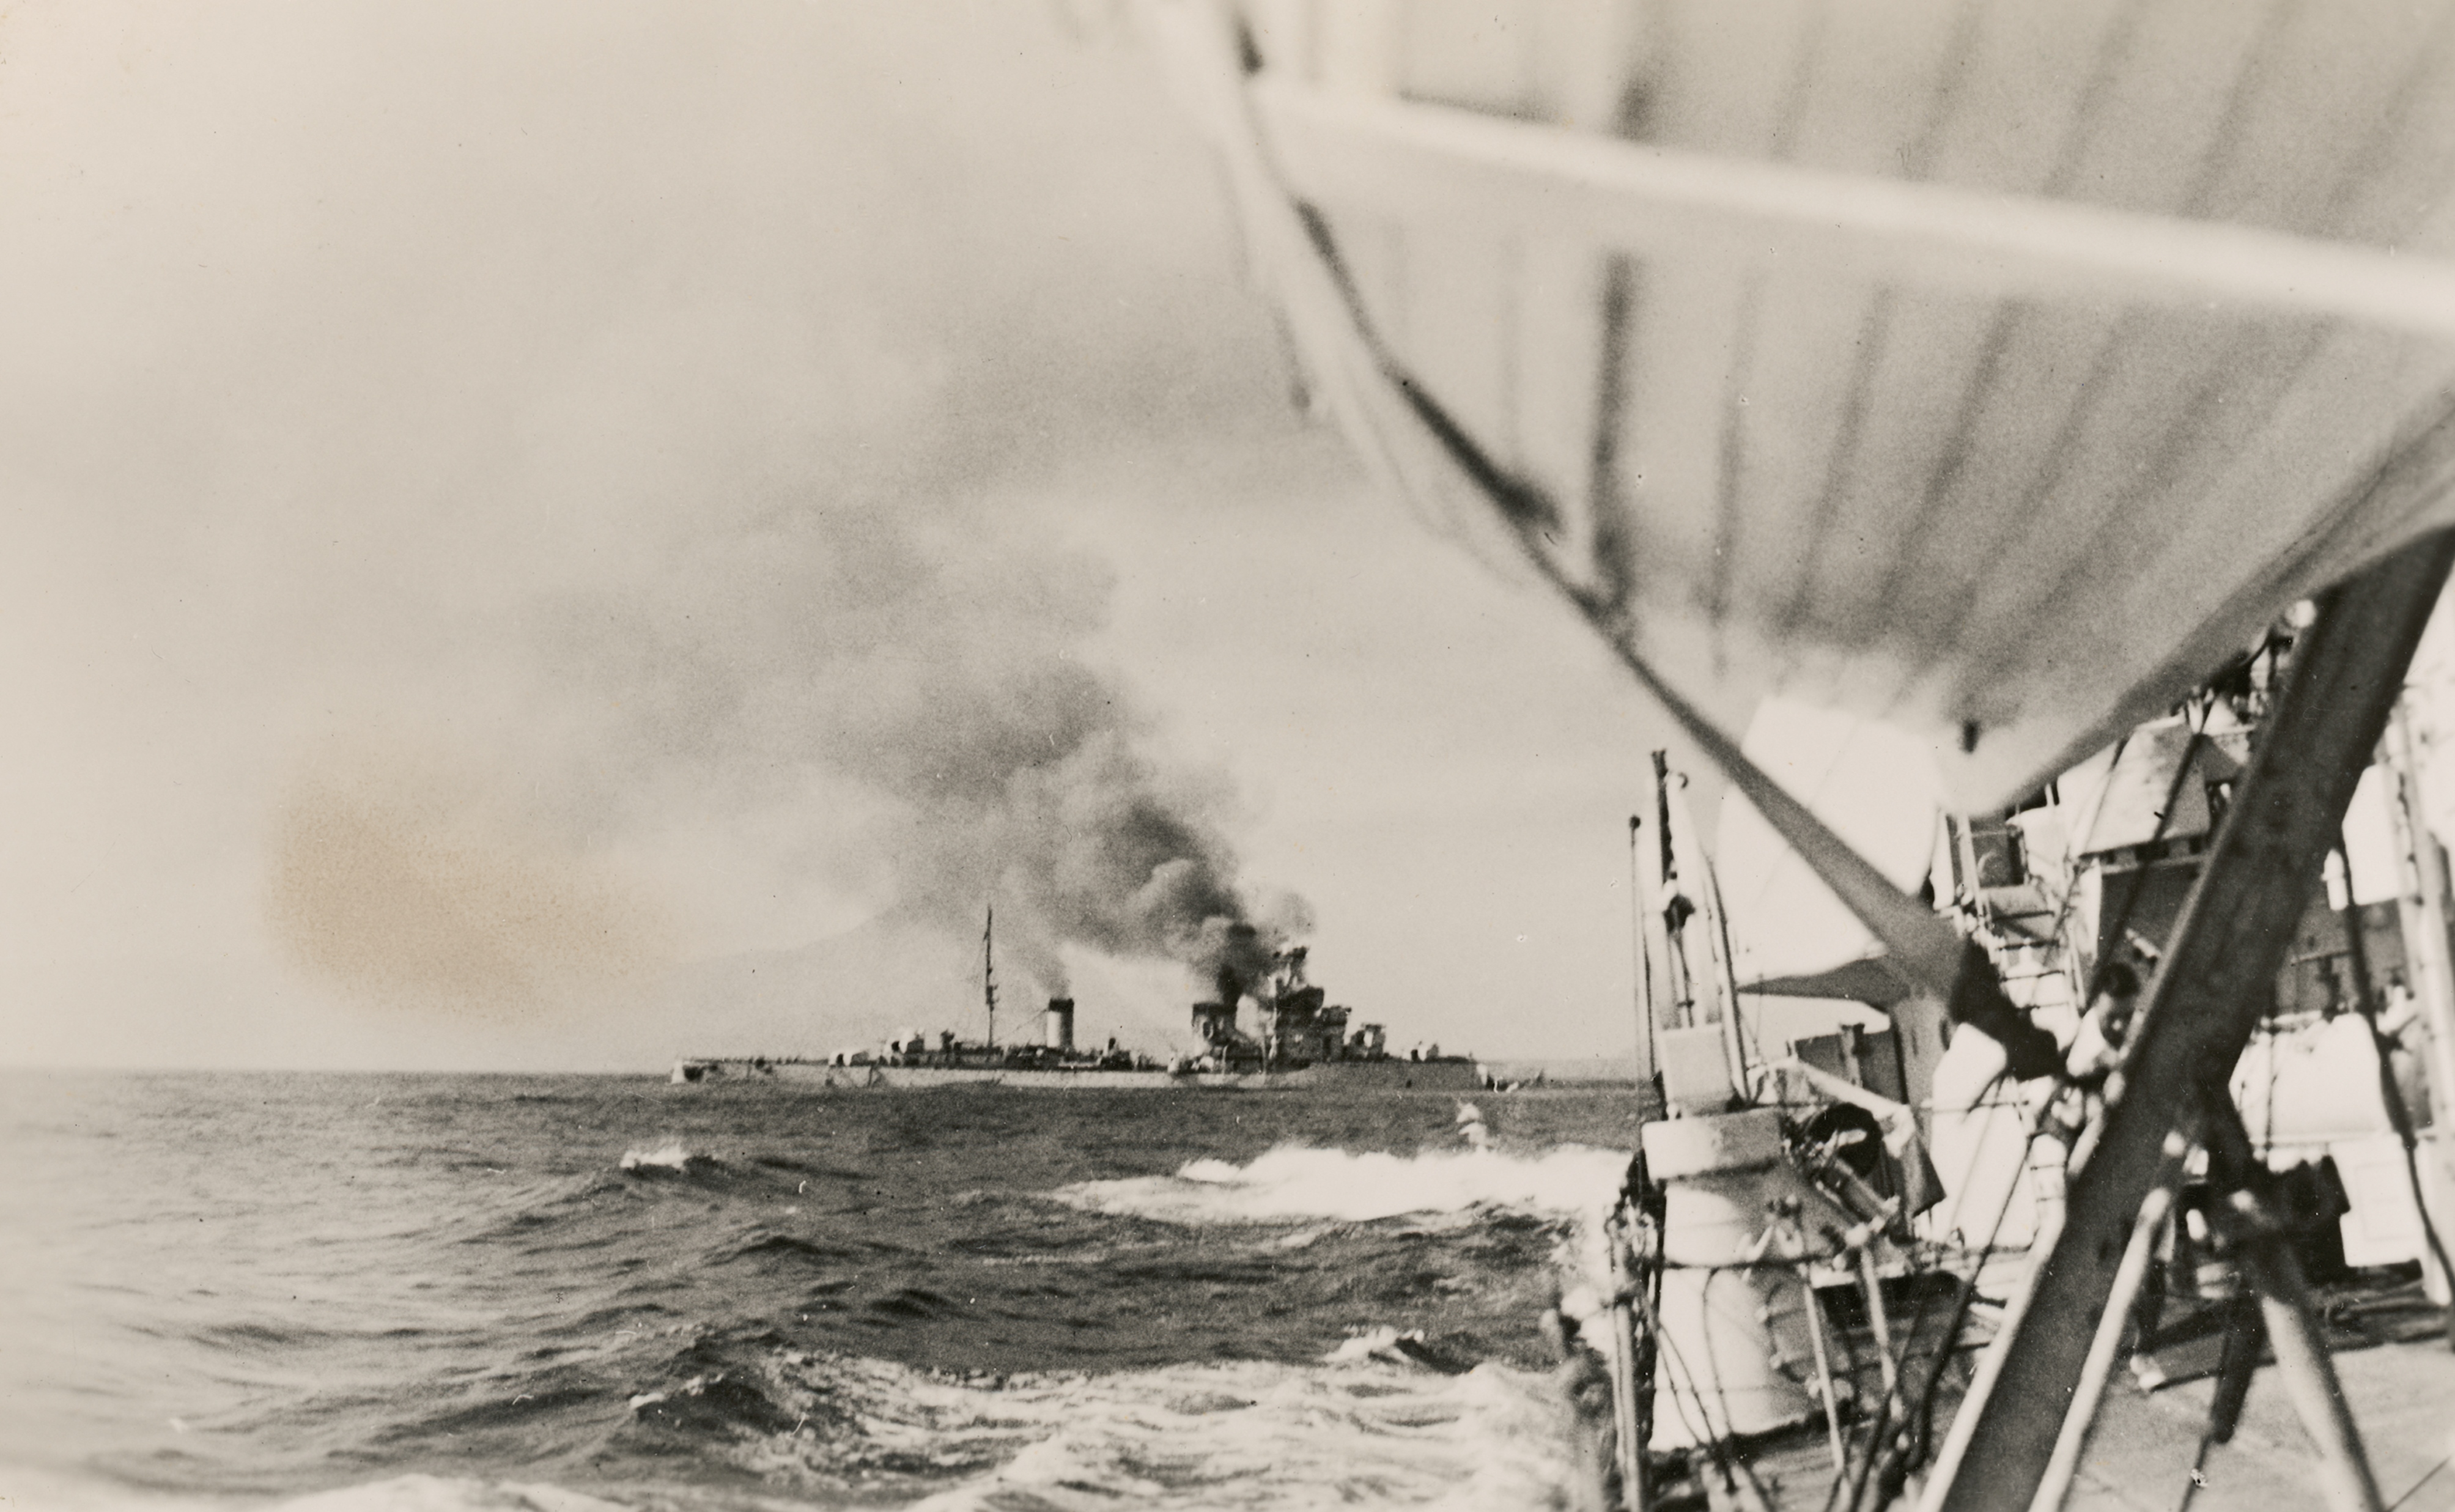
View from HMAS Vendetta of the British destroyer HMS Defender sinking seven miles north of the Egyptian coastal town of Sidi Barrani. HMS Defender had been severely damaged by a bomb dropped by a German aircraft while evacuating troops from Tobruk to Alexandria. The troops, together with the ship's crew, had been safely taken aboard HMAS Vendetta.
Britain and Australia sought to halt the seemingly unstoppable German advance, which they expected to turn to Syria. German aircraft had previously used Syrian airfields to refuel, the logical next step after capturing Crete was to move into Syria and Lebanon, now under Vichy French control. A German foothold in the Near East threatened a pincer attack against Allied troops in Egypt, with German troops advancing from the north while Rommel pushed from the west German aircraft based in Syria would also be able to attack Allied positions throughout the Middle East, including the crucial Iraqi and Iranian oilfields that supplied not only the Mediterranean, but also Australia itself, and later the Pacific theatre. Both Australia and Britain also concluded that Turkey would be compelled to allow Hitler to move troops through its land into the Middle East, if it was faced with German forces on both its western and southern flanks. This could potentially close a significant resupply corridor to the Soviet Union, which Hitler had recently invaded. In mid-1941, the Mediterranean theatre was essentially a house of cards wobbling as it threatened to collapse.
The Allies’ chose to strike first by invading Lebanon and Syria in June 1941. The Allied invasion force comprised a predominantly Australian force that also included British, Free French and Indian troops. The campaign was difficult, but it was successful. By mid-July, the Vichy French commander agreed to a ceasefire. The siege of Tobruk, now a constant concern and thorn in the side of both Australia and Britain, continued as the health of the garrison suffered, and Blamey continually pushed for their relief. Australian troops were eventually relieved over the coming months when shipping and manpower allowed. However, the 2/13th Battalion remained in Tobruk until the siege was broken in December by the Allied counter-attack, Operation Crusader.
The beginning of the end
The question of recalling Australian troops was raised immediately after the Japanese attacked the Philippines and Pearl Harbor, and within weeks, the 6th and 7th Divisions’ return was set in motion. HMAS Hobart, which had relieved Perth in July, was also recalled. Still, 9th Division remained in the thick of it throughout 1942 as control of North Africa see-sawed between Allied and Axis forces. Operation Crusader met with limited success. A subsequent German counter-attack eventually led to a stalemate until a renewed Axis offensive in late May saw Tobruk fall on 21 June, much to its Australian former defenders’ chagrin. By the end of the month, Eighth Army had fallen back to El Alamein in Egypt, the final stop before Alexandria. Between July and November, three battles were waged. The first spanned all of July and was bookended by both great success and tragic loss for Australia. 26th Brigade pulled off an intelligence coup in their first action after arriving at the front when they happened upon and captured Signals Intercept Company 621. But the month ended with devastation as 2/28th Battalion was virtually annihilated in a failed assault on Ruin Ridge; 65 men were killed and 500 captured.
Australian and British troops in the Alamein area
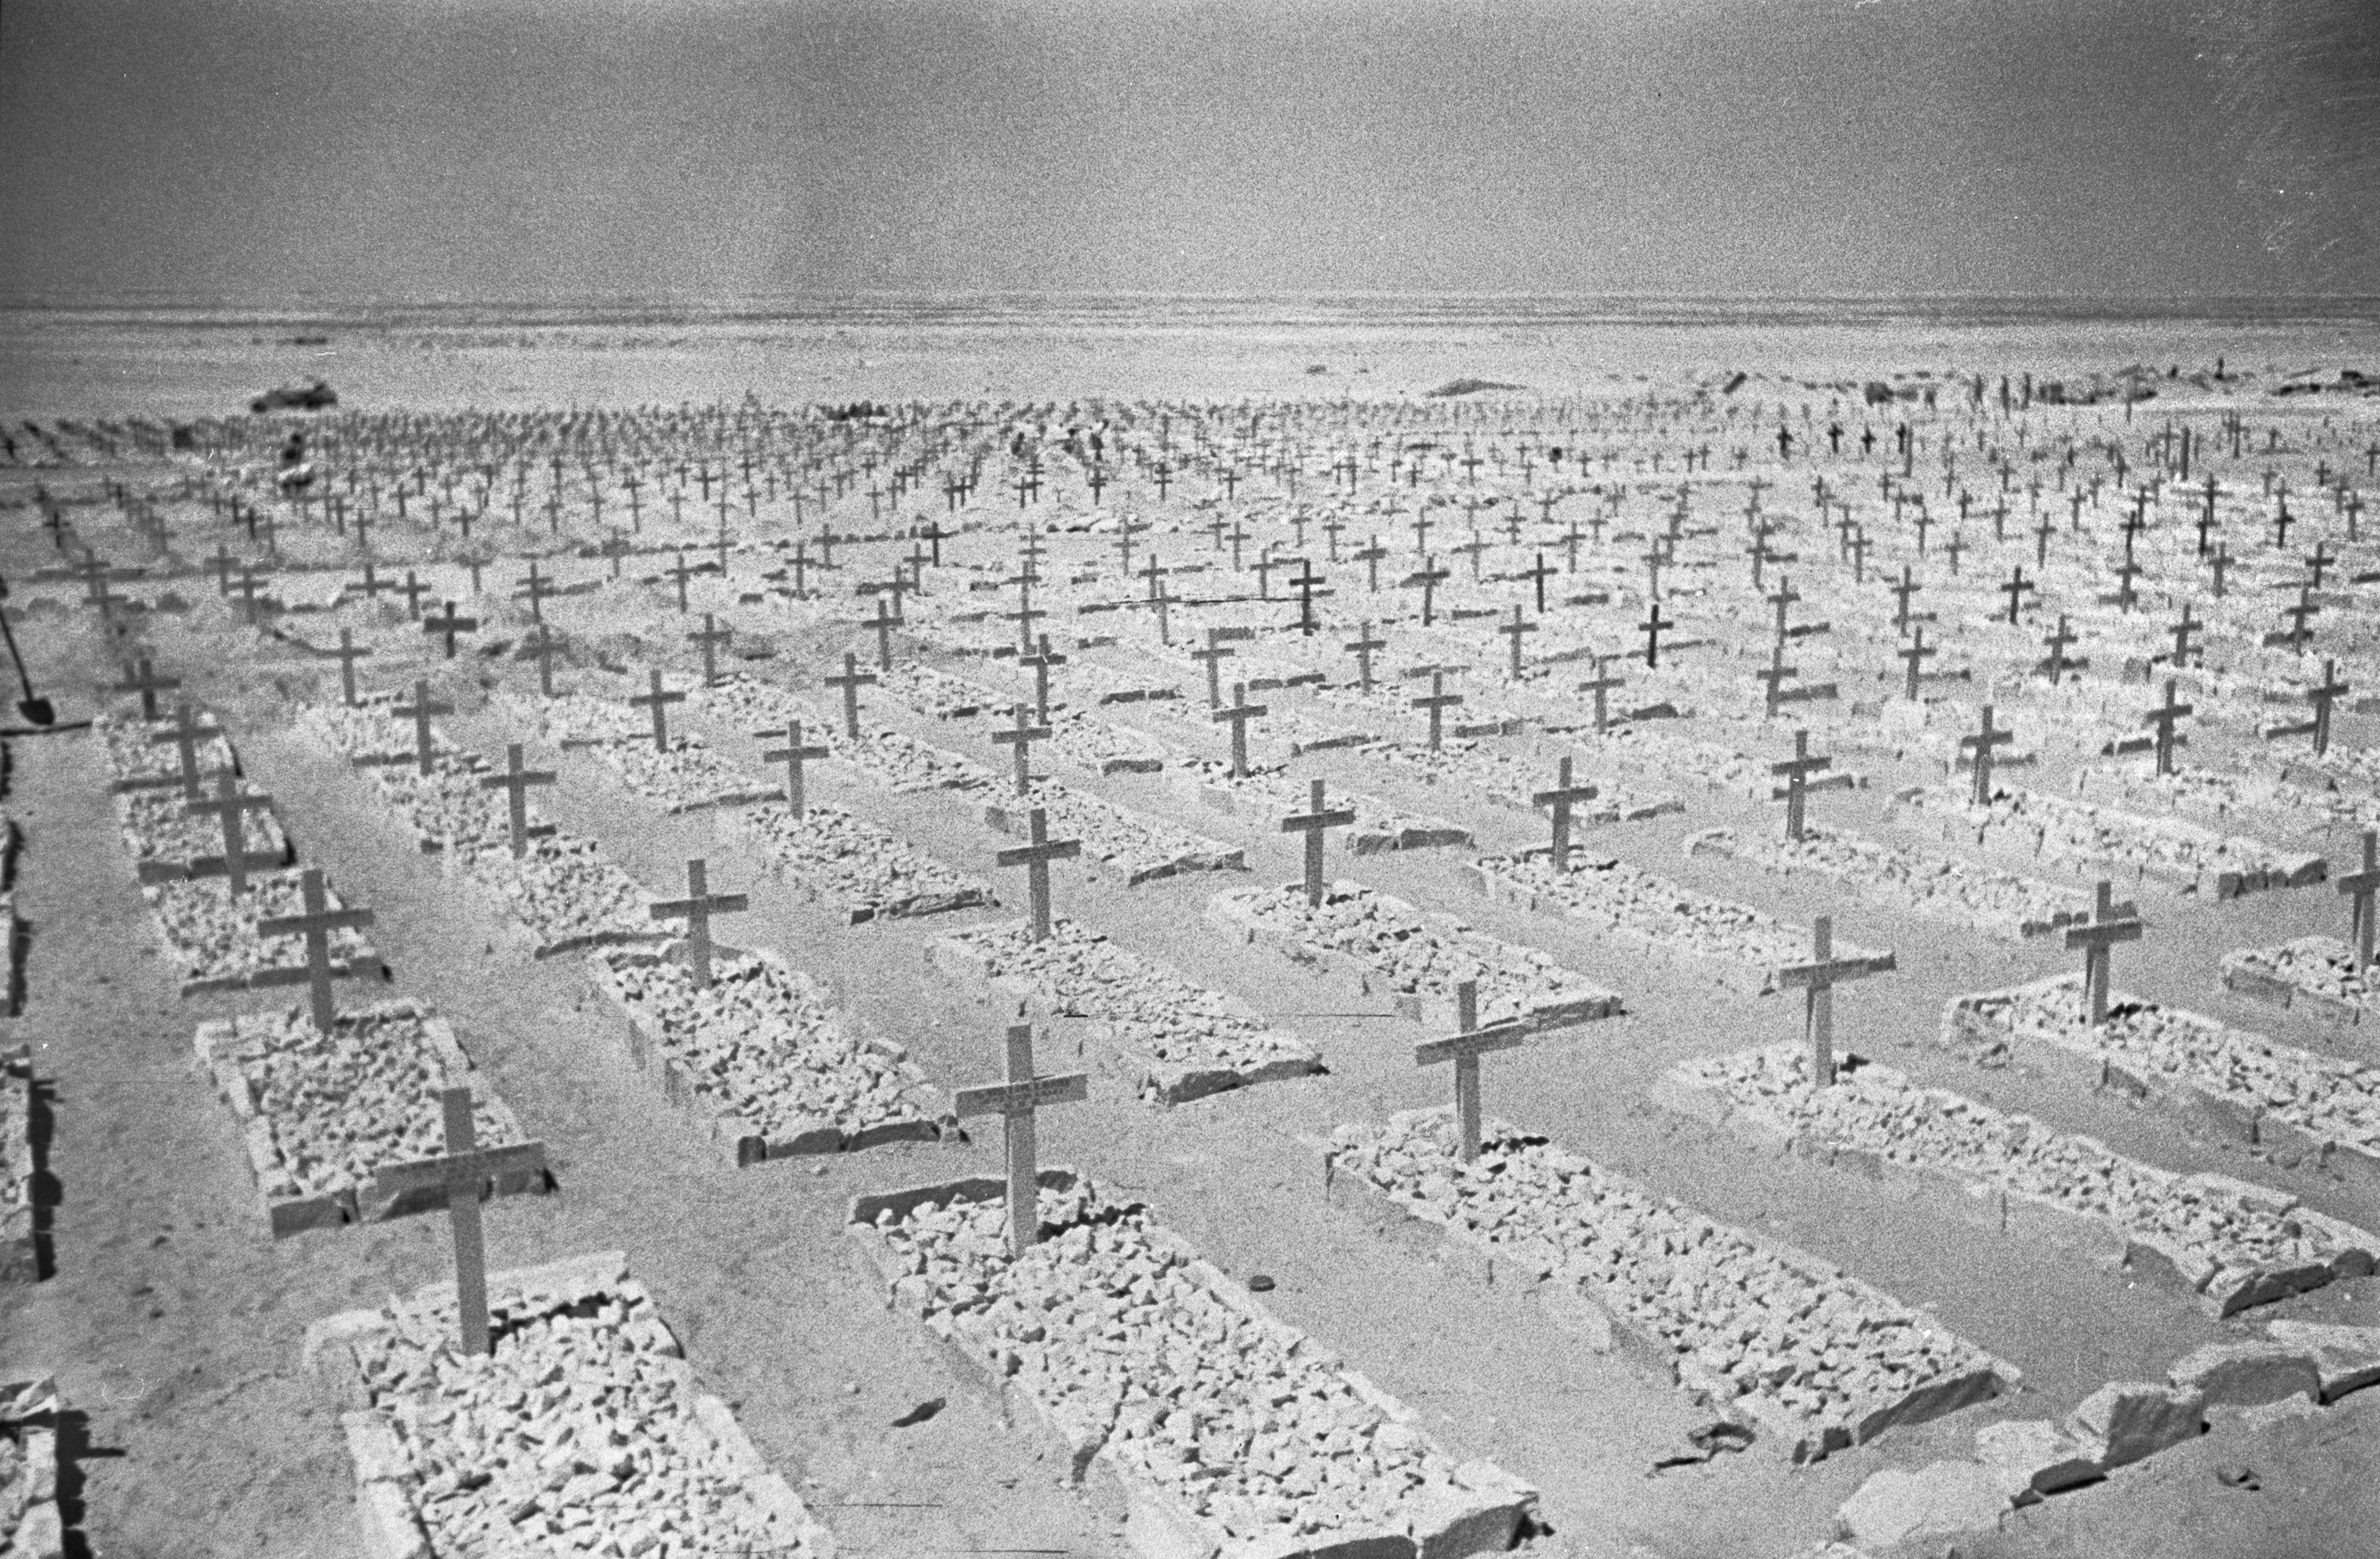
The battle at Ruin Ridge marked the start of a stalemate as both sides re-equipped and resupplied, preparing for the inevitable next battle. Command of Eighth Army transferred to Lieutenant General Montgomery; following a second battle at Alam Halfa, he went on the offensive with the Second Battle of El Alamein on 23 October. For ten days, the opposing armies fought ferociously. 9th Division took the brunt of the fighting, weathering the intense action in the northern sector and inflicting heavy casualties. The division's efforts paved the way for the execution of the second phase of the battle, which aimed to exploit the breaking of the Axis line. On 2 November, a reserve force broke out in the southern sector, moved forward, and struck a decisive blow against German positions. Within two days, they breached the Axis lines, forcing Rommel to order a retreat. Eighth Army finally achieved its elusive decisive victory, but not without cost. Australian casualties – 3,000 men – equated to more than 20 per cent of those suffered by Montgomery’s force; approximately 6,000 Australians were killed in the fighting at El Alamein between July and November.

El Alamein, Western Desert, Egypt. c. 1943. View of the AIF section of the cemetery at El Alamein.
El Alamein was the last Mediterranean battle in which Australian soldiers were involved. Japan was then holding a perimeter north of Australia, and after repeated appeals from military and government officials, Menzies' successor as prime minister, John Curtin, called for 9th Division's return. Still entangled in battle, the division could not be released immediately, and Churchill would not easily let the division go. However, even if the Curtin government had wanted to leave the division in place, sustaining it beyond 1942 was impossible; Australia could not further reinforce the division, and both Blamey and Curtin acknowledged that the return of its sister divisions had already affected morale. By December, the decision was final: the last of 9th Division had departed the Middle East by January 1943.
Although it had not been their intended destination, the Mediterranean was the epicentre of Australia’s war effort for the first half of the war. The Mediterranean theatre was Australia’s baptism by fire, and Australian troops contributed significantly to the campaigns there, helping to pave the path to victory in that theatre. Australian soldiers, sailors and airmen returned home with the knowledge that they had established a reputation as highly capable servicemen who had earned the high opinion of their commanding officers; they were, in Montgomery's words, “beyond all praise”.