In their first major offensive after the Gallipoli landings, the Anzacs were sent into a hopeless battle at Krithia - and paid a terrible price.
The first week of the Gallipoli campaign was a disaster. Allied plans for a swift advance to the Dardanelles forts had evaporated like the morning mist, and their Turkish enemy, who they had expected to scarper at the first sight of a British bayonet, was fighting doggedly for control of the peninsula. The complicated series of landings that was intended to deposit three divisions of Allied infantry in prime positions to overwhelm the Turkish defences had been stymied within sight of the landing beaches, and the Australians, New Zealanders, British and Frenchmen who had survived the opening day were struggling to hold on to the slimmest of beachheads.
For the Anzacs, who had expected to sweep across the peninsula and seize the heights overlooking the Dardanelles within the first few hours, this was a rude awakening to the grim realities of warfare. Although they had come ashore on April 25 in overwhelming numbers – the 3000 Australians in the first wave had faced a Turkish garrison of only 160 men – by the first week of May their entire front line was only two kilometres long, and they had advanced only one kilometre inland. They were exhausted, hungry and disillusioned. Their battalions had been shattered by casualties – more than a quarter of the men who had landed at Gallipoli were now lying in hospital beds or freshly-dug graves.
Chaos at Cape Helles
If the situation was bad at Anzac, at Cape Helles, where the British and French had come ashore, it was farcical.
The troops had been cut down by Turkish rifles on five landing beaches, and advances that had been intended to be measured in miles were instead being counted in yards. After a week of fighting, Achi Baba hill, the objective for the first day, was still three kilometres away. In its shadow, blocking any attempt of the British and French to move forward, stood the village of Krithia.
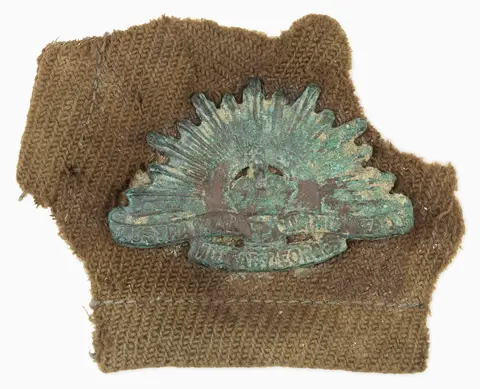
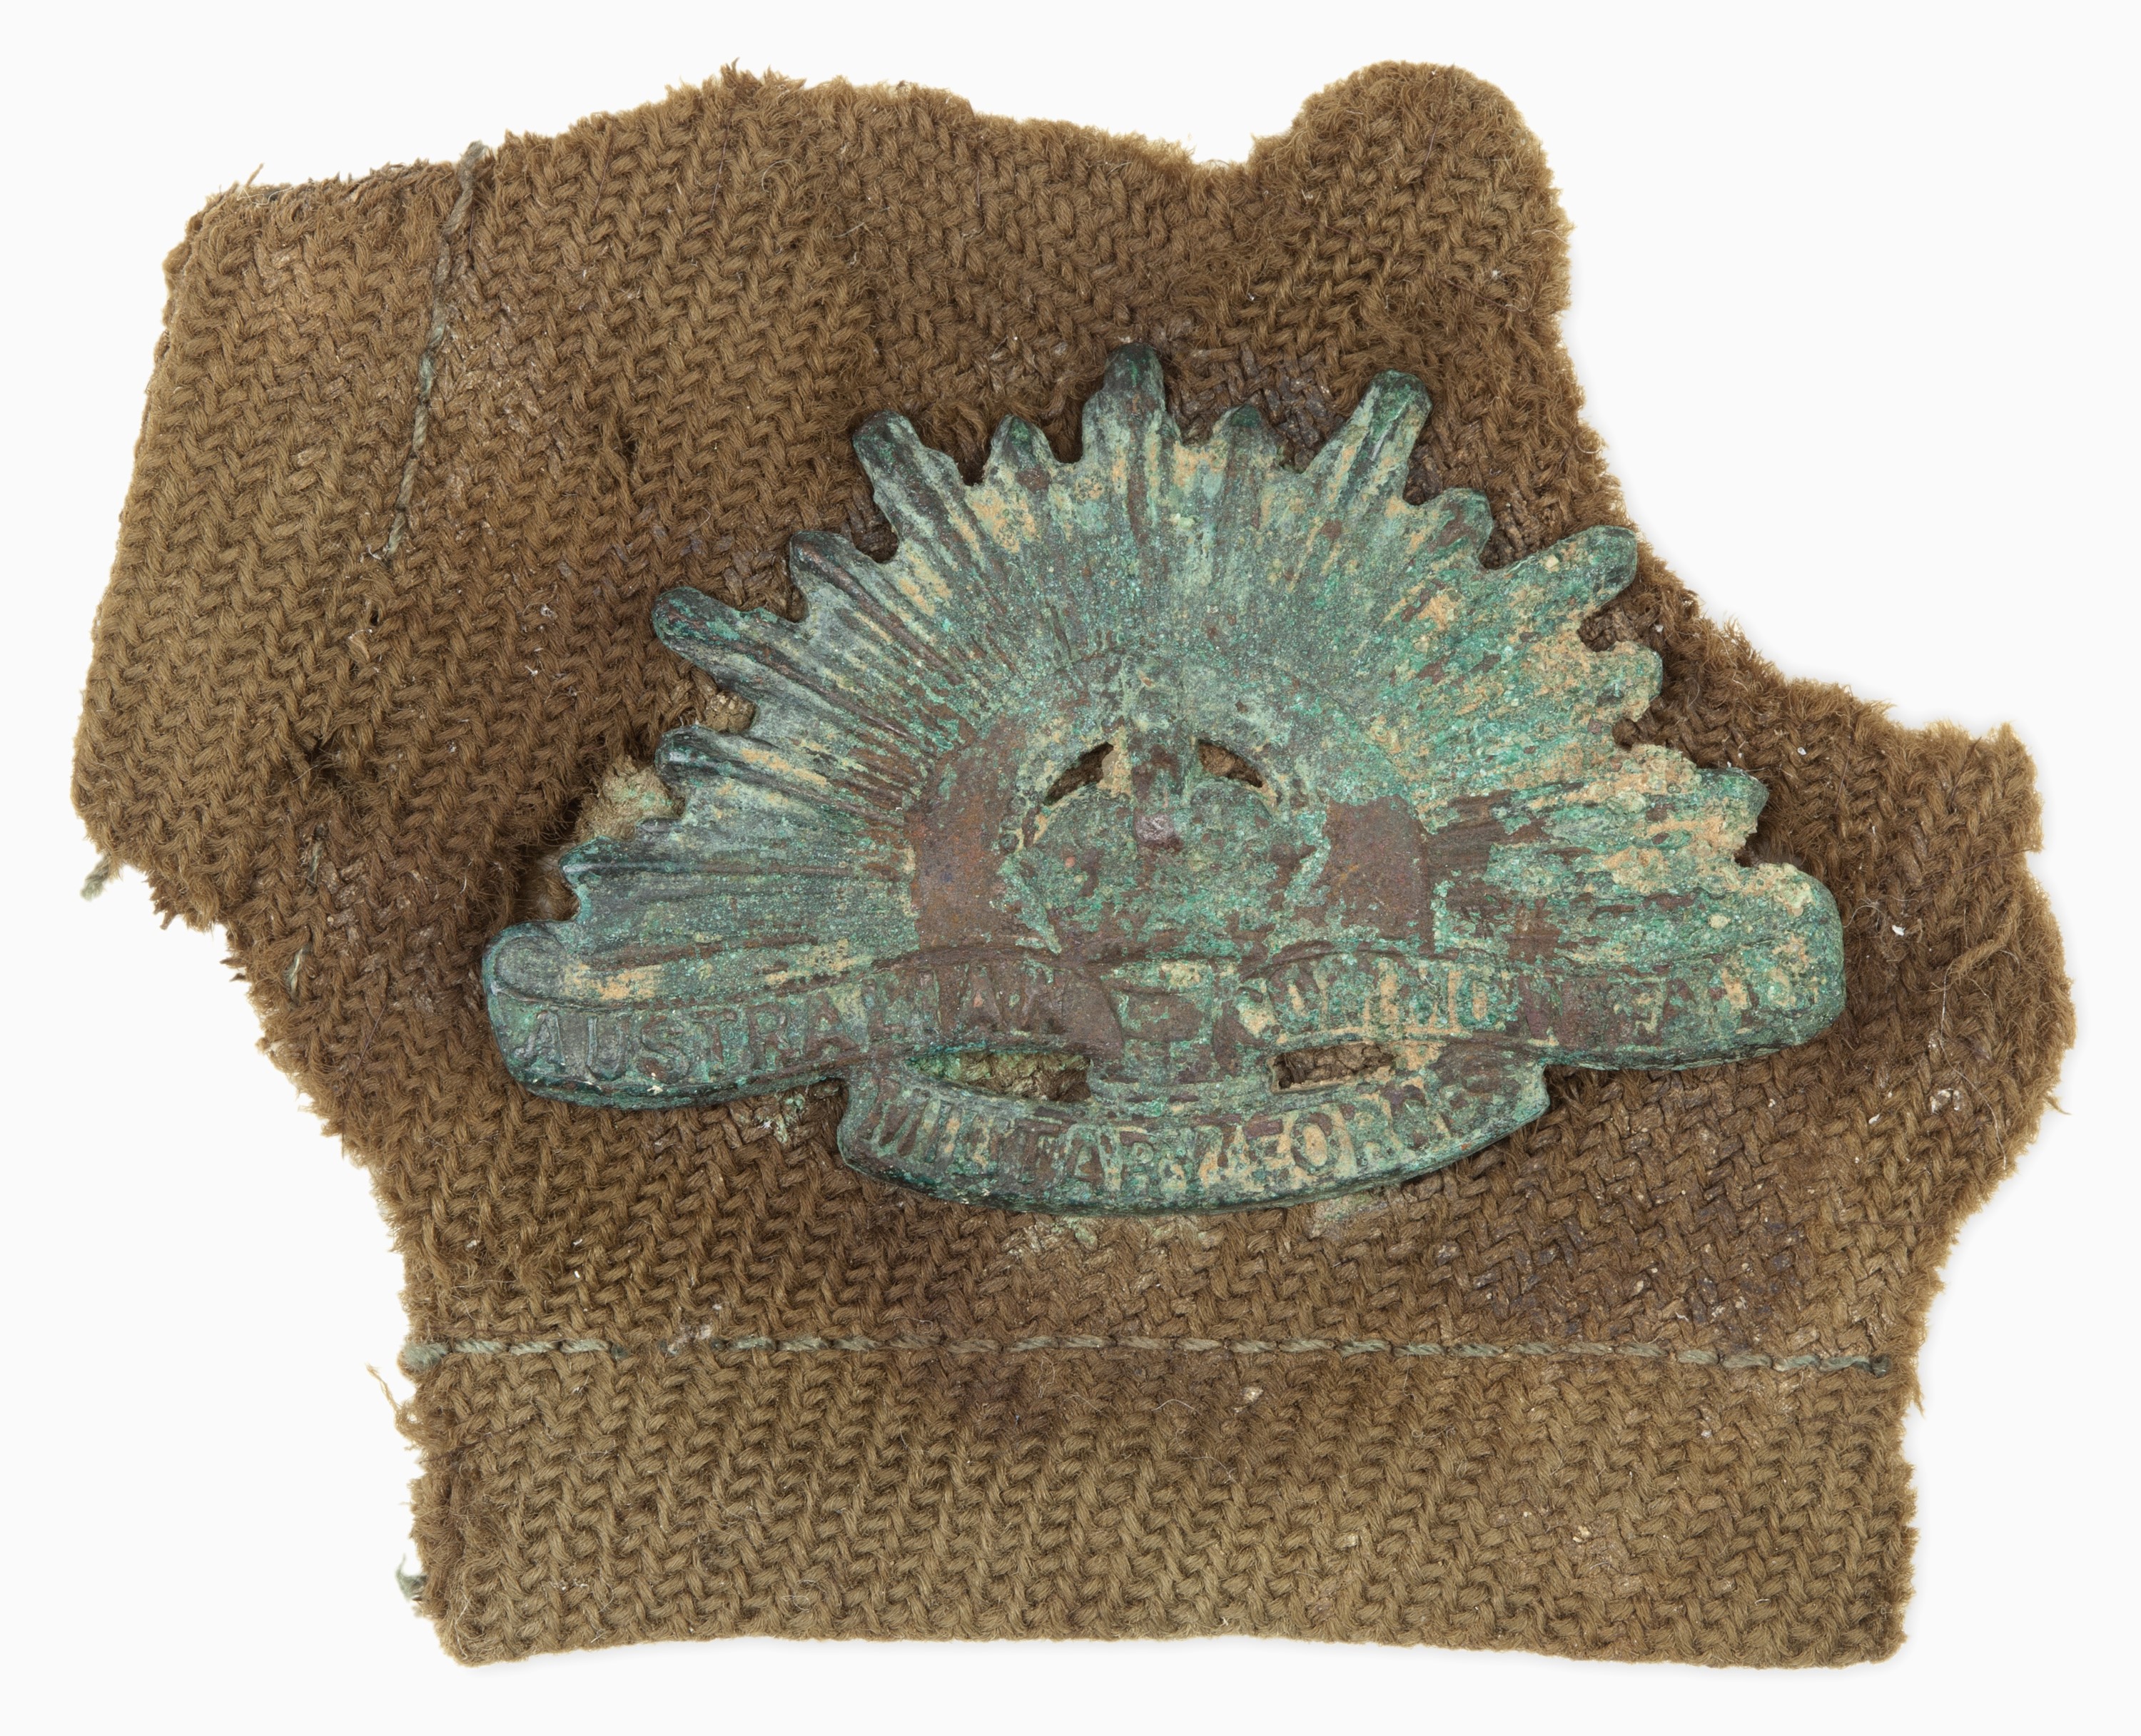
Remains of a Rising Sun badge from the left collar of an Australian tunic, recovered from the Krithia battlefield by Charles Bean in 1919.
On April 28, only three days after they had come ashore, the British and French launched an attack that would come to be known as the First Battle of Krithia. The British and French attacked in broad daylight, against an enemy they couldn’t see, across ground they didn’t know and were met with the sort of concentrated artillery and machine gun fire that their comrades on the Western Front had learnt to dread. The Allied troops were cut down without ever spotting a Turk, and managed to advance only a few hundred metres.
By May 3, a whiff of panic seemed to be pervading the headquarters of Lieutenant General Sir Ian Hamilton, Allied commander at Gallipoli. He was desperate to reinforce his depleted ranks in the vain hope of resuming the advance on Krithia and Achi Baba. With little other option, he turned to the Anzacs. In spite of the Australians and New Zealanders clinging by their fingernails to the ridges above Anzac Cove, their commanders were ordered to release two of their five brigades – 40 per cent of the Anzac force – and redeploy them to Helles to support the next stage of the British advance.
In spite of the immense risks, the two Anzac brigades that had been selected for the Helles operation – the New Zealand Brigade and the Australian Second Brigade – were able to disentangle themselves from the front line trenches and slink away from the Turks without being noticed. But a mix-up with shipping meant that the 5000 troops were forced to spend a cold night on the beach at Anzac Cove, before finally sailing for Helles.
Second Battle of Krithia begins
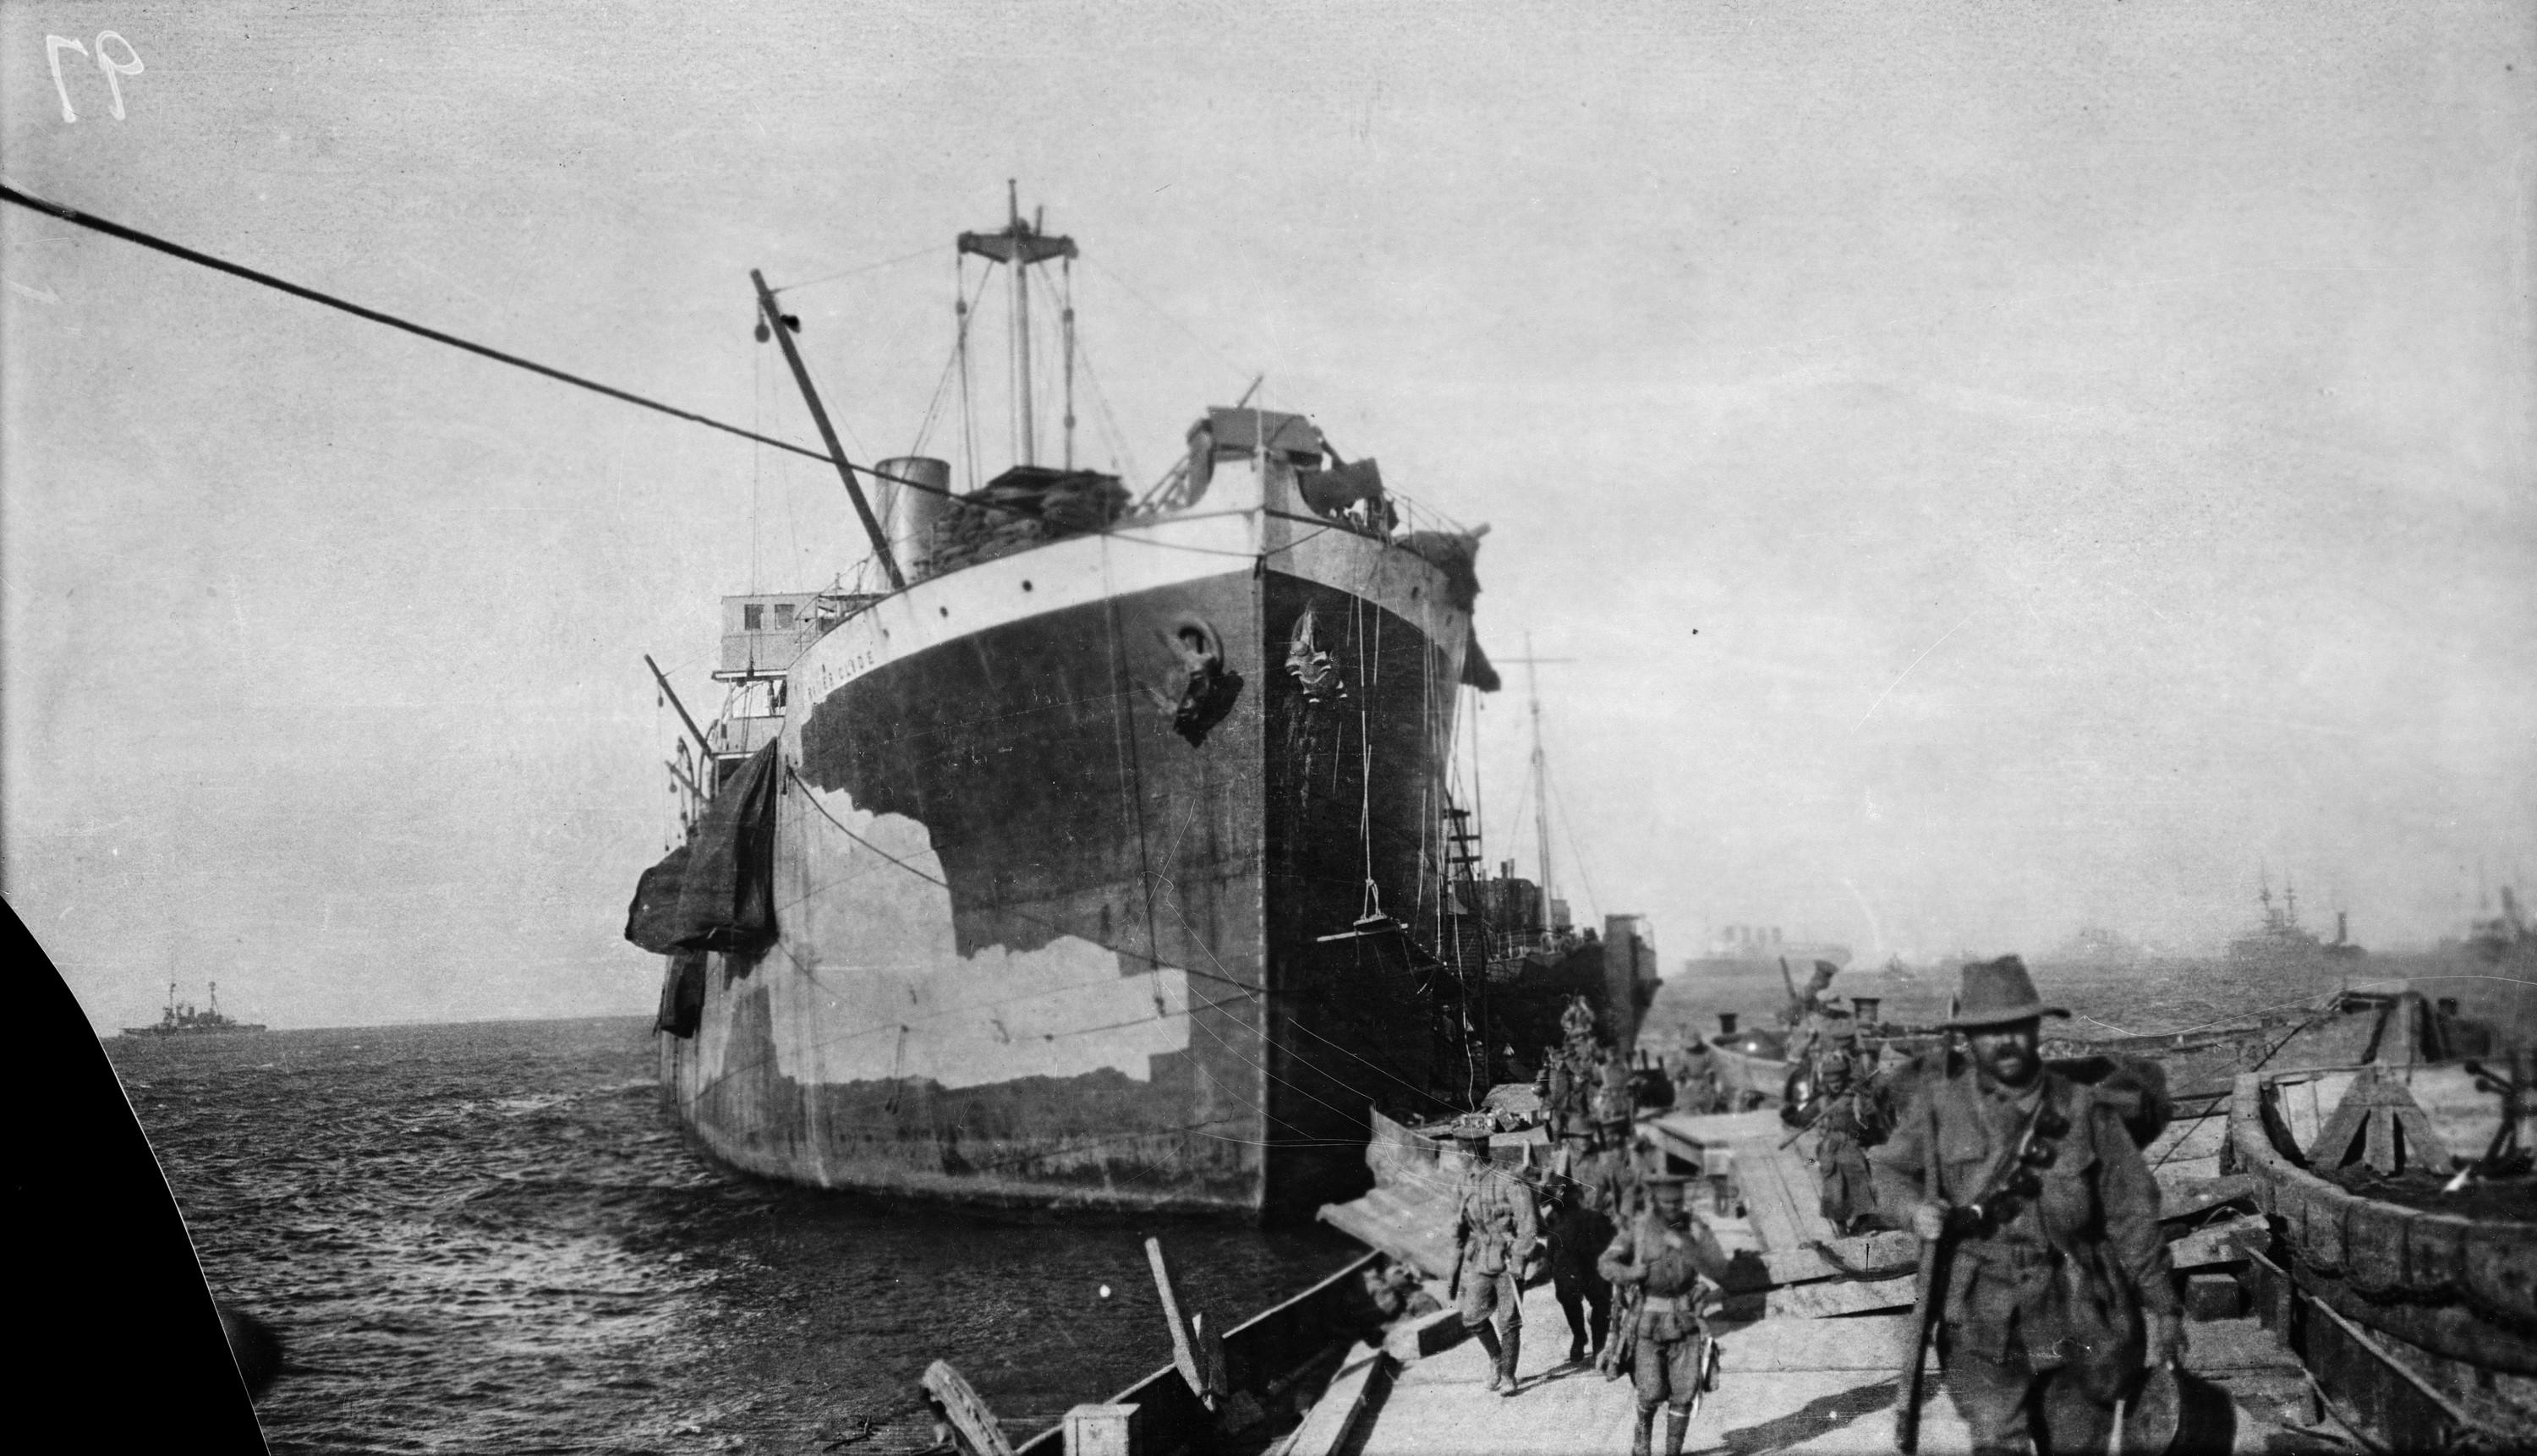
The Anzacs landed at Cape Helles early in the morning of May 6. They came ashore on an improvised pier at V Beach, beside the bullet-scarred hulk of the River Clyde, an old collier that had been deliberately grounded during the landing. They stepped ashore onto the sand that had been a scene of slaughter when the British had come ashore only 10 days before.
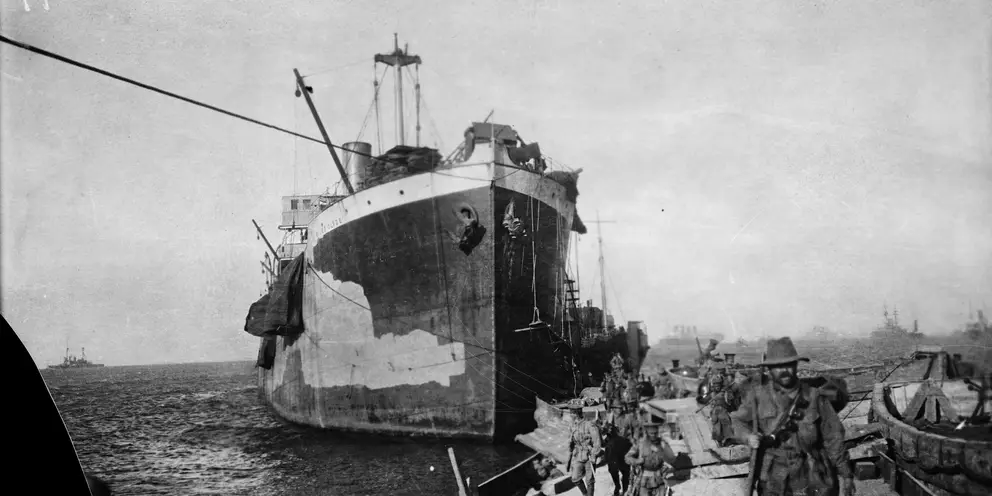
Men of the 2nd Australian Infantry Brigade disembark from their vessel beside the S.S. River Clyde on 6 May 1915.
The Anzacs marched inland on a dusty track, past fields of wildflowers and elms that swayed in the crisp spring air. They were ordered to dig in not far behind the front line, and were startled to see French field guns firing close by. The Anzac rumour mill had suggested the British and French were battling for control of Achi Baba, and the realisation that this battlefield was as bogged down as Anzac was shocking. ‘Seems to me they’ve got very little further than we have,’ someone muttered. ‘Just a foothold – no more.’
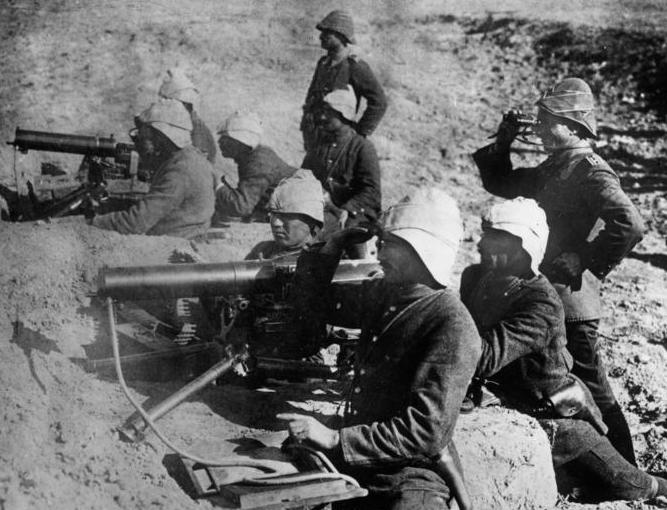
As the Anzacs finished digging in they heard the roar of Allied artillery that heralded the resumption of the British and France advance, an action that would come to be known as the Second Battle of Krithia. The barrage may have been loud, but it was also disturbingly ineffective. The British had barely had time to land a small portion of their artillery guns, and they were woefully short of shells to fire from them. Worse still, they had no idea what they were supposed to be shooting at. Having massacred the Allies on the landing beaches, the Turks had skilfully pulled back and were now staging a heroic defence from natural features such as gullies, copses and ditches. They had nothing resembling a constructed front line of trenches and dugouts, which made their improvised line almost possible to spot. And although the Turks had had no machine guns on the day of the landing, they certainly did now. With each hour that had passed, hundreds of Turkish reinforcements had streamed into the line.
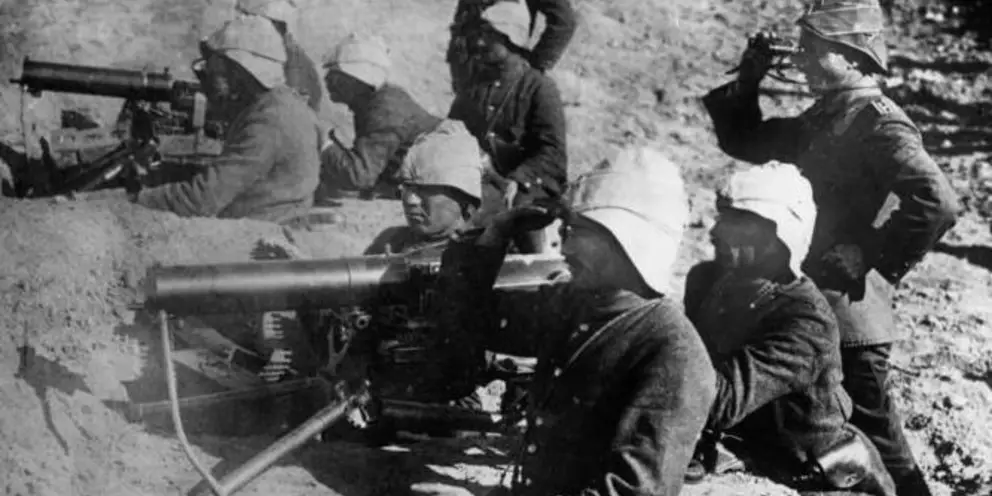
Turkish machine-gunners proved a deadly foe for the allied soldiers attacking Krithia. Bundesarchiv, Bild 183-S29571 / CC-BY-SA 3.0
Bloodshed at Kereves Dere
On the right of the Allied line, the French would advance into the Kereves Dere, a steep-sided canyon that was the most imposing feature on the battlefield, and one which the Turks had wasted no time in entrenching. As the French began to move forward, they met little opposition on the near side of Kereves Dere. But as they tried to fight to the far side, they came under a storm of machine gun and artillery fire, and their ranks were shattered.
Lieutenant Henri Feuille from the 30th Artillery Regiment was serving as a forward observer and had a disturbingly clear view of the French advance.
They advanced as on exercise, no gaps in the ranks, punctuated by flashes of bayonets and the blue glint of the rifles reflecting the rays of the mid-day sun. You would think they were on a training ground. But what is there to say? This wall of steel stops, hurls itself at an obstacle that it can’t breach, hesitates, immobile for an instant. Then, all the geometric lines fall apart. Groups running right, left, thrown into confusion. All the while Turkish machine guns, rattling away, tearing at the air, ceaselessly firing into a wall of palpitating flesh.
The French captured a few short sections of Turkish trench and then dug in. Their attack was effectively over.
On the left of the line, the British were tasked advancing along two of the four long spurs that ran the length of the battlefield. Each was separated by a deep gully, perfect avenues for Turkish reinforcements to quickly redeploy where needed. The British troops were unsure how far ahead the Turkish defenders were, so advanced tentatively. But before long they came under a murderous fire, as the interlocked network of Turkish machine guns raked the battlefield. Men fell in their dozens, and then in their hundreds.
Able Seaman Joe Murray from the Royal Naval Division was in the thick of this action.
The Turkish fire was murderous and we lost a lot of men. There were no trenches to be seen but the Turks must have had their machine-guns perfectly sighted. It was terrifying; fewer men rose after each rush but we still charged forward blindly, repeatedly changing direction, but it did not appear to make the slightest difference. The fire was coming from all directions yet we could not see a single Turk or any sign of a trench.
After advancing less than 250 metres, the British realised the attack was hopeless and began to dig in.
Hamilton's final push
Hamilton was nothing if not a wishful thinker, and he ordered the advance to resume the following morning. The Anzacs had watched the carnage from a hill near their lines, and were disturbed when the New Zealand Brigade was ordered to detach from the Australians and march towards the front line in the early hours of May 7. After hours of marching, the New Zealanders dug in in the British support trenches, as scenes of carnage played out a short distance in front of them.
Men fell in their dozens, and then in their hundreds.
The British troops tasked with attacking on May 7 had to cross the same fire-swept ground their comrades had crossed with huge losses the previous day, and they were cut down before even reaching the new front line. They managed to push on another couple of hundred metres, but still had not encountered the main Turkish defences, let alone capture them. The sun set on May 7 with the British line less than half a kilometre further forward than where it had begun, and a battlefield littered with corpses. But Hamilton was still not done. He was determined for one last push at the Turks, and this time the Anzacs were going to join the fight.
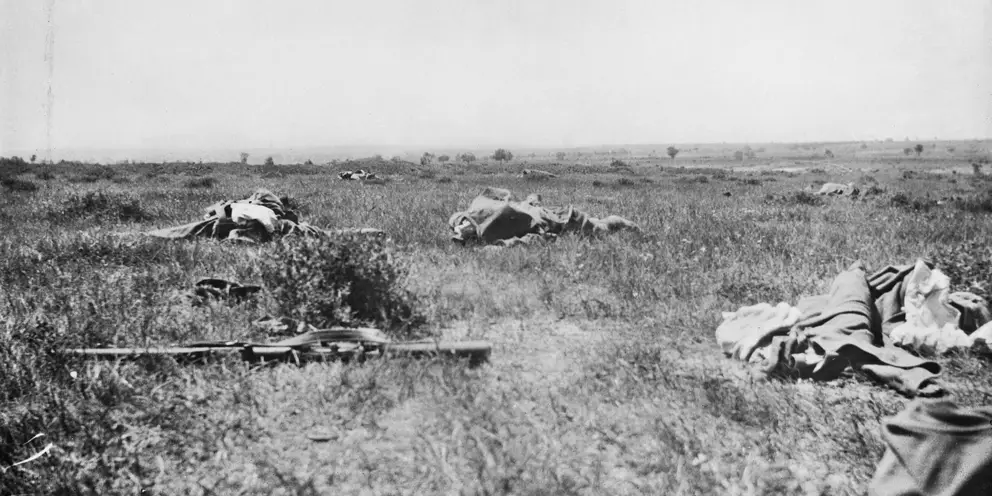
Several bodies lie in the open after the unsuccessful attack towards Krithia by the Australian 2nd Infantry Brigade. 8 May 1915.
By the third day of the battle Hamilton had nearly run out of troops, and the Anzacs were really the only men he had left. It should have been clear that this small contingent had no chance of capturing Krithia and Achi Baba, but Hamilton was determined to give it one last go. He ordered the New Zealanders to advance. The British Official History bleakly sums up the task: ‘Four weak battalions of New Zealanders were to attack, in broad daylight, a position held by at least nine battalions of Turks.’
Kiwi advance
At first the New Zealand advance started well. The Turks appeared to have not expected another attack, and were slow to respond. But as the Kiwis drew near to the advanced Turkish outposts, the defenders opened up with every gun they had. Fire from a small copse of fir trees and a field of daisies was particularly heavy, and the New Zealanders began to fall.
Private Cecil Malthus of the Canterbury Battalion was lucky to survive the charge.
Now the storm was let loose, and increased every moment in fury, until a splashing, spurting shower of lead was falling like rain on a pond. Hugging the ground in frantic terror we began to dig blindly with our puny entrenching tools, but soon the four men nearest me were lying, one dead, two with broken legs, and the other badly wounded in the shoulder. A sledgehammer blow on the foot made me turn with positive relief that I had met my fate, but it was a mere graze and hardly bled. Another bullet passed through my coat, and a third ripped along two feet of my rifle sling. Then the wounded man on my right got a bullet through the head that ended his troubles. And still without remission the air was full of hissing bullets and screaming shells.
The New Zealanders had managed to push the line forward another couple of hundred metres, and the survivors dug in. Against this torrent of fire they could do no more.
The Australians, meanwhile, had spent the day marching into the reserve area, and had dug in in a dry creekbed on the right of the New Zealanders. At 4.55pm, as the men were cooking their evening meals, their officers received a completely unexpected order – they were to attack the Turkish lines at 5.30pm. Most of them doubted it was humanely possible to organise and launch an attack with 35 minutes’ notice, but they sprang to the task and sergeants began shouting at their men to drop their packs and grab their rifles. At no other time in the First World War would the Australians be ordered to attack at such short notice.
The Australian battalions filed out of the creekbed and spread out across a featureless plain. Ahead of them, the ground rose gently all the way to Krithia and Achi Baba, with only the odd tuft of scrub providing any cover. At 5.30pm, on time to the minute, they began to advance.

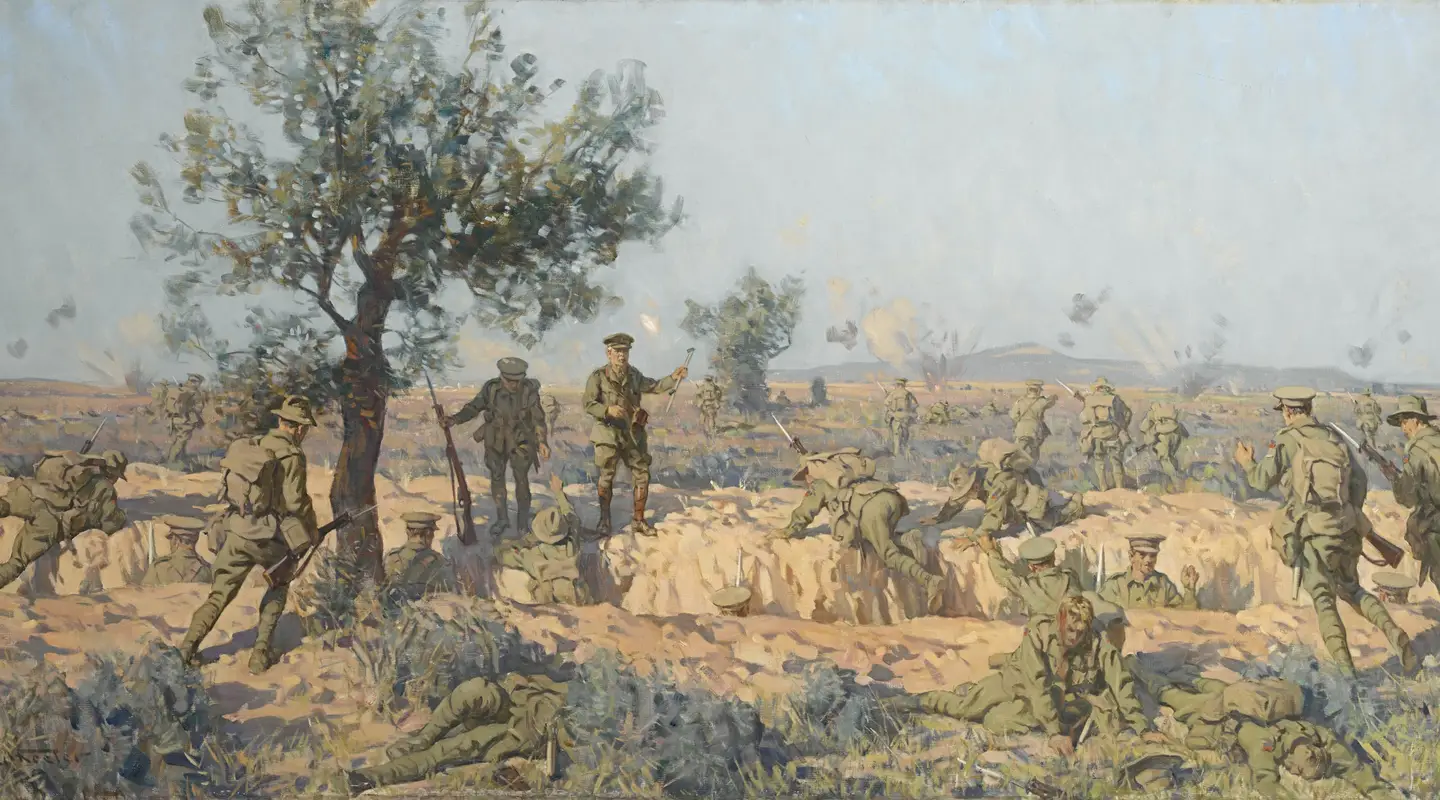
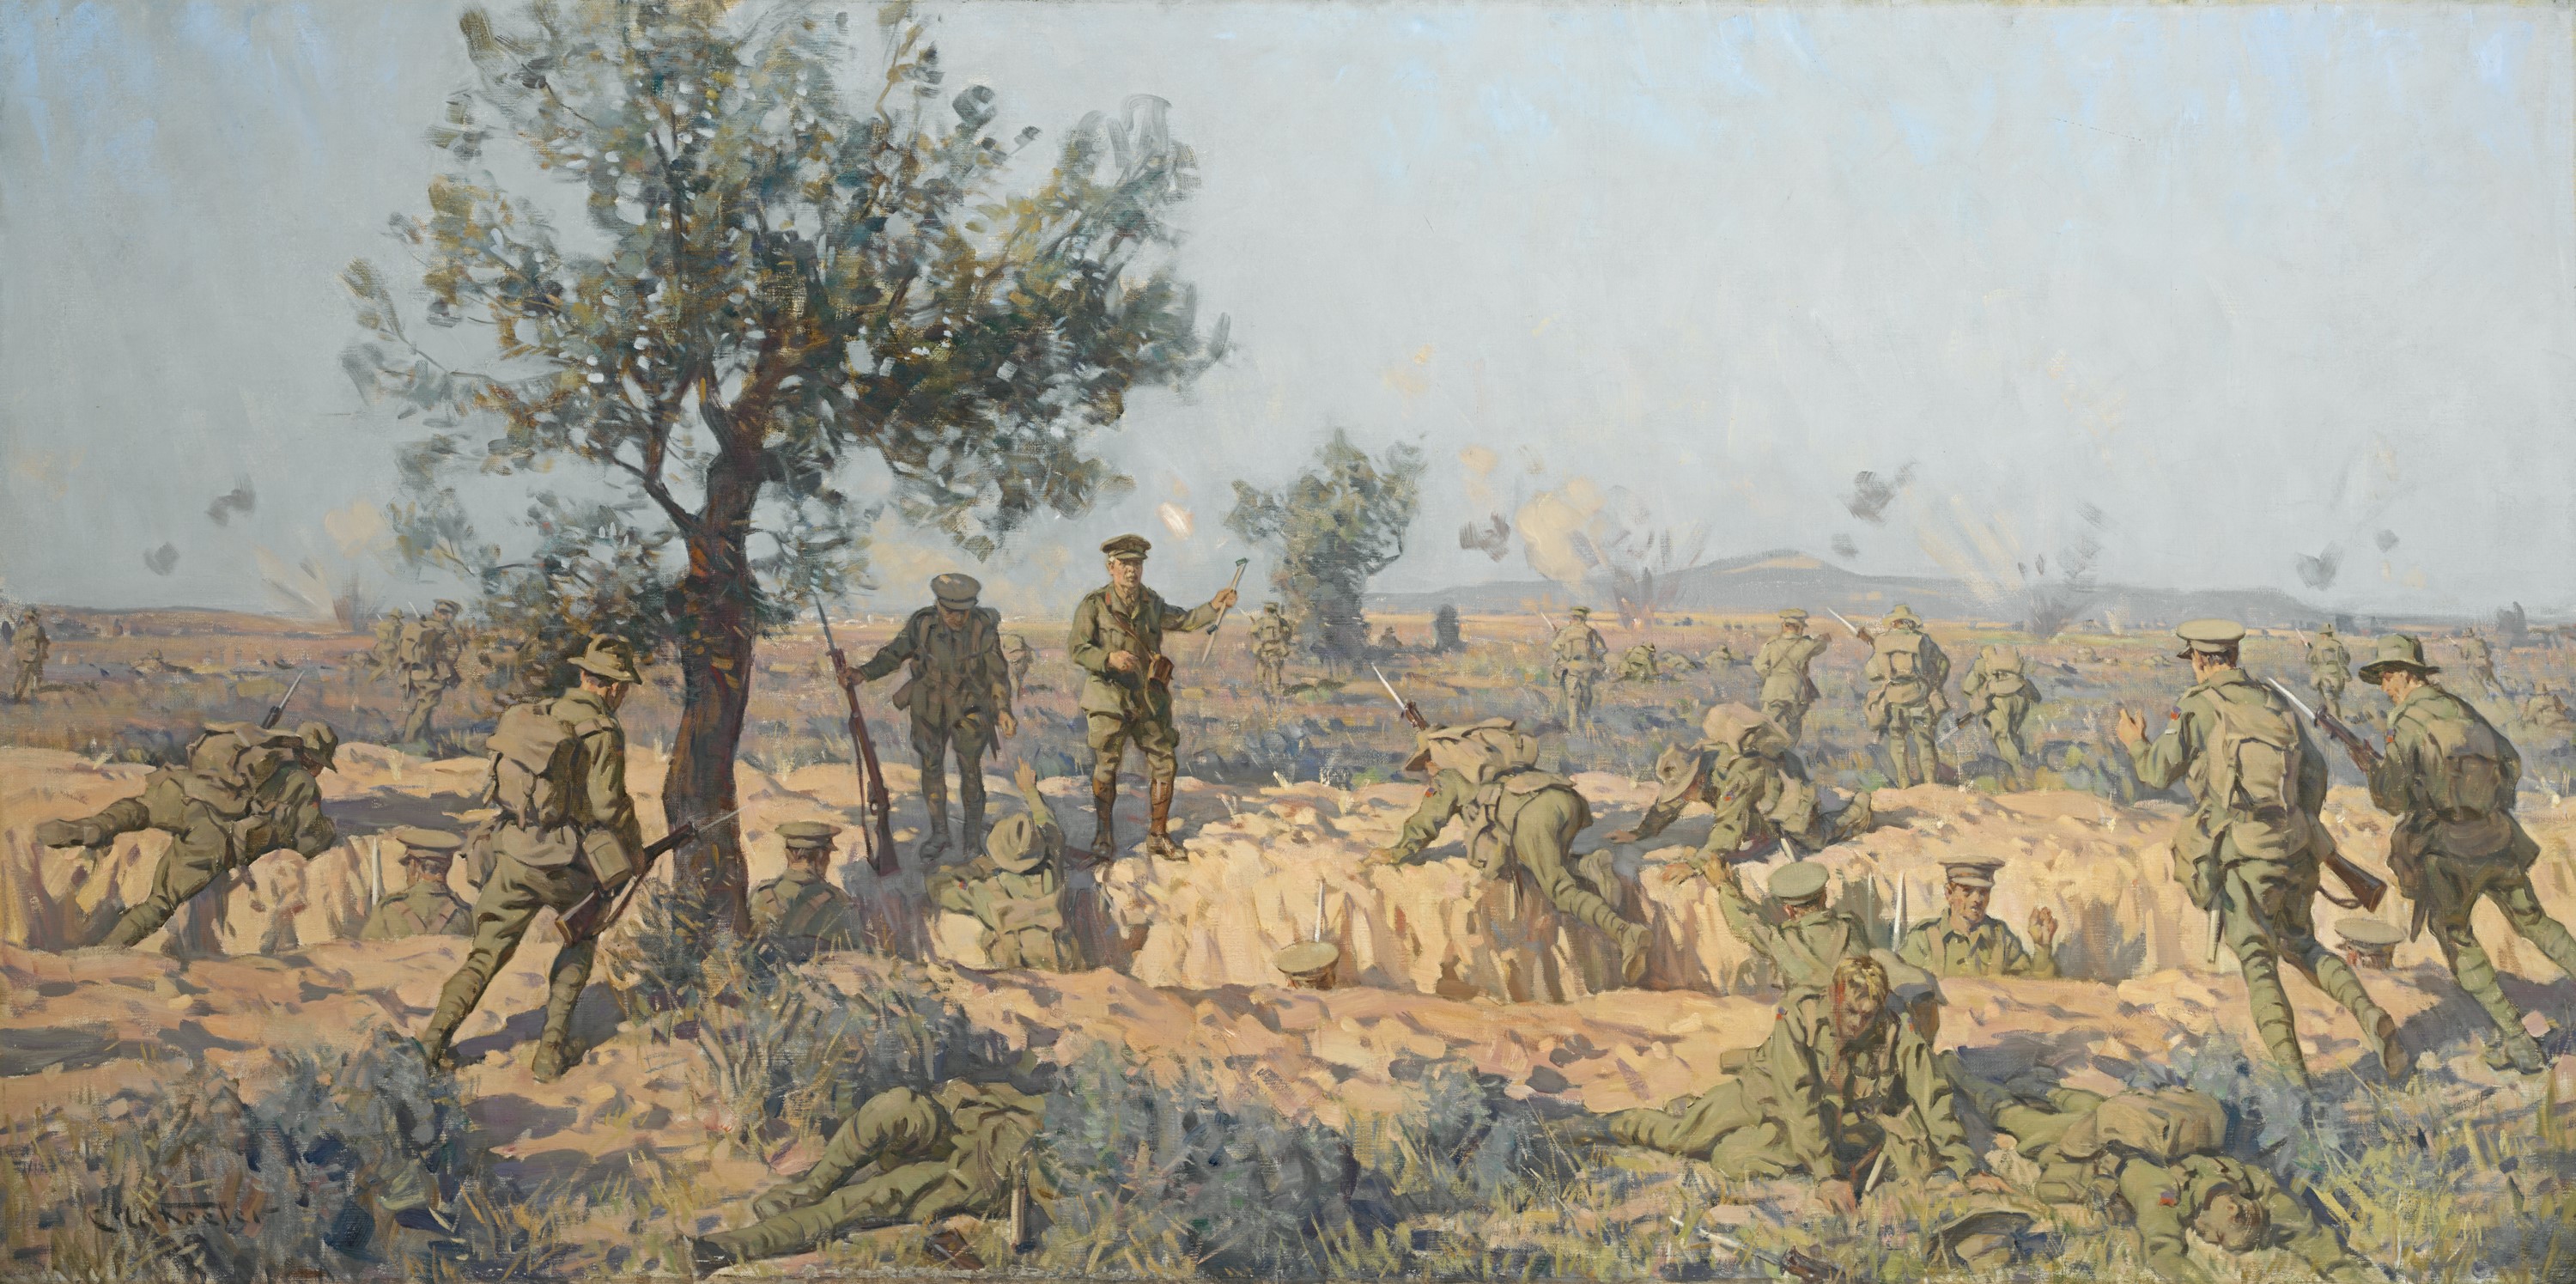
Australian troops attacked towards Krithia at short notice on 8 May 1915. Over a third of them were killed or wounded. Charles Wheeler, Charge of the 2nd Infantry Brigade at Krithia, oil on canvas, 1927.
Into No Man's Land
What followed was one of the bravest and most hopeless Australian advances of the First World War. At first a dip in the ground protected them from Turkish observation, and only the odd shrapnel shell burst above their heads. But as they moved forward, they came under full view of the Turks in the advanced outposts, and their artillery observers on the heights of Achi Baba, and a hurricane of fire erupted. Men started to fall, and their comrades pushed on with grim determination. Suddenly, the Australians came to a trench. It wasn’t filled with Turks, it was full of Englishmen, and the Australians realised with dread that they had only reached the British front line. No man’s land, and the full fury of the Turks, still lay in front of them.
The Australians flopped down behind the trench or crammed in beside the agitated British troops. Before long their Colonel, James McKay, could be seen striding along the top of the trench, shouting for the Australians to continue the advance.
Charles Bean, the official historian and future founder of the Australian War Memorial, was in the trench alongside the Australians, and watched, spellbound, as they left the safety of the trench:
I watched … line after line of men scramble to the parapet, stand there for a moment astride of the trench, with rifle and bayonet clutched across their chests, glaring to the front with eyes puckered to pick up any trace of where the tempest of bullets came from. I noted in my diary: ‘Their faces were set, their eyebrows bent, they looked into it for a moment as men would into a dazzling flame. I never saw so many determined faces at once.’
One man advanced with a shovel held in front of his face, as if holding an umbrella against the rain. The Turkish fire soon found its mark and the Australians began to fall, some with a groan, some with a scream. Private Frank Brent of the 6th Battalion was witnessing so much carnage all around him that he became fatalistic, accepting the fact that he had no chance of seeing out the day alive.
You could see your mates going down right and left. And you were face-to-face with the stark realisation that this was the end of it. And that was the thought that was with you the whole time, because despite the fact that we couldn't see a Turk, he was pelting us with everything he’d got from all corners. And sure enough, we got to within about a mile of Krithia village when I copped my packet. And as I lay down I said, ‘Thank Christ for that.
The Turks were particularly good at singling out officers, and just about every one of them was hit in the early stages of the advance. One of the few to survive was Major Gordon Bennett of the 6th Battalion (who would earn infamy in 1942 as the commander of the 8th Division in Singapore for seemingly abandoning his men and fleeing back to Australia in the face of the Japanese invasion). He led a small group forward into the withering fire and finally ordered them to dig in. At one stage they saw movement in a clump of scrub and opened fire, and half-a-dozen Turks bolted for safety. These were the only Turkish soldiers the Australians saw all day.
Eventually, thankfully, the sun began to sink low in the sky, and the survivors of the advance dug in where they lay. The Australians had advanced less than 400 metres, and had left the battlefield littered with the bodies of their mates. They were relieved by British troops overnight, and returned with their New Zealand comrades to the rear area at Cape Helles. Ten days later, they boarded ships to return to Anzac, and their brief adventure at Helles was over.
A heavy cost
After the battle, the butcher’s bill was tallied. Of the 5000 Anzac troops who had attacked at Krithia, more than 1800 had been killed or wounded. Four years later, when Charles Bean returned to Gallipoli to explore the battlefield, the bodies of the dead were still lying where they had fallen. They were gathered together and buried in Redoubt Cemetery, which still marks the final line where the Australians dug in.
The Second Battle of Krithia had been a brutal, bloody failure, and marked the end of British aspirations to sweep up the peninsula and seize the Dardanelles forts. From then on the Gallipoli campaign would be defined by stalemate, disappointment and eventual withdrawal.

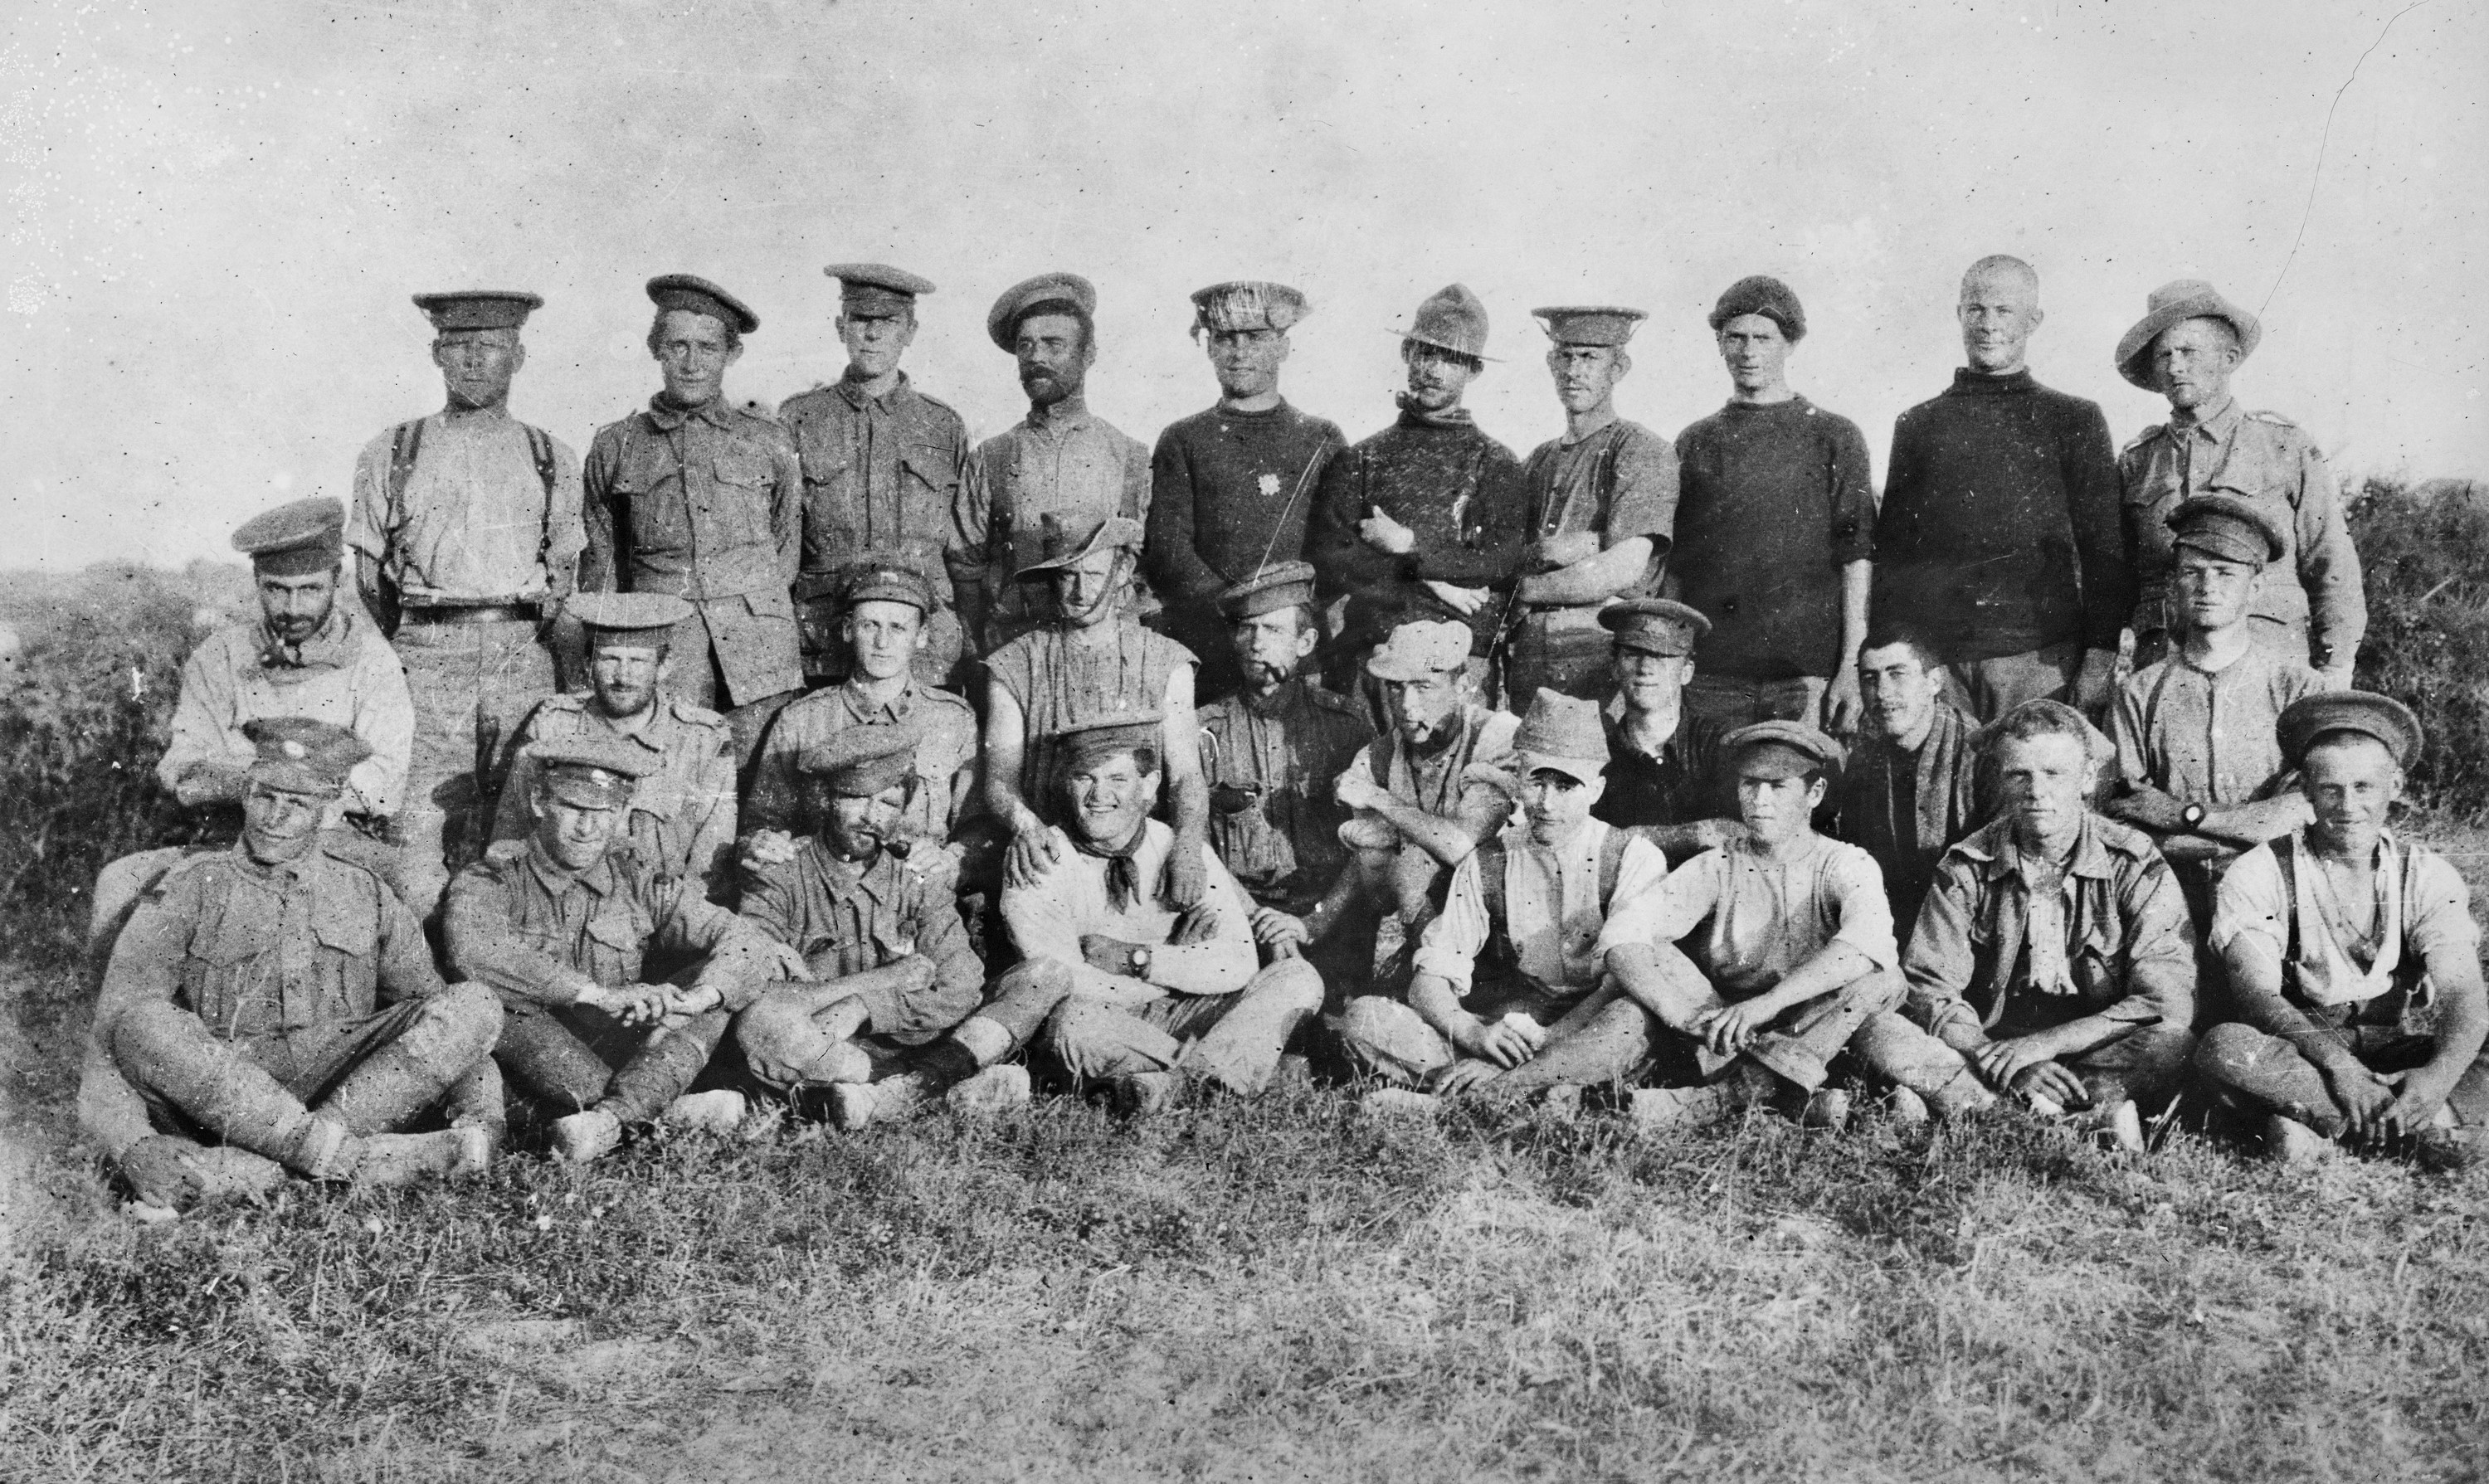
The surviving members of D Company, 7th Battalion, following the battle of Krithia. Photographer: Percival Reuben Carne
Second Krithia became a footnote in Anzac history, just one of countless bloody reversals that defined this misguided campaign in this small corner of Turkey. But for the men who lived through it, it was an ordeal they would never forget, and they lobbied hard for greater recognition of the battle. Today, the bodies of their mates still lie in Redoubt Cemetery on the plain where they fell. Not many Australians come to this part of the battlefield, but as the sun sinks low and the goat herders drive their flocks through the gorse and olives that surround the cemetery, the ghosts of Krithia are never far away.
